Section 3: Connecting services to the fabric
The fabric is expanded and the network segments exist. Now you need to connect the servers that will run the analytics platform, attach them to the correct virtual networks, and stage external BGP peering for customer access.
Adding a server (generic system)
In Apstra, servers and external devices connected to the fabric are modelled as generic systems. There are two reasons to model them here rather than just plugging them in and configuring the switch ports manually.
The first is documentation — every connection is recorded inside the same single source of truth as your network design. The second, more important reason is that Apstra needs to know a server is there in order to generate the correct switch port configuration for the leaf switches facing that server. Without modelling it, Apstra cannot configure those ports.
-
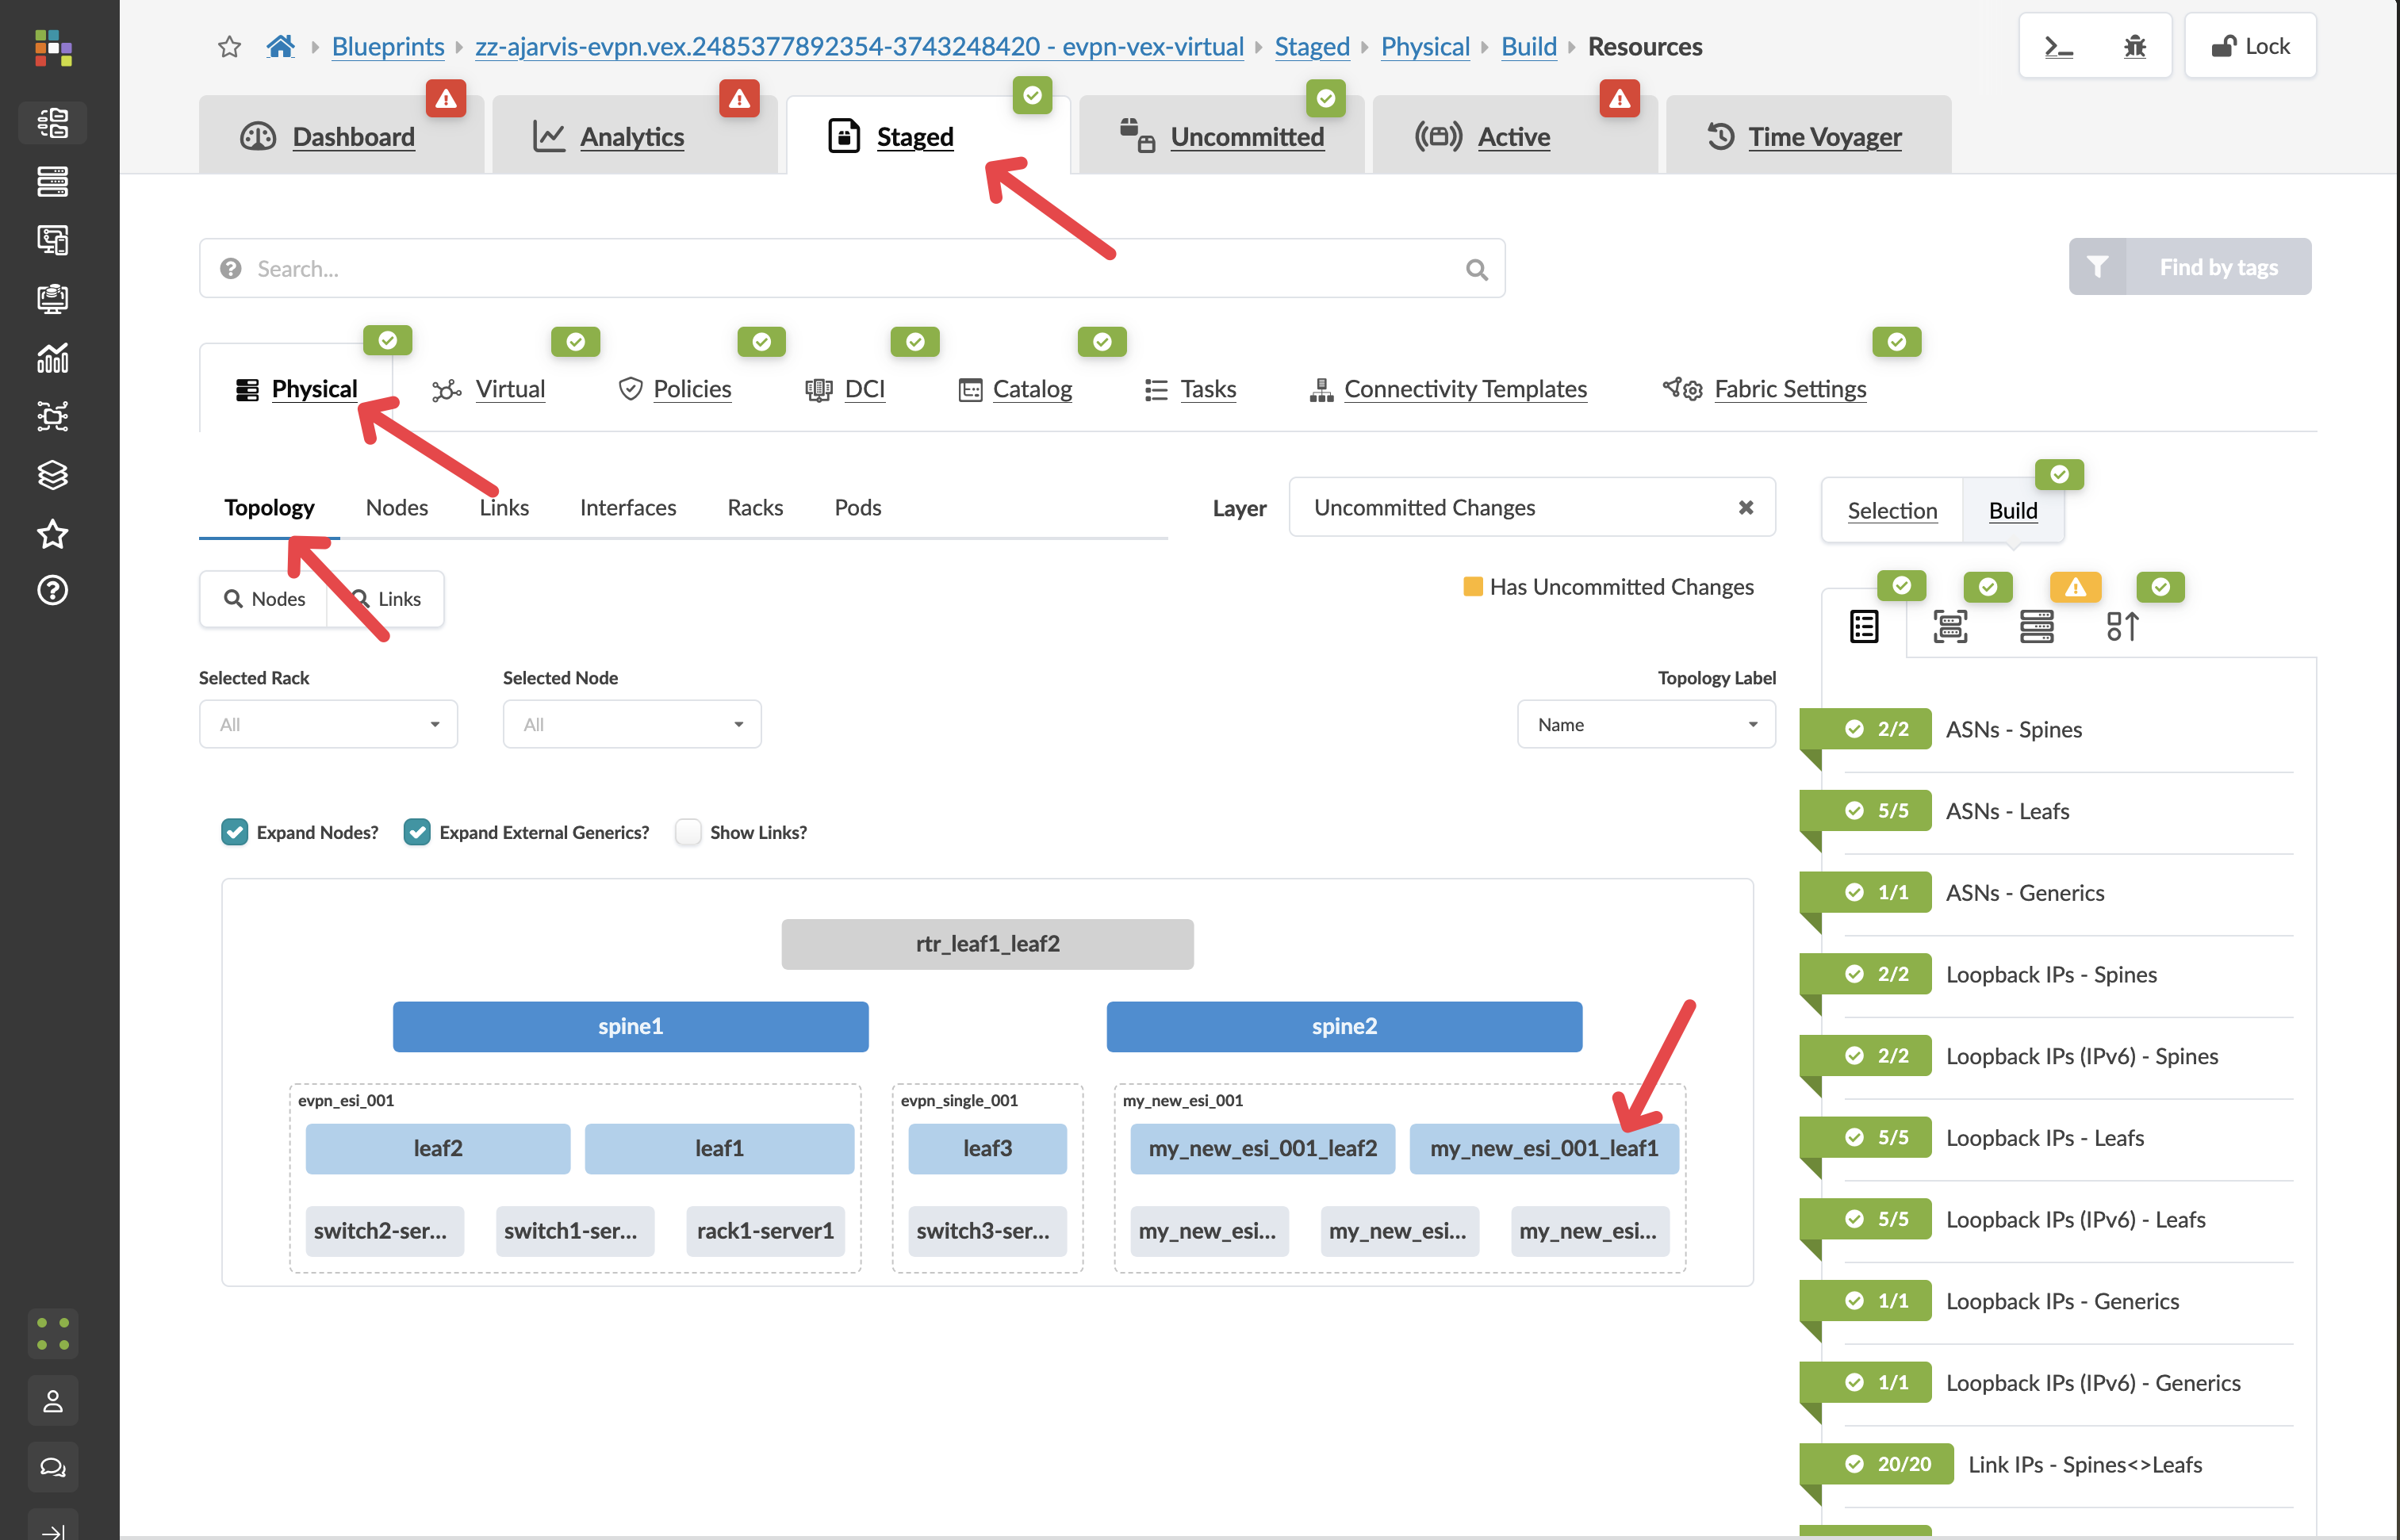
Navigate to menu:Staged[Physical > Topology].
-
Locate the new rack you added in the previous section.
-
Click on one of the new leaf switches in that rack.
-
Click the box to the left of the device name.
-
Select Add internal/external generic system.
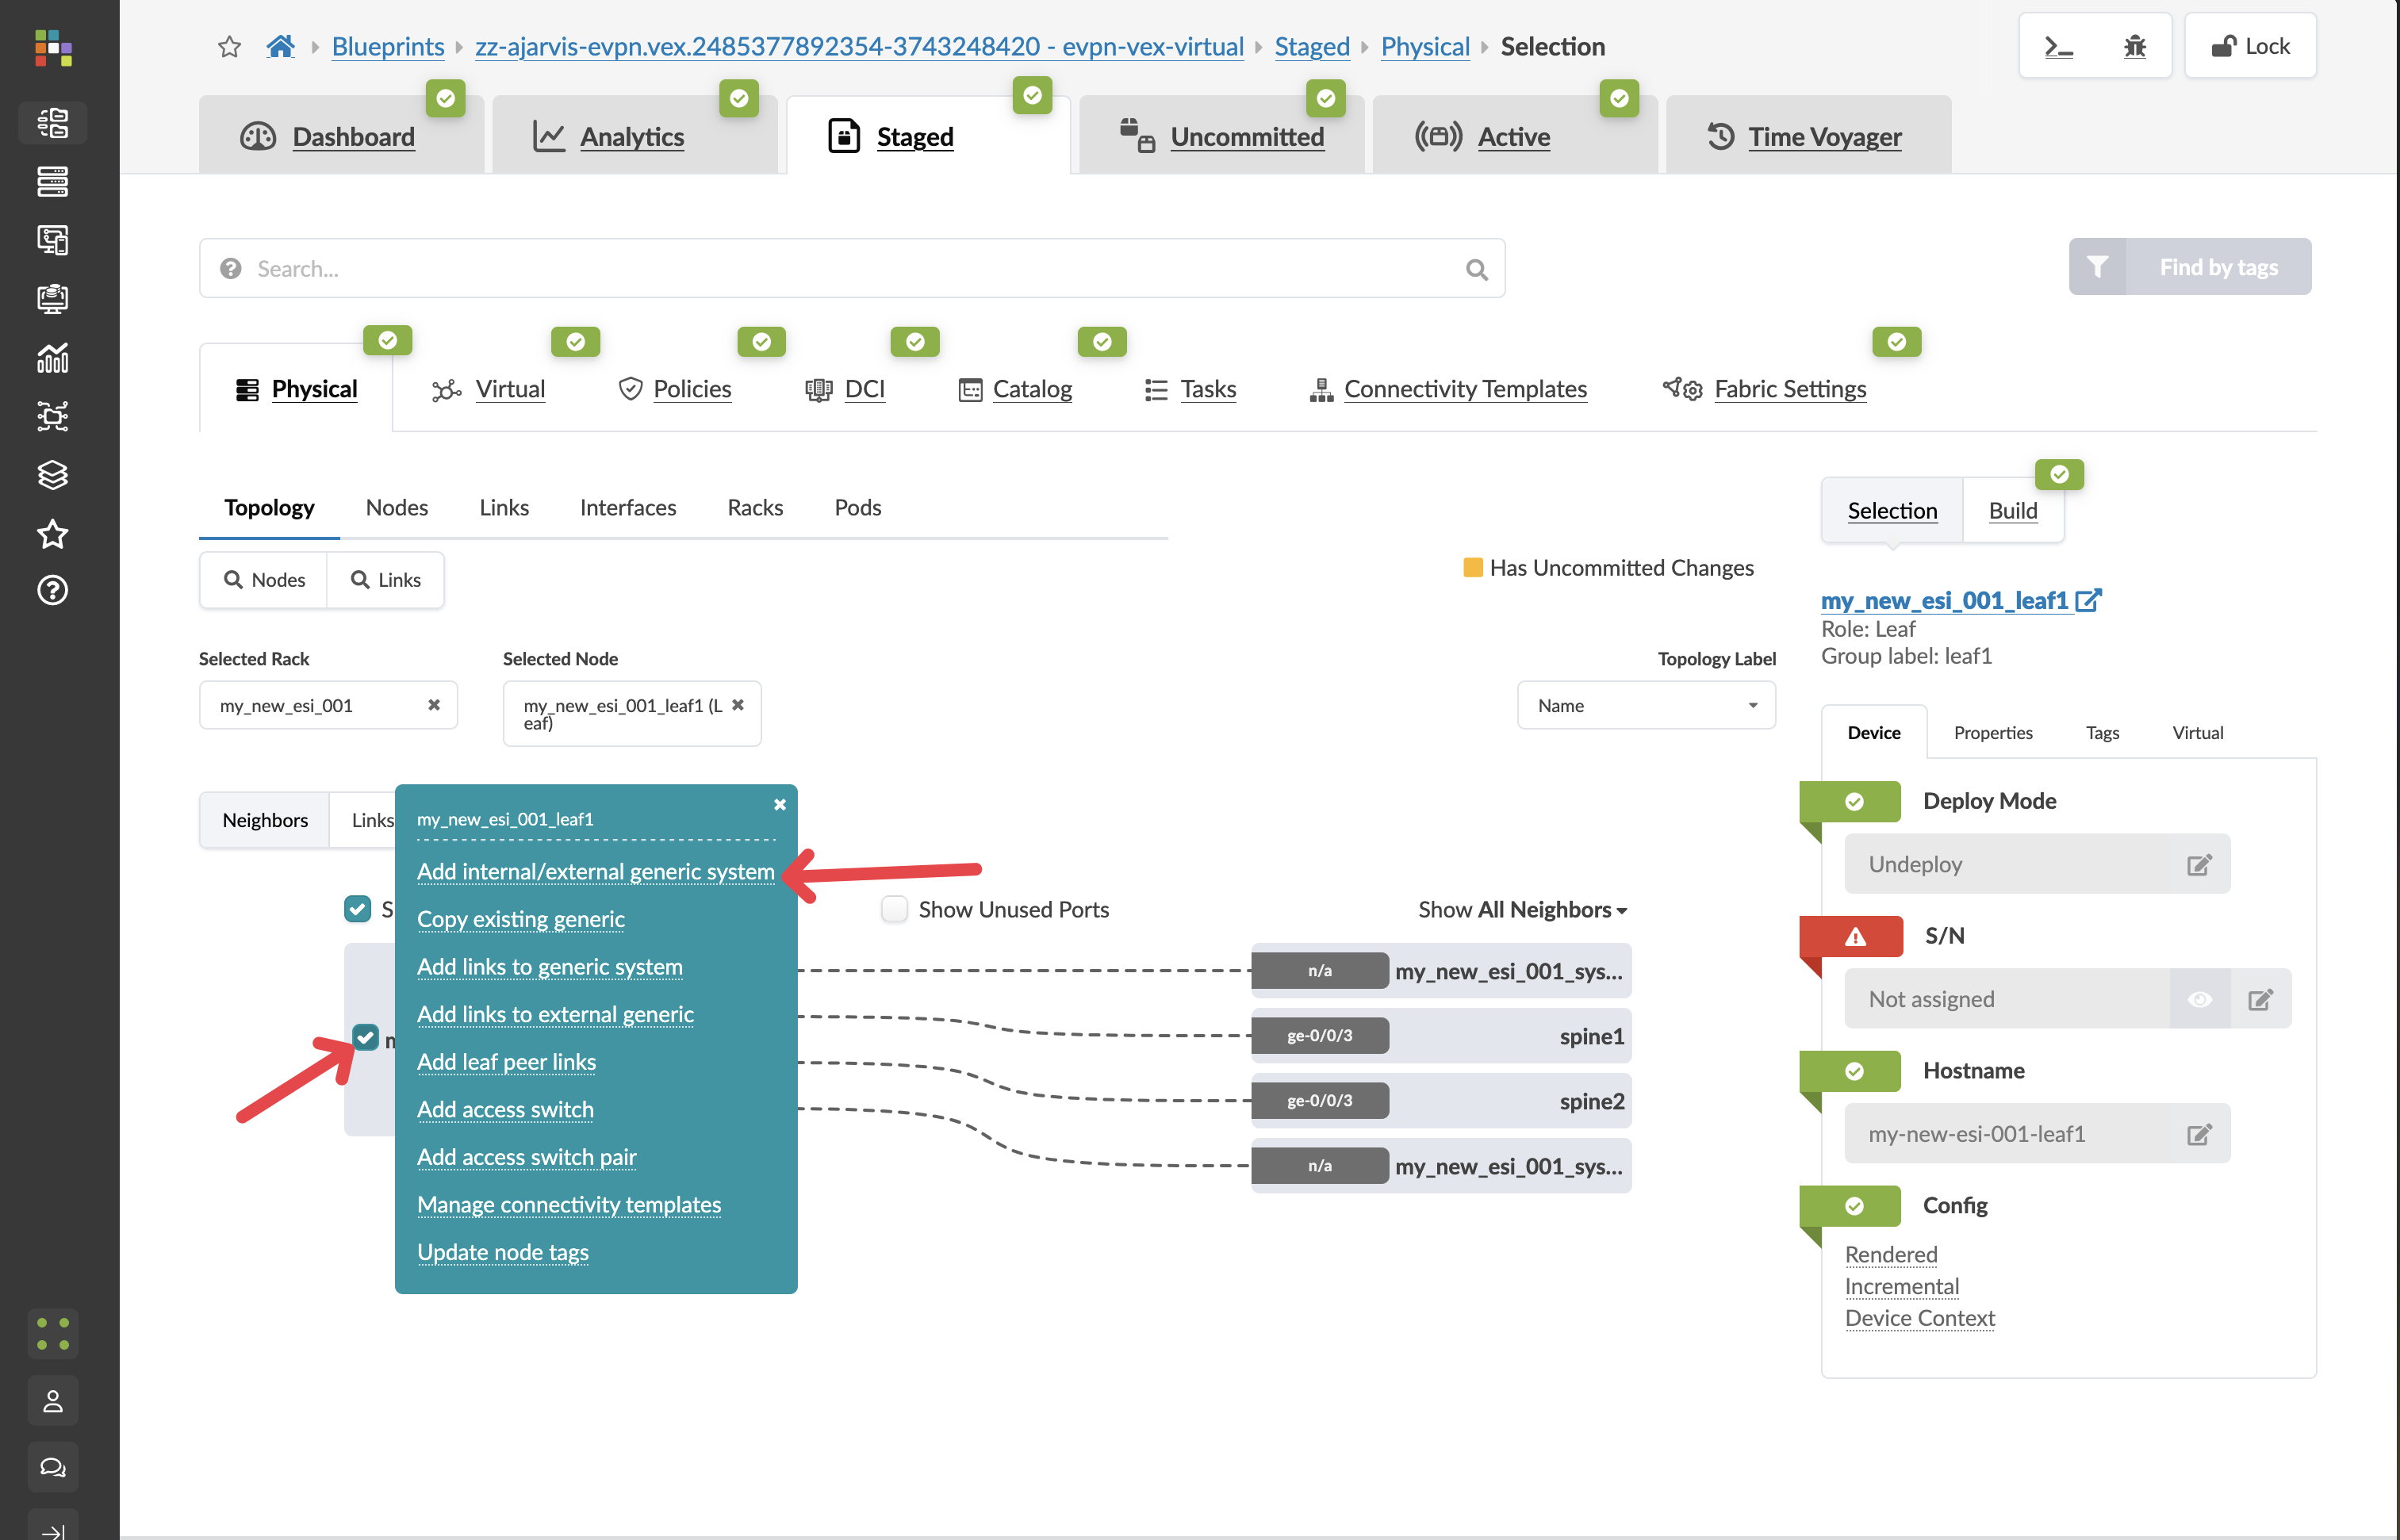
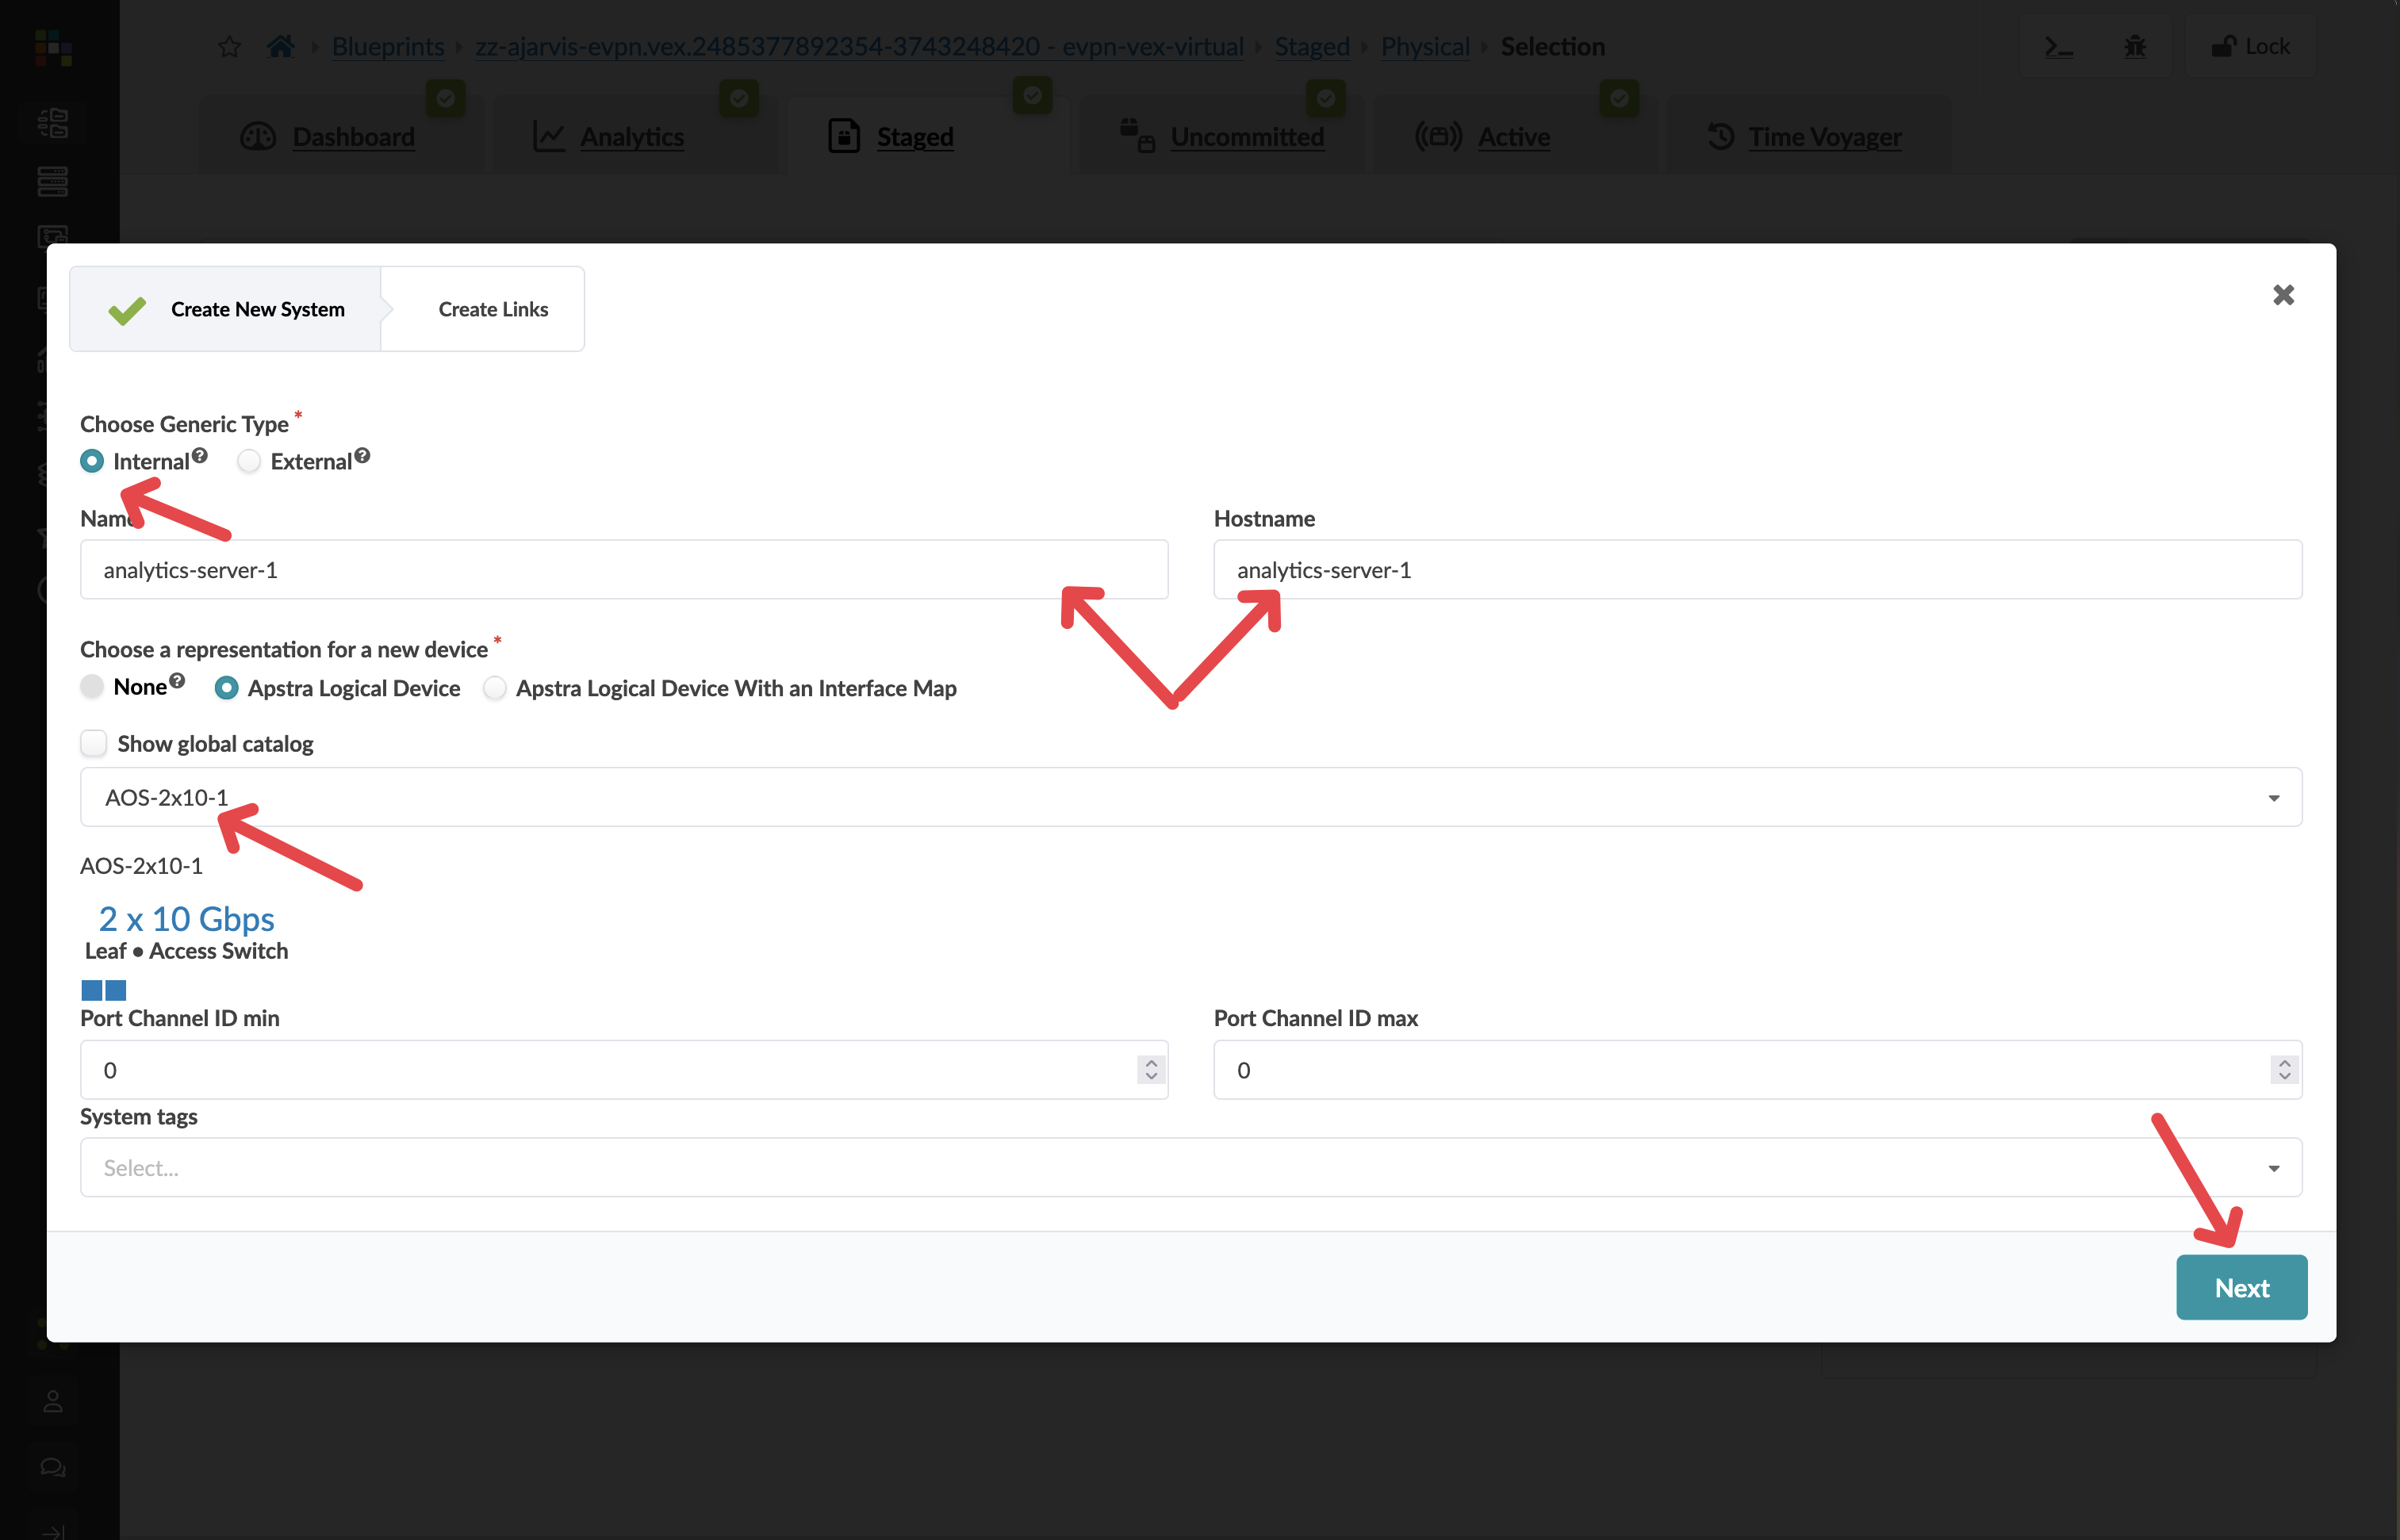
| Parameter | Value |
|---|---|
Generic Type |
Internal |
Name |
analytics-server-1 |
Hostname |
analytics-server-1 |
Logical Device |
AOS-2x10⁻¹ |
|
What is AOS-2x10⁻¹? It is Apstra’s way of describing the server’s connectivity characteristics — in this case, a server with two 10Gbps ports. This tells Apstra what to expect when configuring the switch ports facing this server. |
-
Click Next.
Configuring the server links
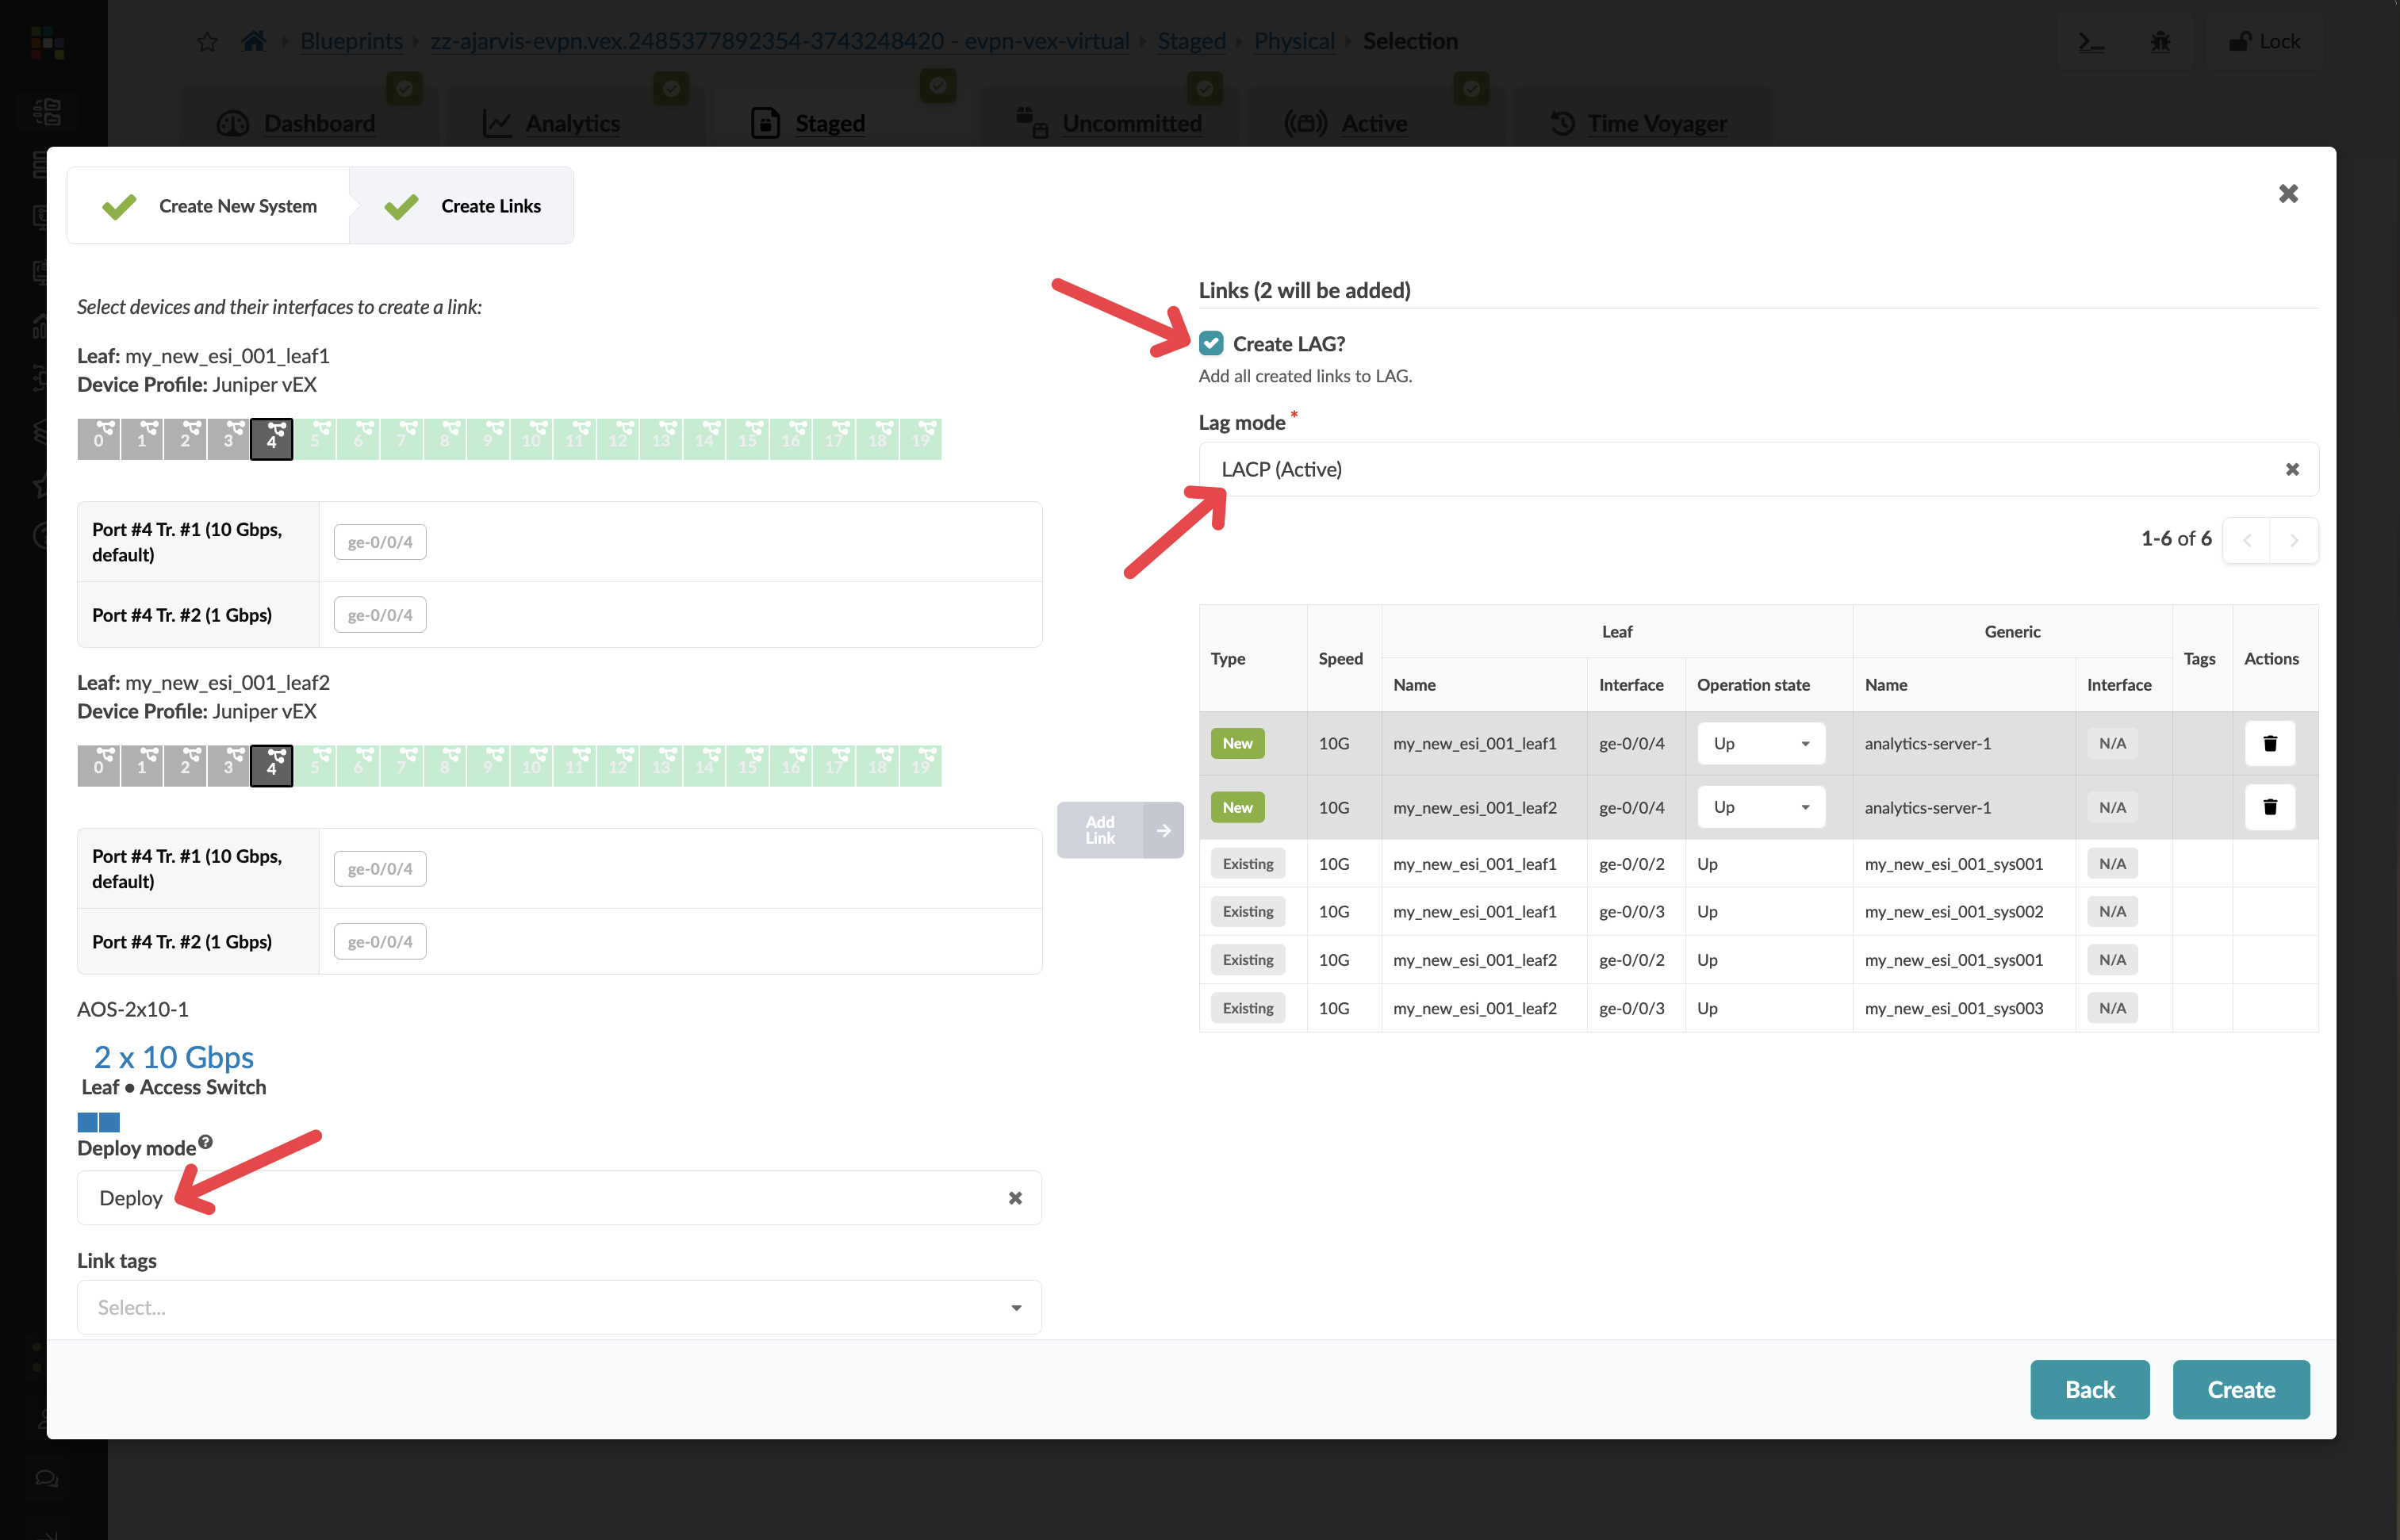
Connect the server redundantly to both leaf switches in the rack — one link to each. If one leaf switch fails, the server stays connected through the other.
| Action | Detail |
|---|---|
Leaf 1 |
Select an available port (e.g. port 4), set speed to 10Gbps, click Add Link |
Leaf 2 |
Select a corresponding port, set speed to 10Gbps, click Add Link |
-
Set Deploy mode to Deploy.
-
Set LACP mode to active.
|
What is LACP? LACP (Link Aggregation Control Protocol) bonds both physical links into a single logical connection, providing redundancy at the link level. Setting it to active means the leaf switches will initiate the bonding negotiation. Combined with ESI-LAG on the leaf switches, the server sees one logical uplink regardless of which physical path traffic takes. |
-
Review both links, then click Create.
Applying connectivity templates
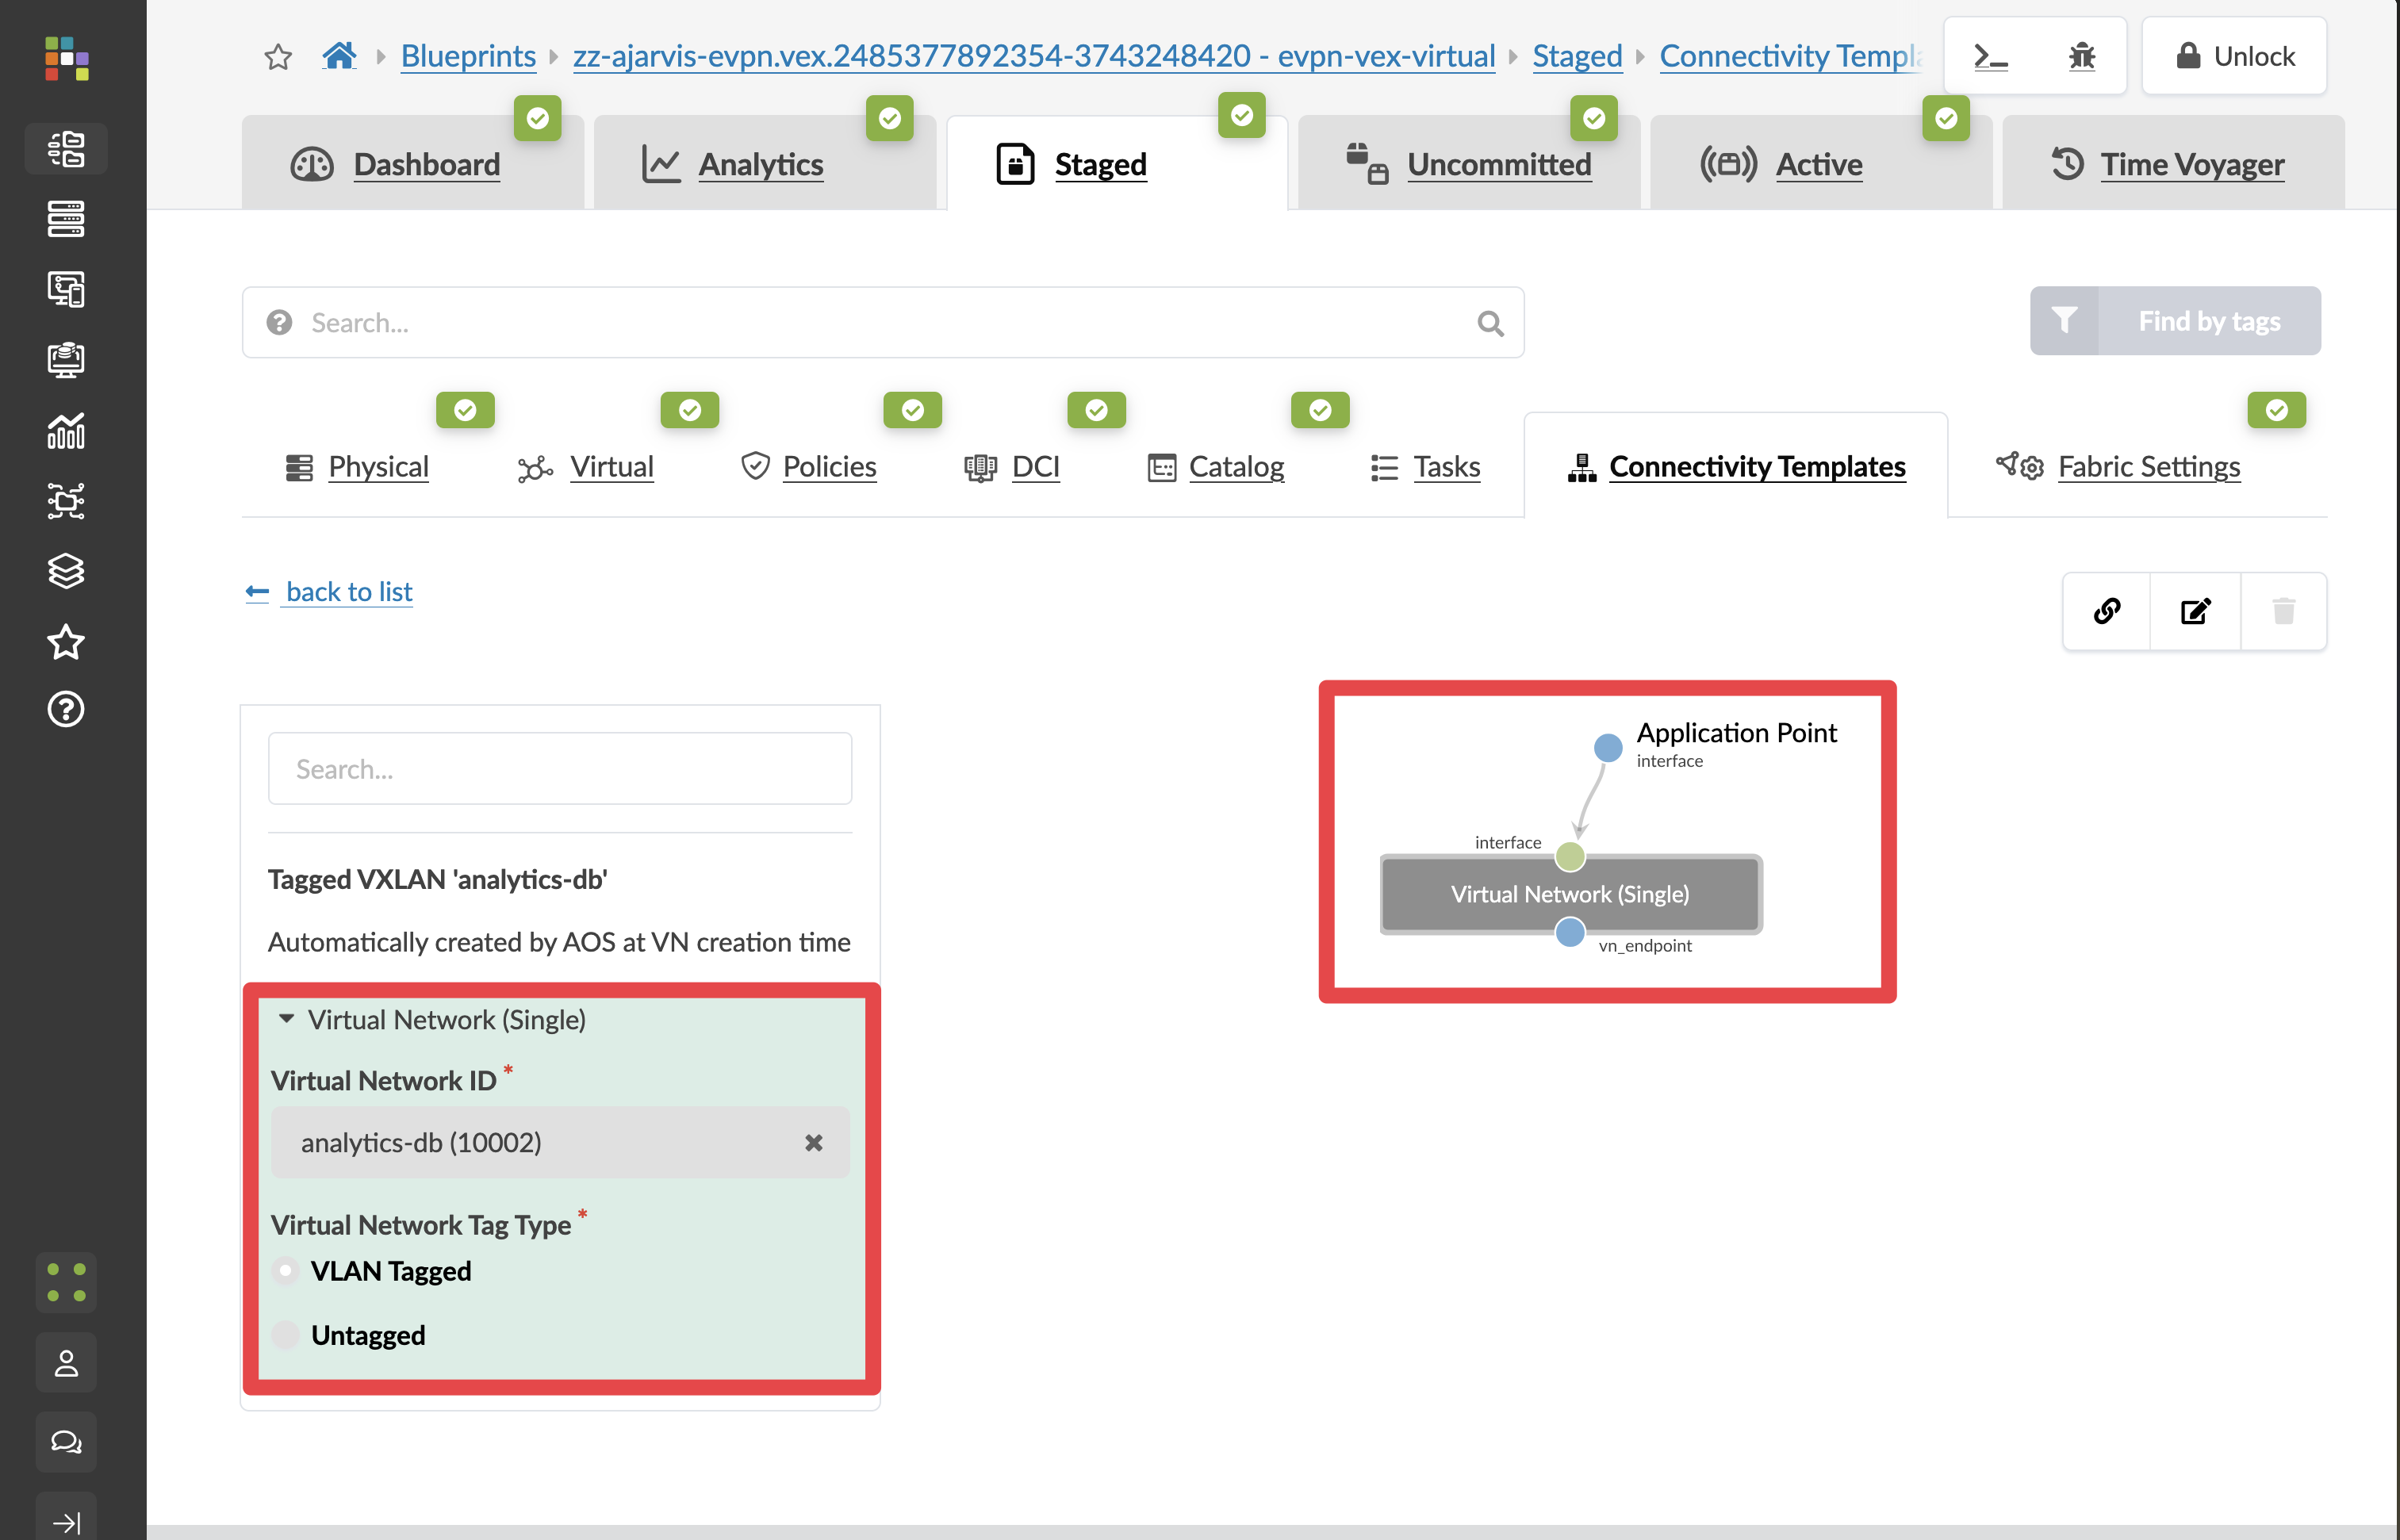
A connectivity template defines which virtual networks a server’s switch ports should carry. Rather than configuring individual VLANs on individual ports, you select a template that represents the desired connectivity outcome, then apply it to the interfaces you want.
When you created the analytics-web and analytics-db virtual networks in the previous section, Apstra automatically generated a connectivity template for each one.
|
Think of connectivity templates as expressing what you want to achieve — "this server connects to these networks" — rather than how to configure it, which Apstra works out automatically. |
-
Navigate to menu:Staged[Connectivity Templates].
-
Confirm you can see Tagged VxLAN 'analytics-web' and Tagged VxLAN 'analytics-db' in the list.
|
If you do not see these templates, navigate to Virtual > Virtual Networks, select each virtual network, and use the export icon to generate them. Call out to your instructor if you are unsure. |
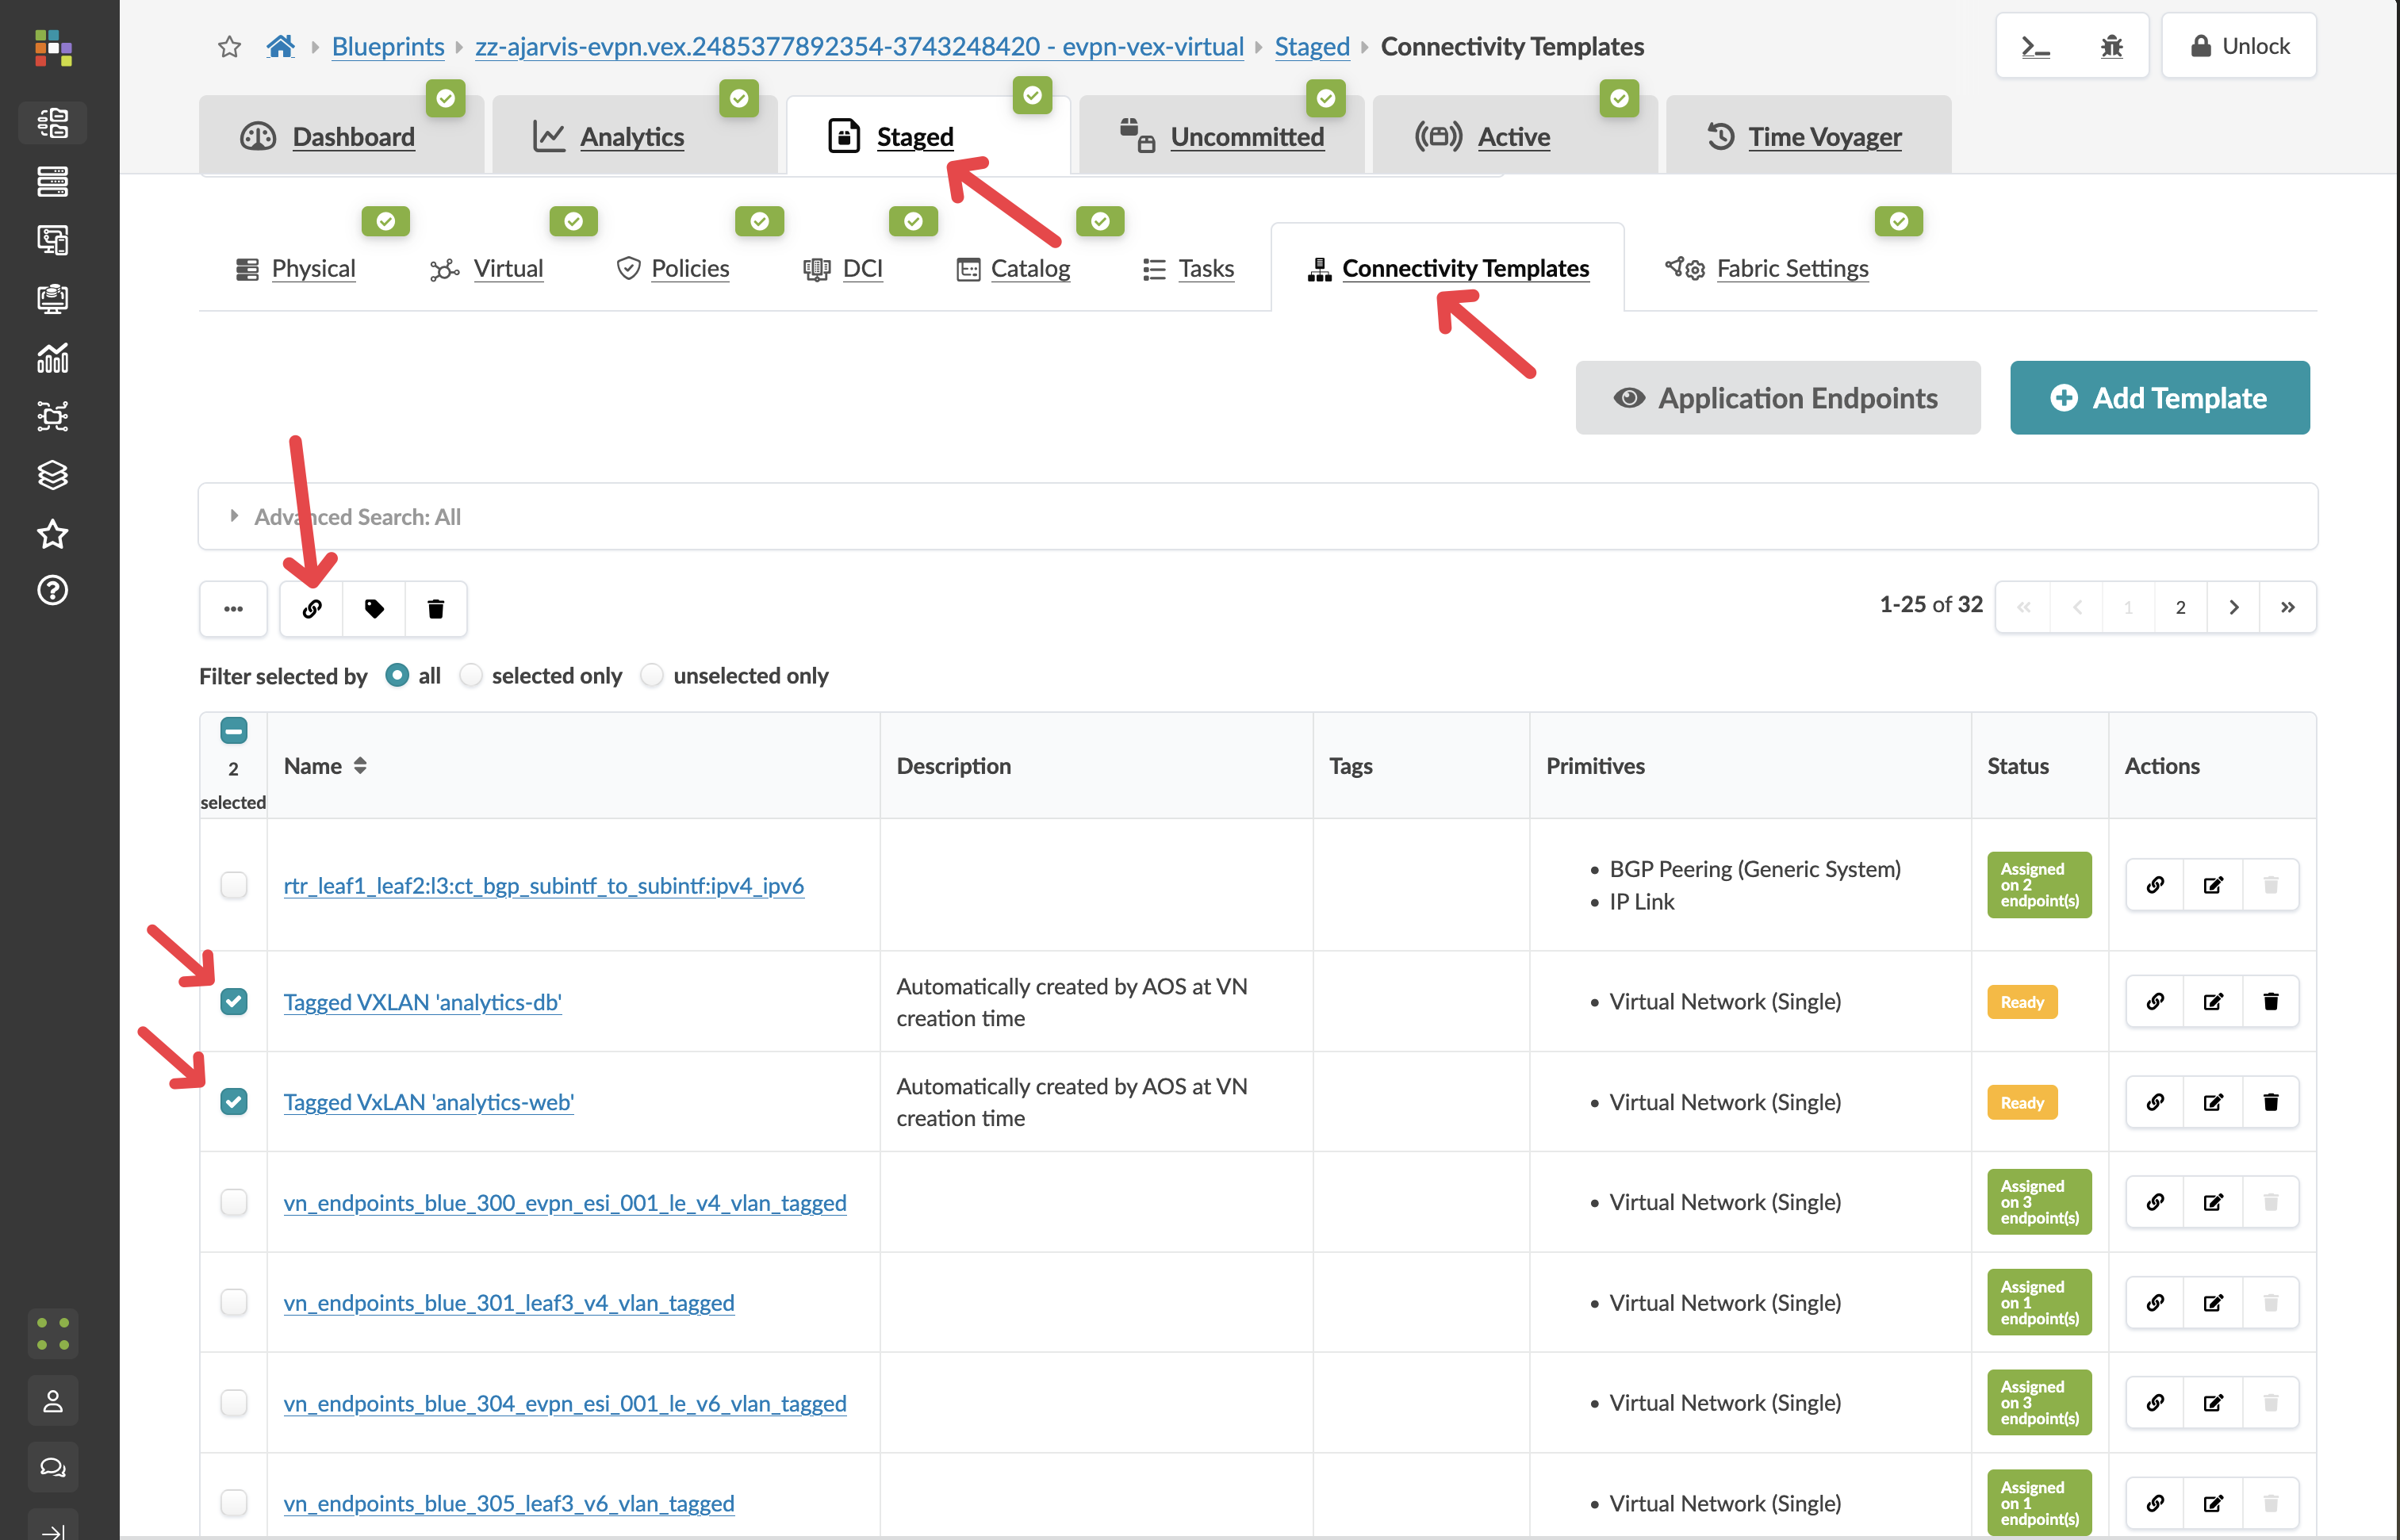
You can click on a template to see how it is built before applying it.
-
Return to the Connectivity Templates list.
-
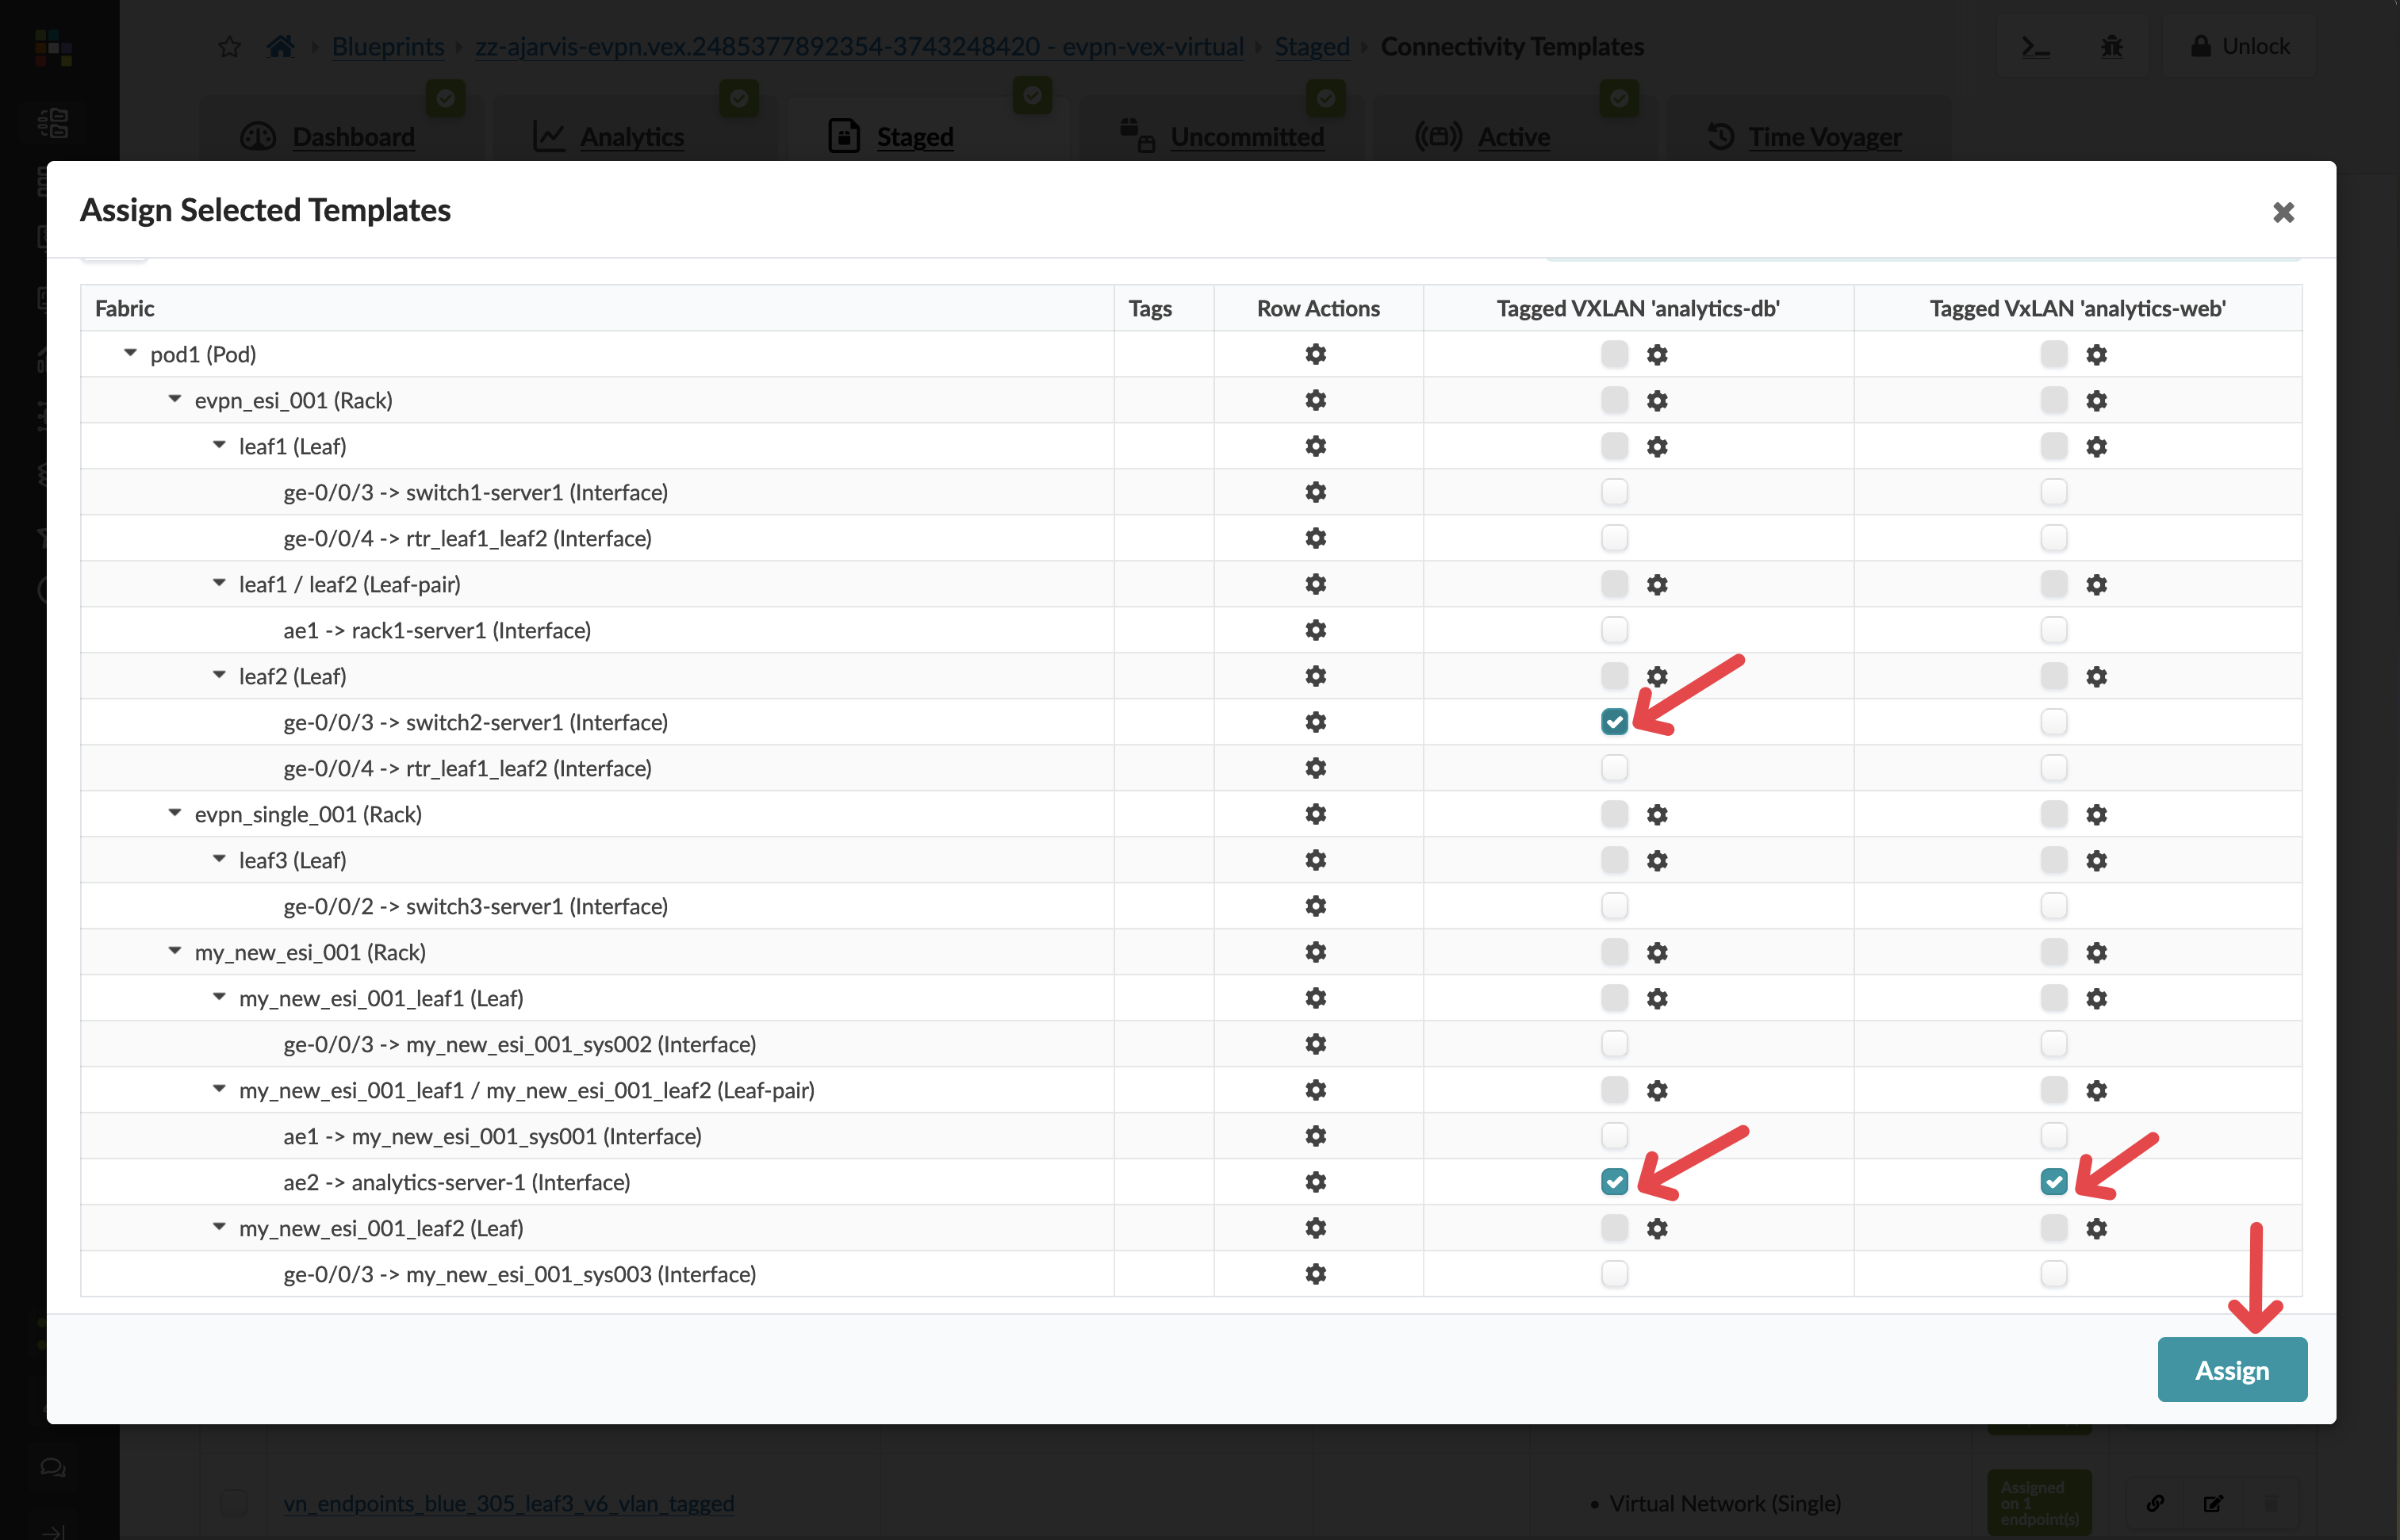
Select both templates and click the Assign icon.
-
Select the interfaces for your analytics server.
-
Click Assign.
|
What is happening here: Apstra is configuring the switch ports facing the analytics server to carry both VLANs as tagged traffic, mapping those VLANs to their VXLAN VNIs for fabric-wide transport, and setting up the ESI-LAG across both leaf switches for link redundancy. All of that from two template selections — no per-port manual configuration. |
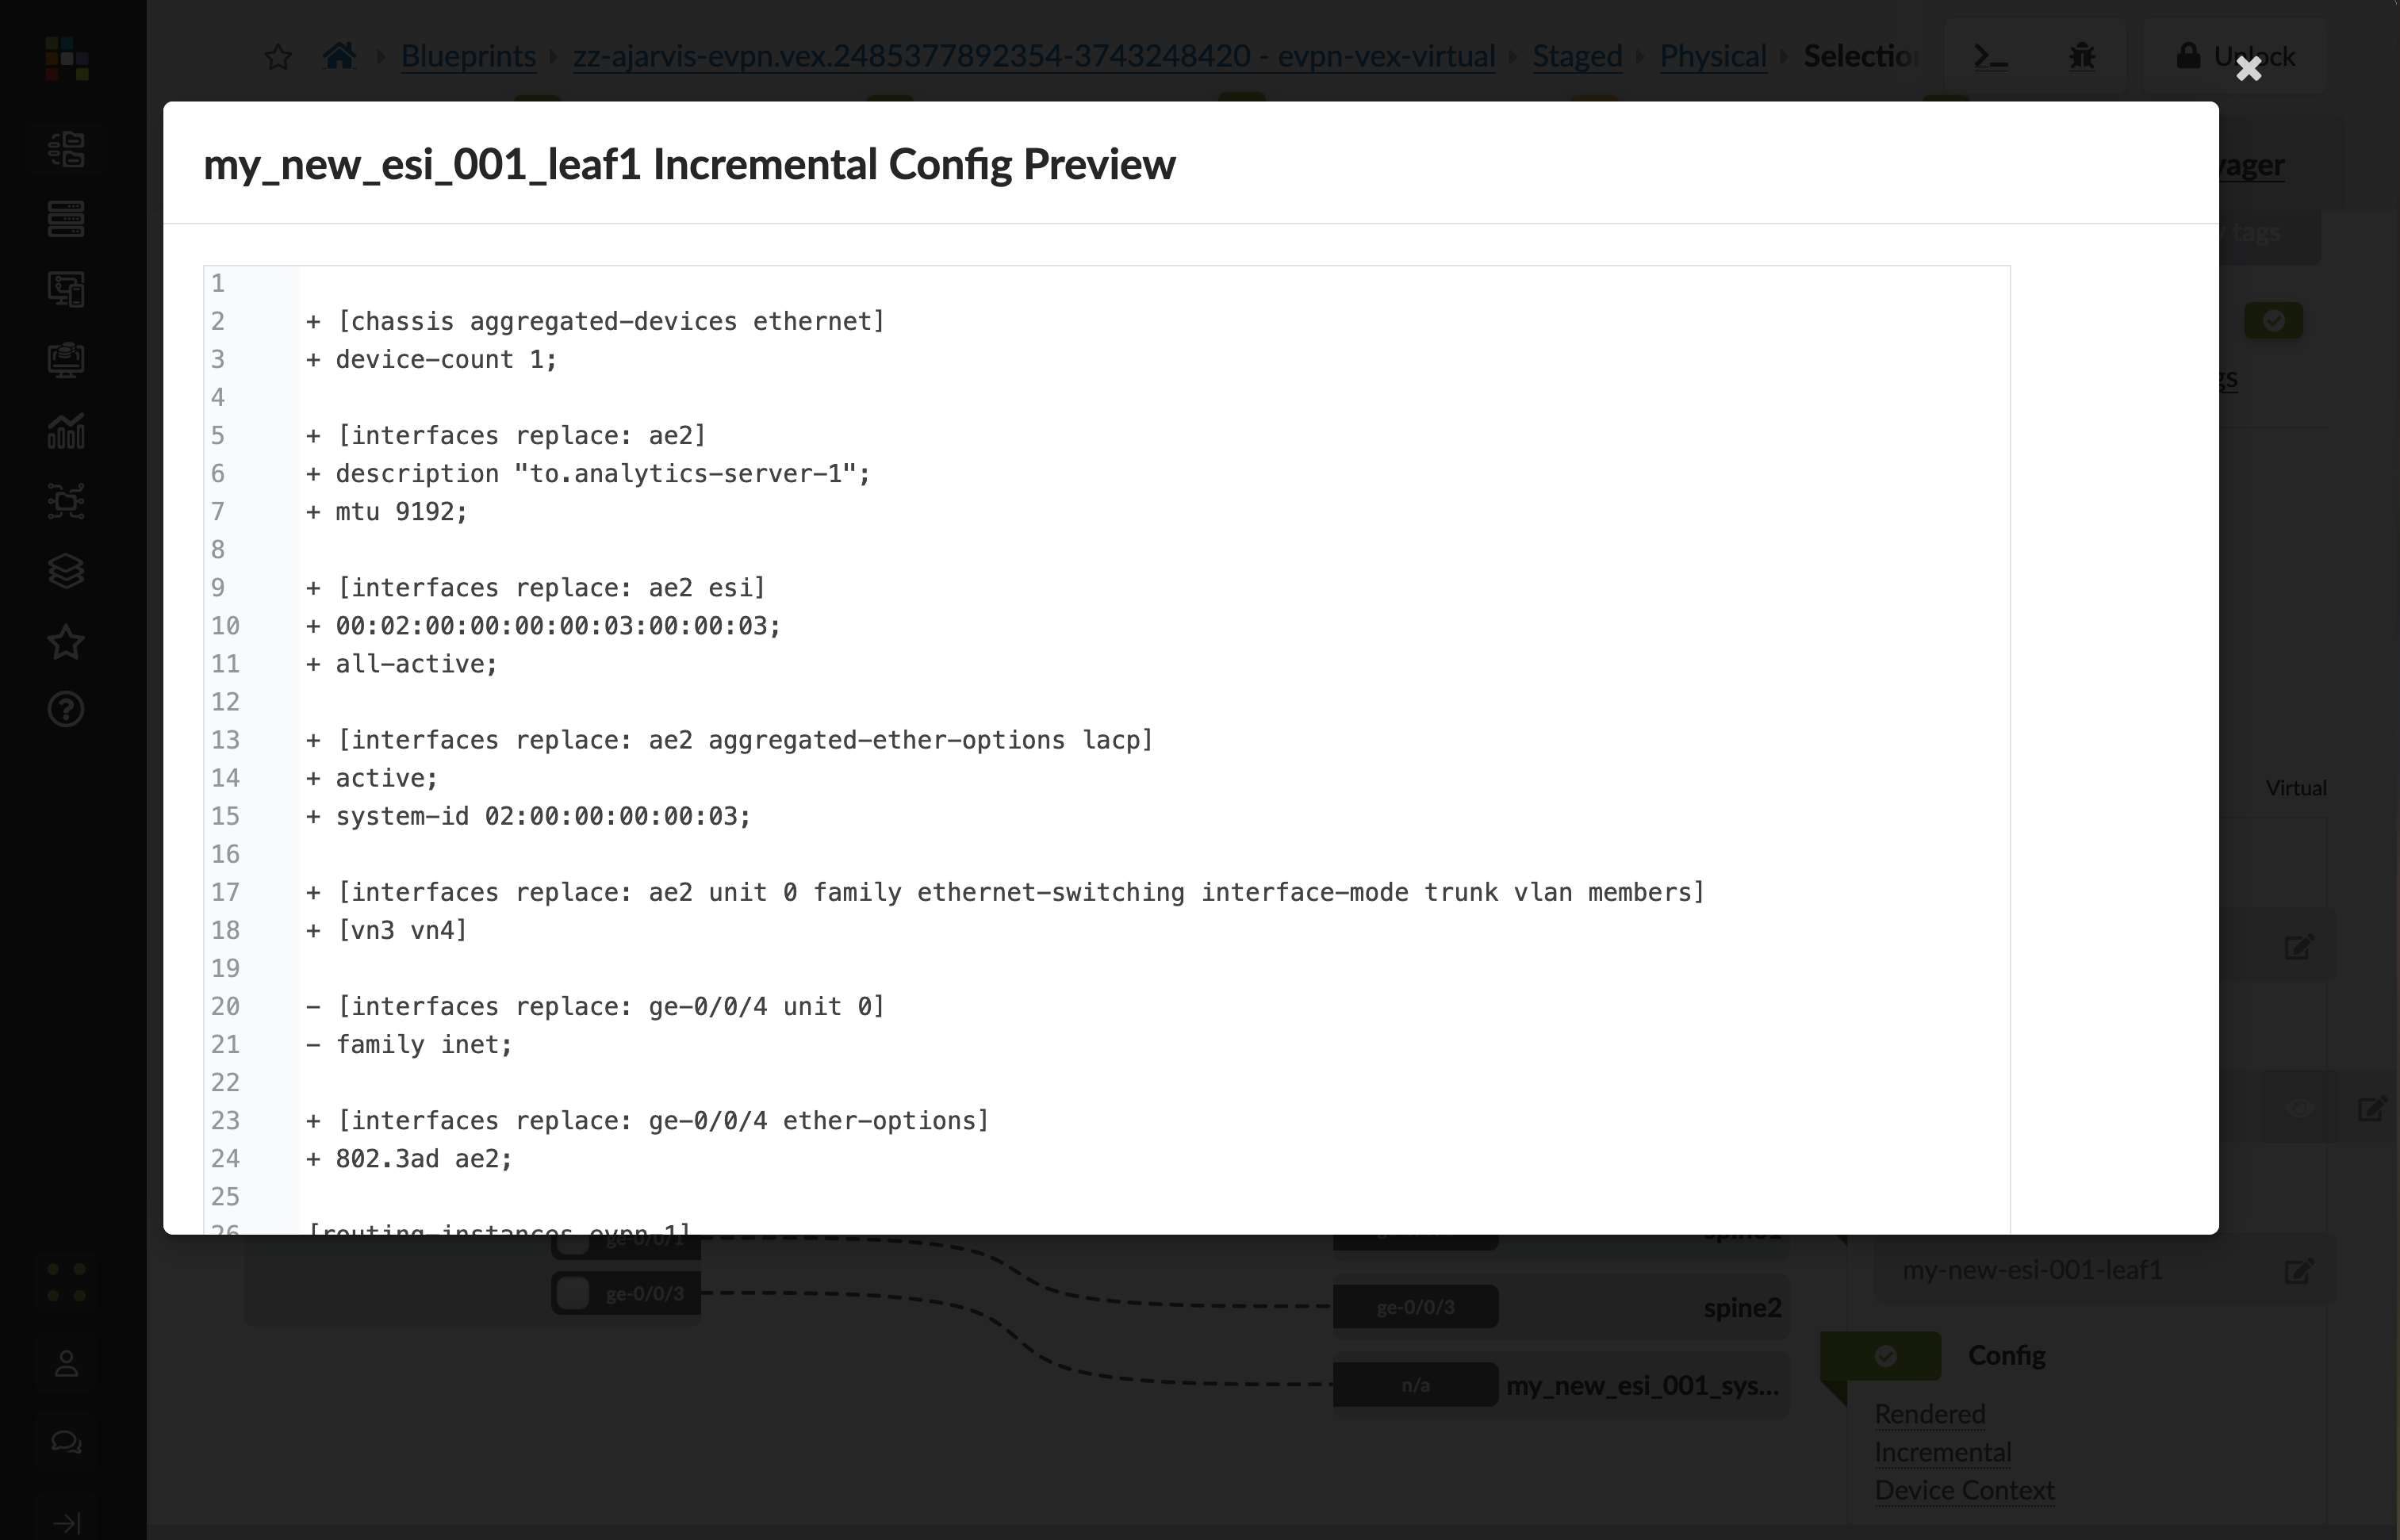
Navigate to menu:Staged[Physical > Topology] * Select a leaf switch and check the *Incremental Configuration tab to see what Apstra has prepared.
-
Click the Uncommitted tab, enter a commit message such as Connected analytics server to virtual networks, and click Commit.