Section 3: Traversals and Direction
A node query tells you about individual objects. A traversal tells you about how objects are connected. This is where the graph becomes genuinely powerful — and where direction becomes critical.
What a traversal is
Imagine you want to find every interface on every leaf switch in the fabric. A node query can get you the leaf switches, and a separate node query can get you all interfaces — but neither tells you which interfaces belong to which switch.
A traversal walks from one node to another via a relationship, following the connections in the graph.
node(type='system', role='leaf')
  .out('hosted_interfaces')
  .node(type='interface')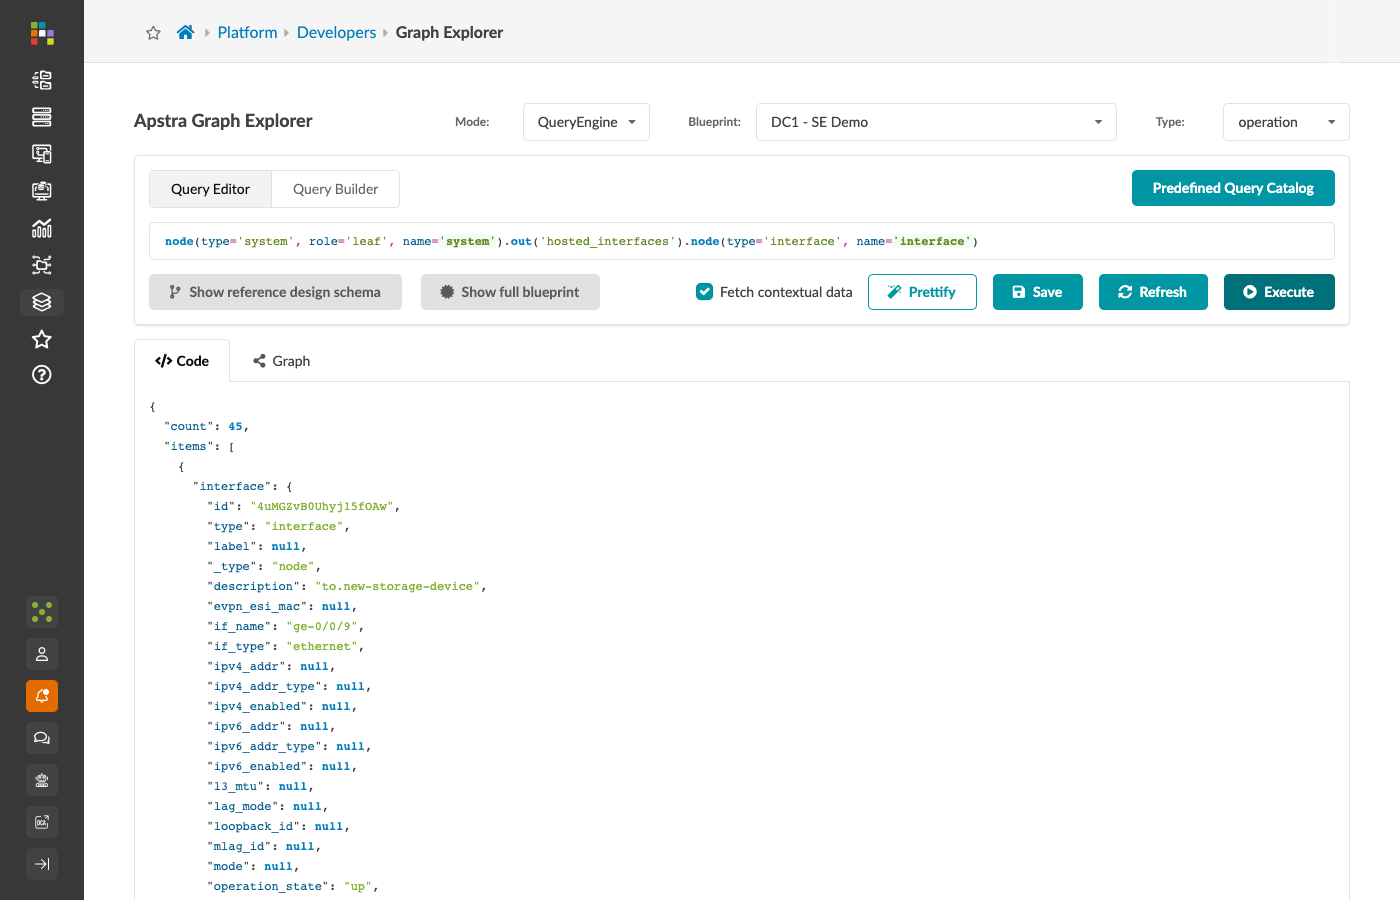
This query reads left to right:
-
Start with all
systemnodes whose role isleaf. -
Follow the
hosted_interfacesrelationship outward from those nodes. -
Arrive at every
interfacenode at the other end of those relationships.
The result is a subgraph: every leaf system connected to every interface it hosts. The DC1 - SE Demo blueprint has 3 leaf systems each with 15 interfaces, giving 45 interface results.
| Property | Example value | What it means |
|---|---|---|
|
|
Physical port name — the exact string used in device config |
|
|
Port category |
|
|
Assigned IP address (fabric-facing ports only) |
|
|
Current operational status of the port |
|
|
MTU value |
Direction: .out() and .in_()
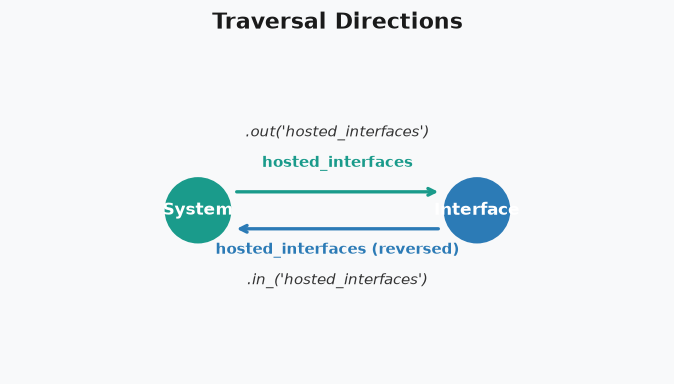
Relationships in the graph are directional — they have a source end and a target end. When you traverse a relationship, you must specify which direction you are walking.
.out('type') — follow a relationship that departs from the current node (source → target)
.in_('type') — follow a relationship that arrives at the current node (target → source, walking backwards)
Reading direction from the detail panel
The relationship detail panel, which you explored in Section 1, shows:
-
source_id— the node the relationship departs from (tail of the arrow) -
target_id— the node the relationship points to (head of the arrow)
If a hosted_interfaces relationship has a system as its source and an interface as its target, then:
-
Starting from a system node, you use
.out('hosted_interfaces')to reach the interface. -
Starting from an interface node, you use
.in_('hosted_interfaces')to reach the system it belongs to.
|
Apstra’s relationship directions are fixed and cannot be changed.
If you write |
How to discover direction in your blueprint
-
Open the Graph Explorer canvas.
-
Find a node of the type you are starting from and a node of the type you want to reach.
-
Click the line between them.
-
Read the
source_idfrom the relationship detail panel. -
Find the corresponding node on the canvas (paste the source ID into
node(id='…')) to confirm which type is the source.
Alternatively, use the Show reference design schema button to display a diagram of the main node types and their relationship directions.
Always specify the relationship type
You can call .out() and .in_() without a type argument:
node(type='system').out().node(type='interface')This returns all interfaces connected to all systems via any outbound relationship — not just hosted_interfaces.
In a fabric where systems have multiple types of outbound relationships, this query may return a much larger and less predictable result set than you intended.
Get into the habit of always specifying the relationship type:
node(type='system').out('hosted_interfaces').node(type='interface')This is unambiguous and will not surprise you as the blueprint grows.
A reference to the common relationships
The table below covers the relationships you will use most frequently when querying a three-stage reference design.
Direction is shown as source_type → target_type.
| Relationship type | Source | Target | What it connects |
|---|---|---|---|
|
|
|
A switch or server to its physical ports |
|
|
|
A system to the rack it sits in |
|
|
|
A leaf switch to the VN instances it hosts |
|
|
|
A VN instance to the virtual network it is an instantiation of |
|
|
|
A routing zone to its member virtual networks |
|
|
|
A routing zone to its routing policy |
|
|
|
An ESI/MLAG pair to its member switches |
|
|
|
A port-channel interface to its member physical interfaces |
|
|
|
A physical interface to the link object connecting it to another interface |
|
|
|
A system to its interface mapping |
|
|
|
An interface map to its device profile |
|
|
|
A virtual network to its endpoint objects |
|
|
|
An interface to the VN endpoint hosted on it |
|
This table covers the most common relationships. When you encounter one that is not listed here, click it in the Graph Explorer and read the type from the detail panel. |
Building a traversal step by step
The best way to understand traversal construction is to build a query incrementally. The target: find every interface on every system in a specific rack.
Step 1 — Start with the rack
node(type='rack', label='rack1')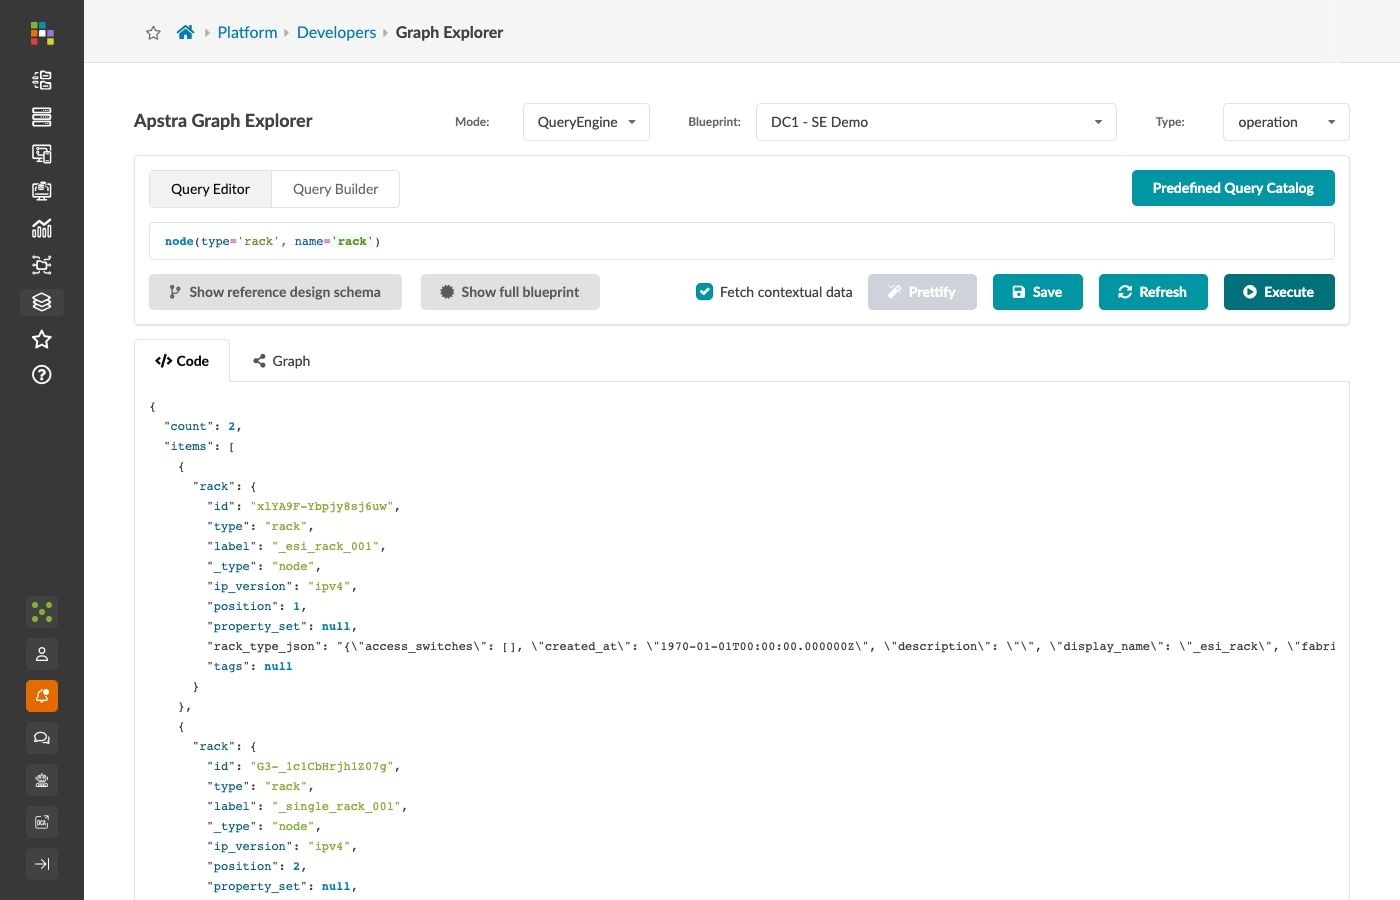
One rack node. Confirm the label matches a rack that exists in your blueprint.
Step 2 — Add the relationship to systems
node(type='rack', label='rack1')
  .in_('part_of_rack')
  .node(type='system')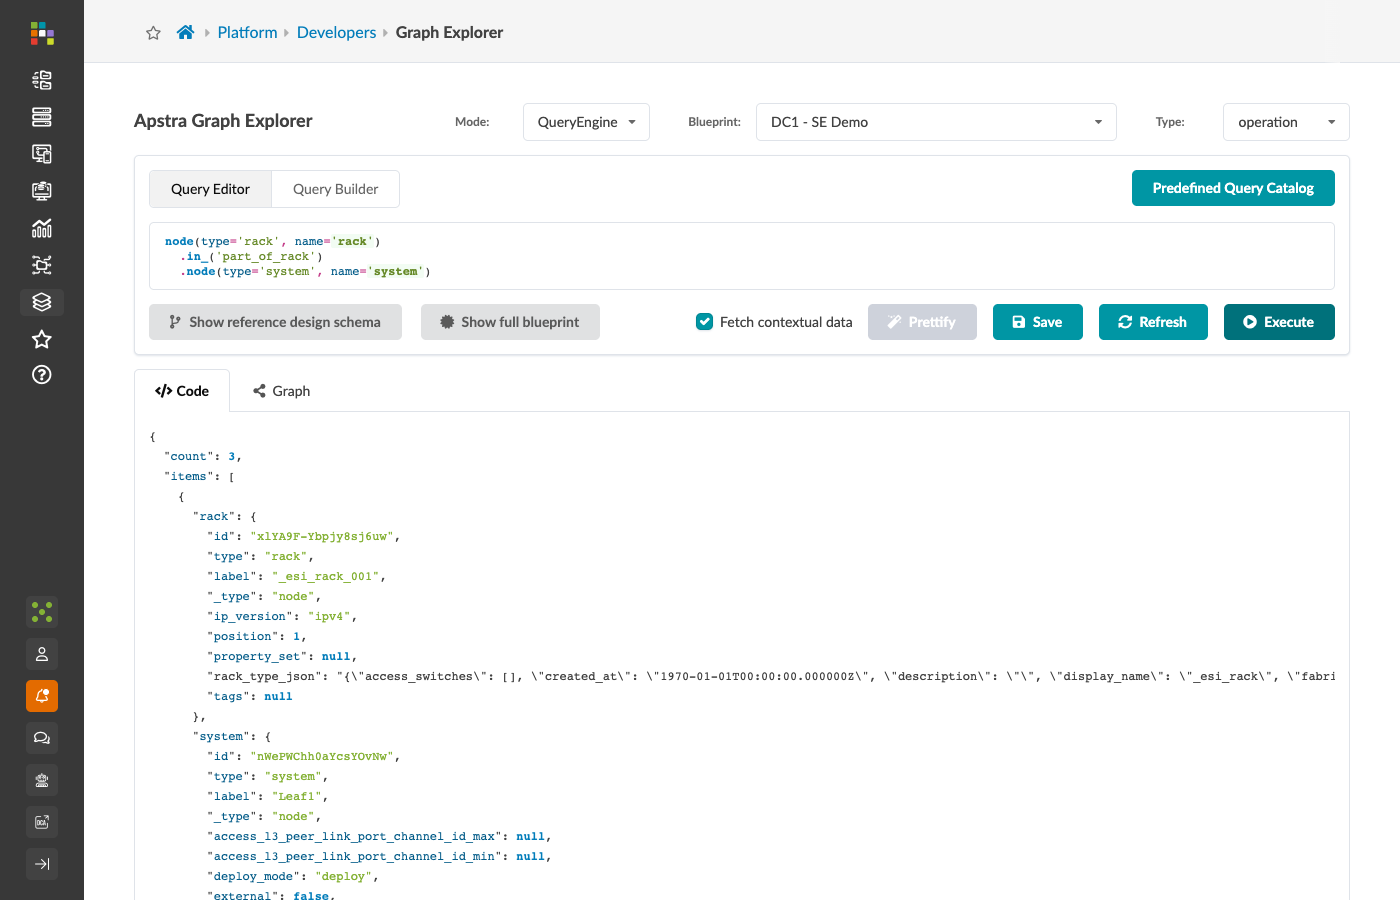
The part_of_rack relationship has system as its source and rack as its target.
We are starting at the rack and walking backwards along those relationships — hence .in_('part_of_rack').
You now have the rack and all the systems in it.
Step 3 — Add the relationship to interfaces
node(type='rack', label='rack1')
  .in_('part_of_rack')
  .node(type='system')
  .out('hosted_interfaces')
  .node(type='interface')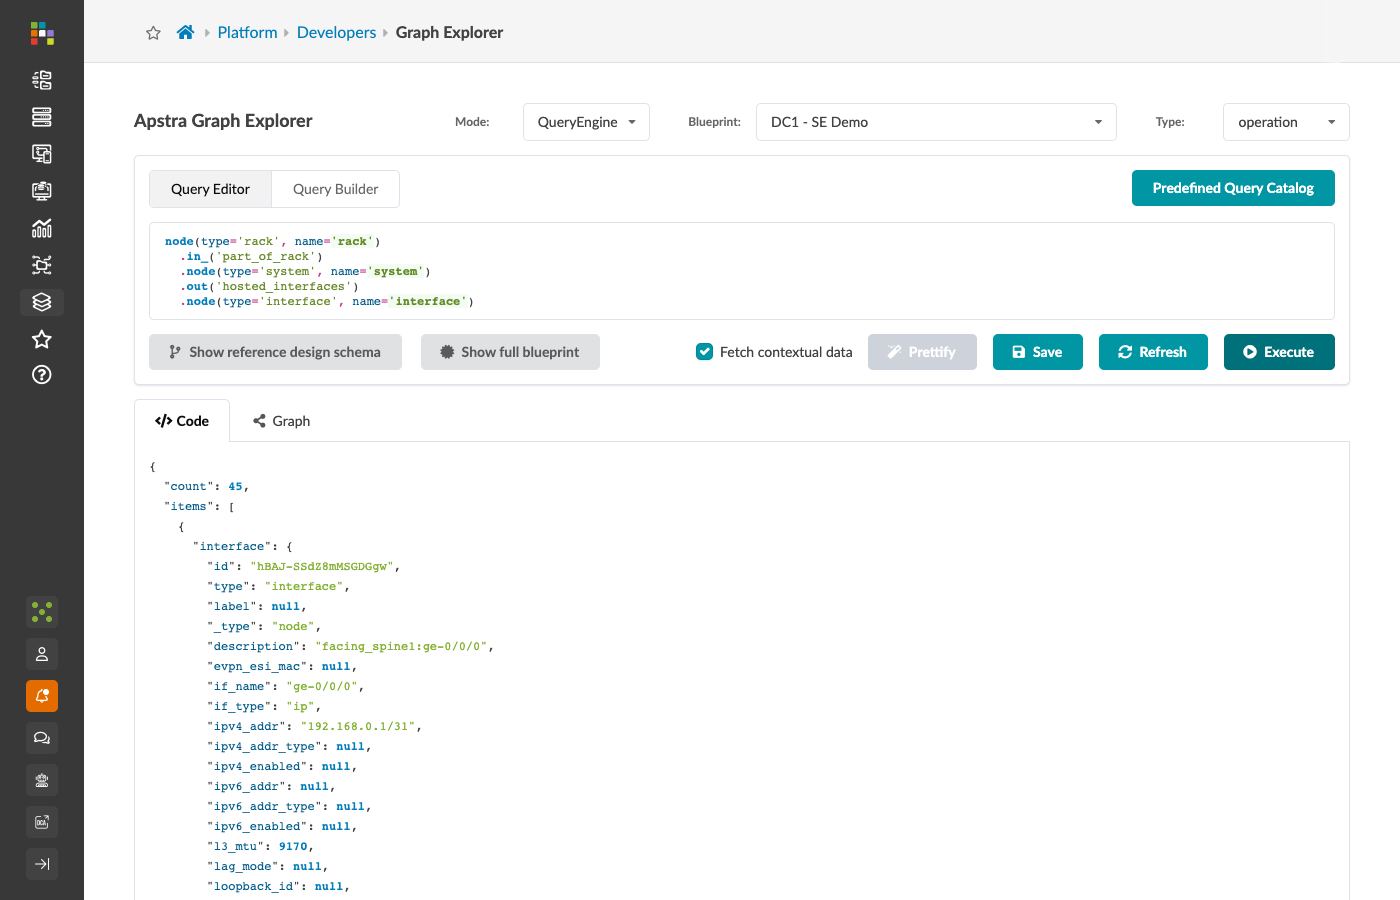
Now the query reads:
-
Start at rack1.
-
Walk backwards along
part_of_rackto reach all systems in that rack. -
Walk forwards along
hosted_interfacesto reach all interfaces on those systems.
This is the same query from the slides, made real with your blueprint. If your rack has two systems with seven and six interfaces respectively, you will see exactly that.
Extending the traversal
A traversal can be as long as you need.
You can chain as many .out(), .in_(), .node() segments as required:
node(type='system', role='leaf', deploy_mode='deploy')
  .out('hosted_vn_instances')
  .node(type='vn_instance')
  .out('instantiates')
  .node(type='virtual_network')
This walks: deployed leaf → VN instances on that leaf → virtual networks those instances represent.
Each .node() in the chain can carry its own filters.
Each .out() or .in_() can carry its own type.
The chain is evaluated left to right, narrowing the result set at each step.
Checkpoint
Build and run the following traversals in your blueprint. In each case, inspect the result on the canvas and confirm the node counts make sense for your fabric.
All interfaces on all spine switches:
node(type='system', role='spine')
  .out('hosted_interfaces')
  .node(type='interface')
All systems in any rack (list all racks and their systems):
node(type='rack')
  .in_('part_of_rack')
  .node(type='system')
All virtual networks in any security zone:
node(type='security_zone')
  .out('member_vns')
  .node(type='virtual_network')
When you are comfortable building traversals, continue to Section 4: Property Matchers to learn how to apply more sophisticated filters than simple equality.