Section 0: Finding your lab
Before starting the hands-on tasks, first locate your pre-provisioned lab details and open your assigned Apstra blueprint.
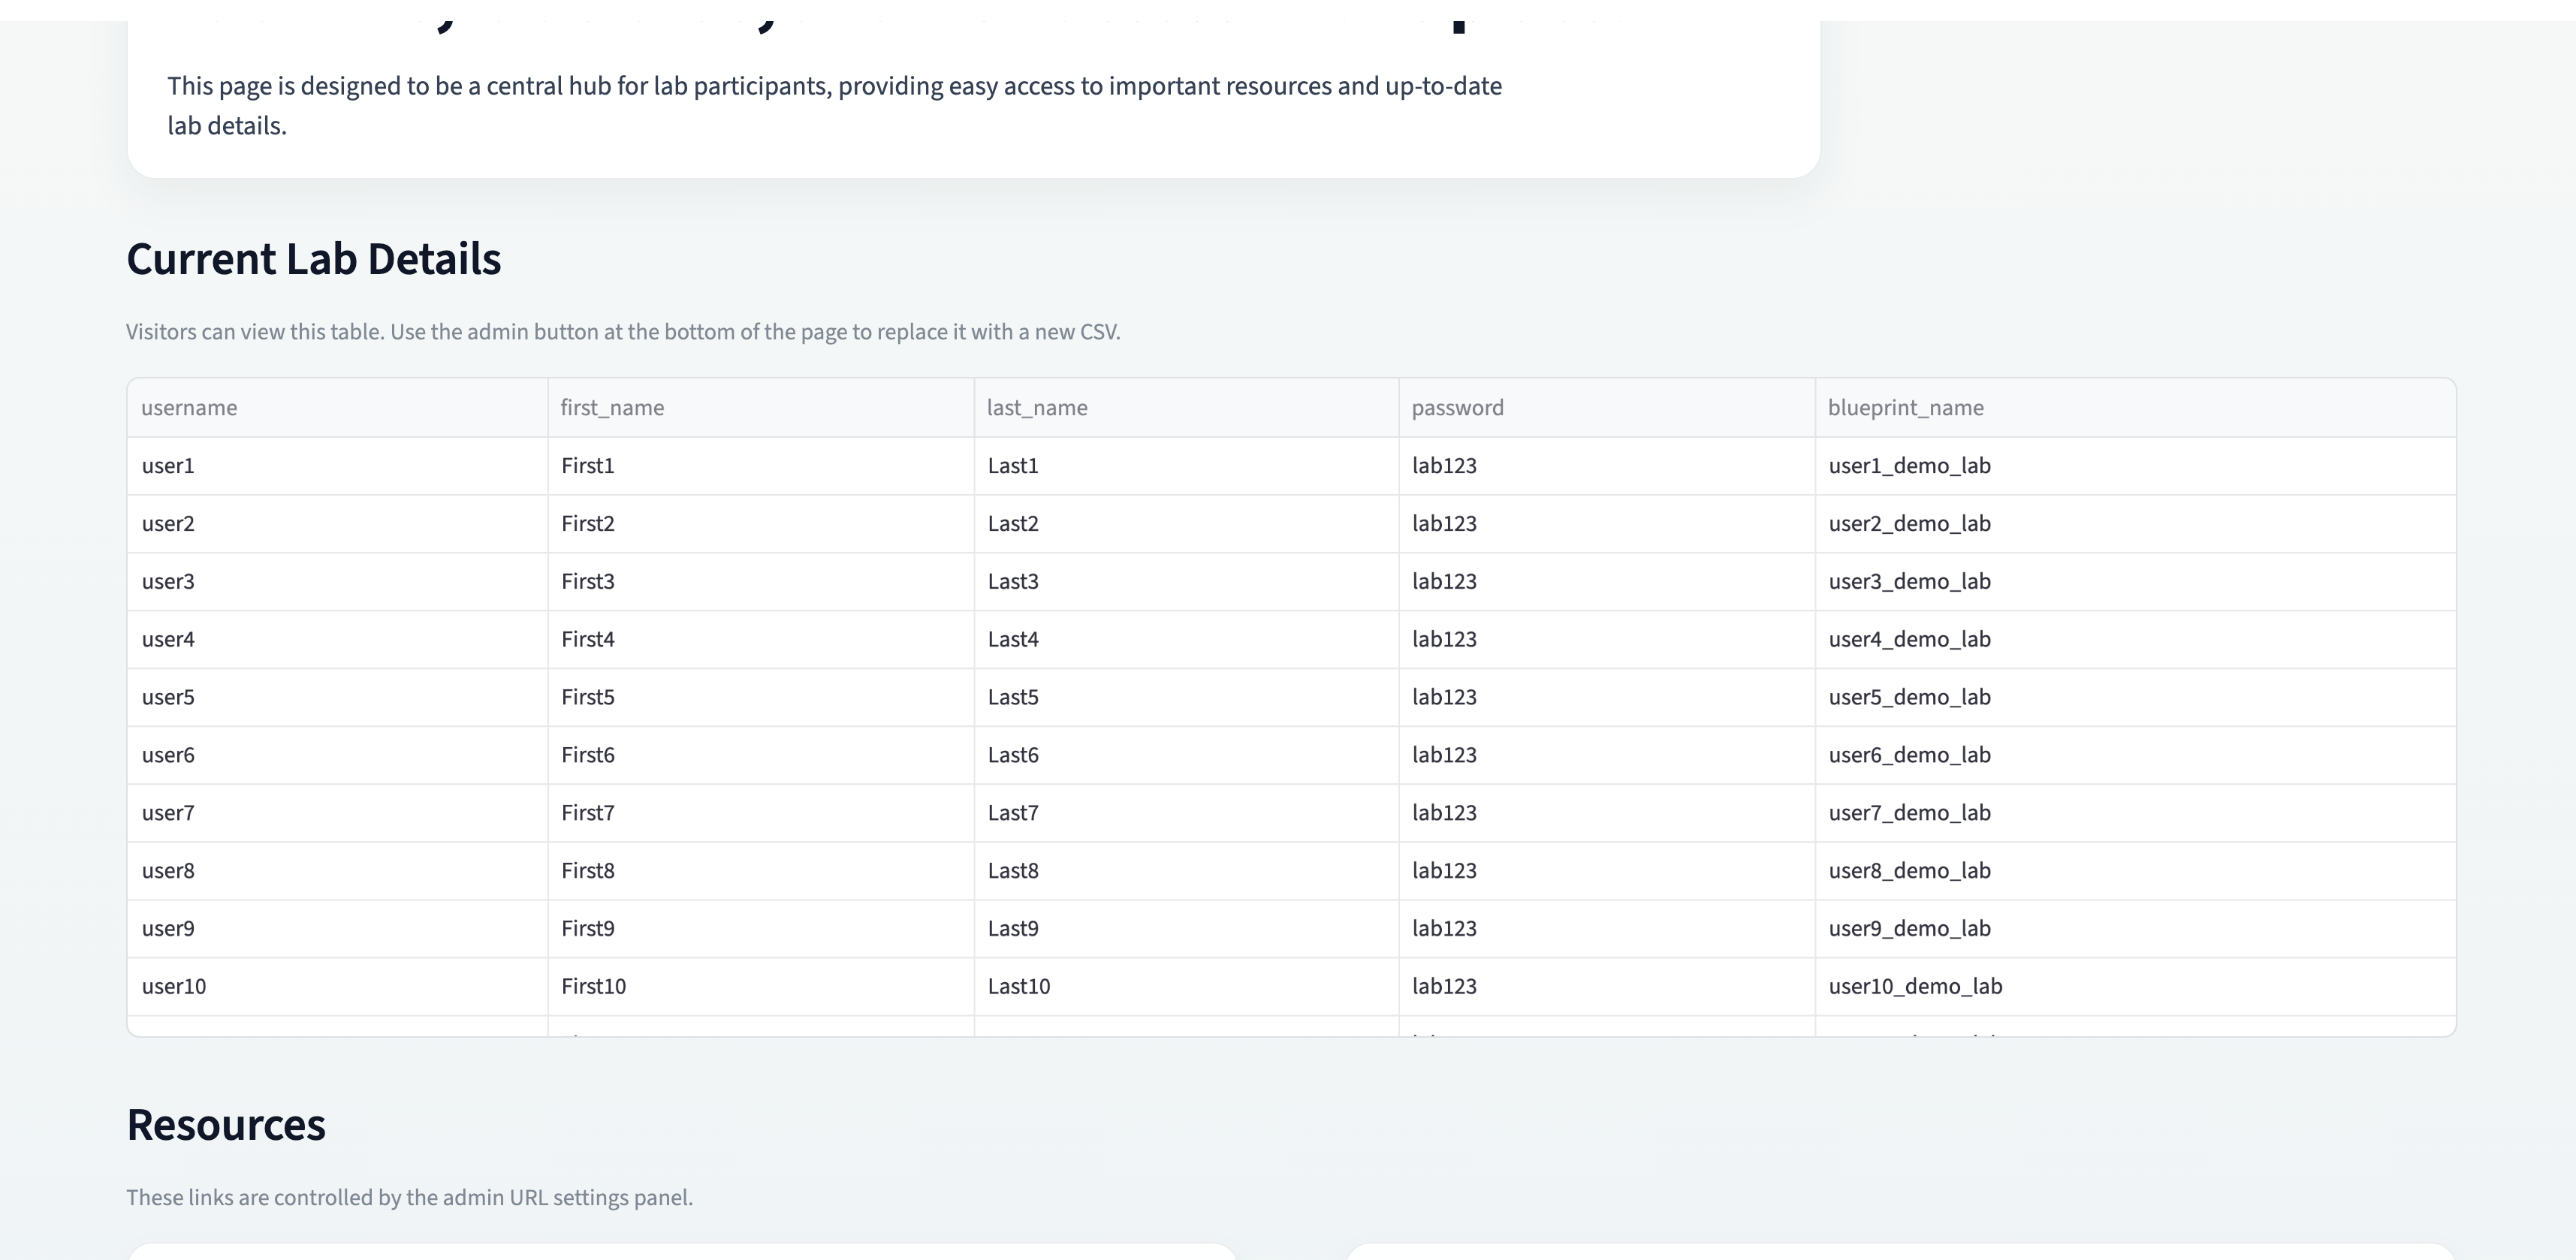
Step 1: Find your pre-provisioned user details
-
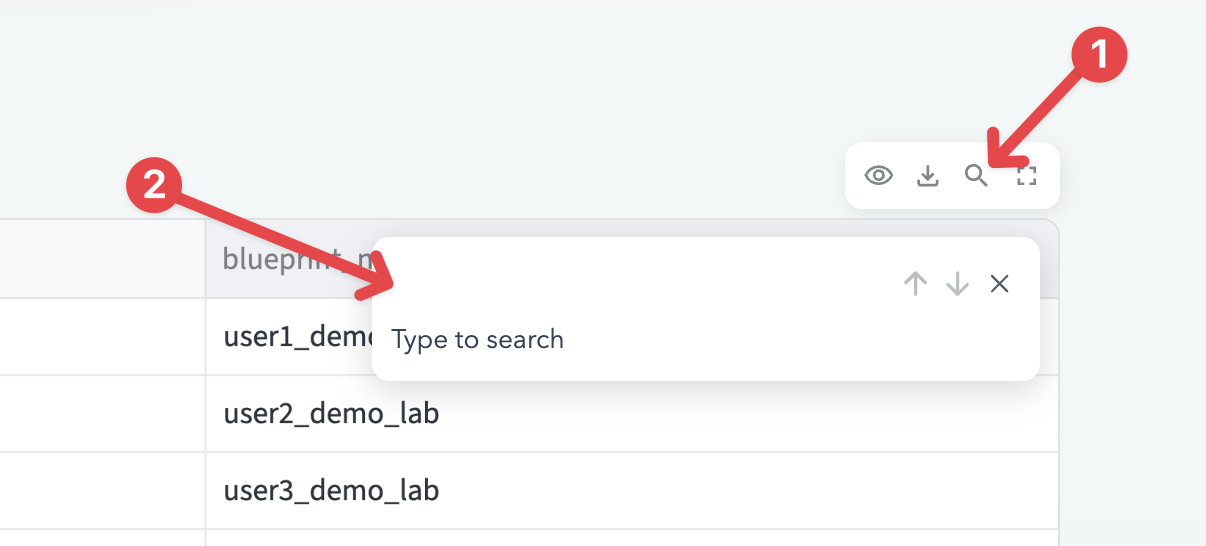
Locate your entry in the pre-provisioned user table.
|
Use the table search box to quickly find your row by name. |
From your row, note these values:
-
Username
-
Password
-
Blueprint name
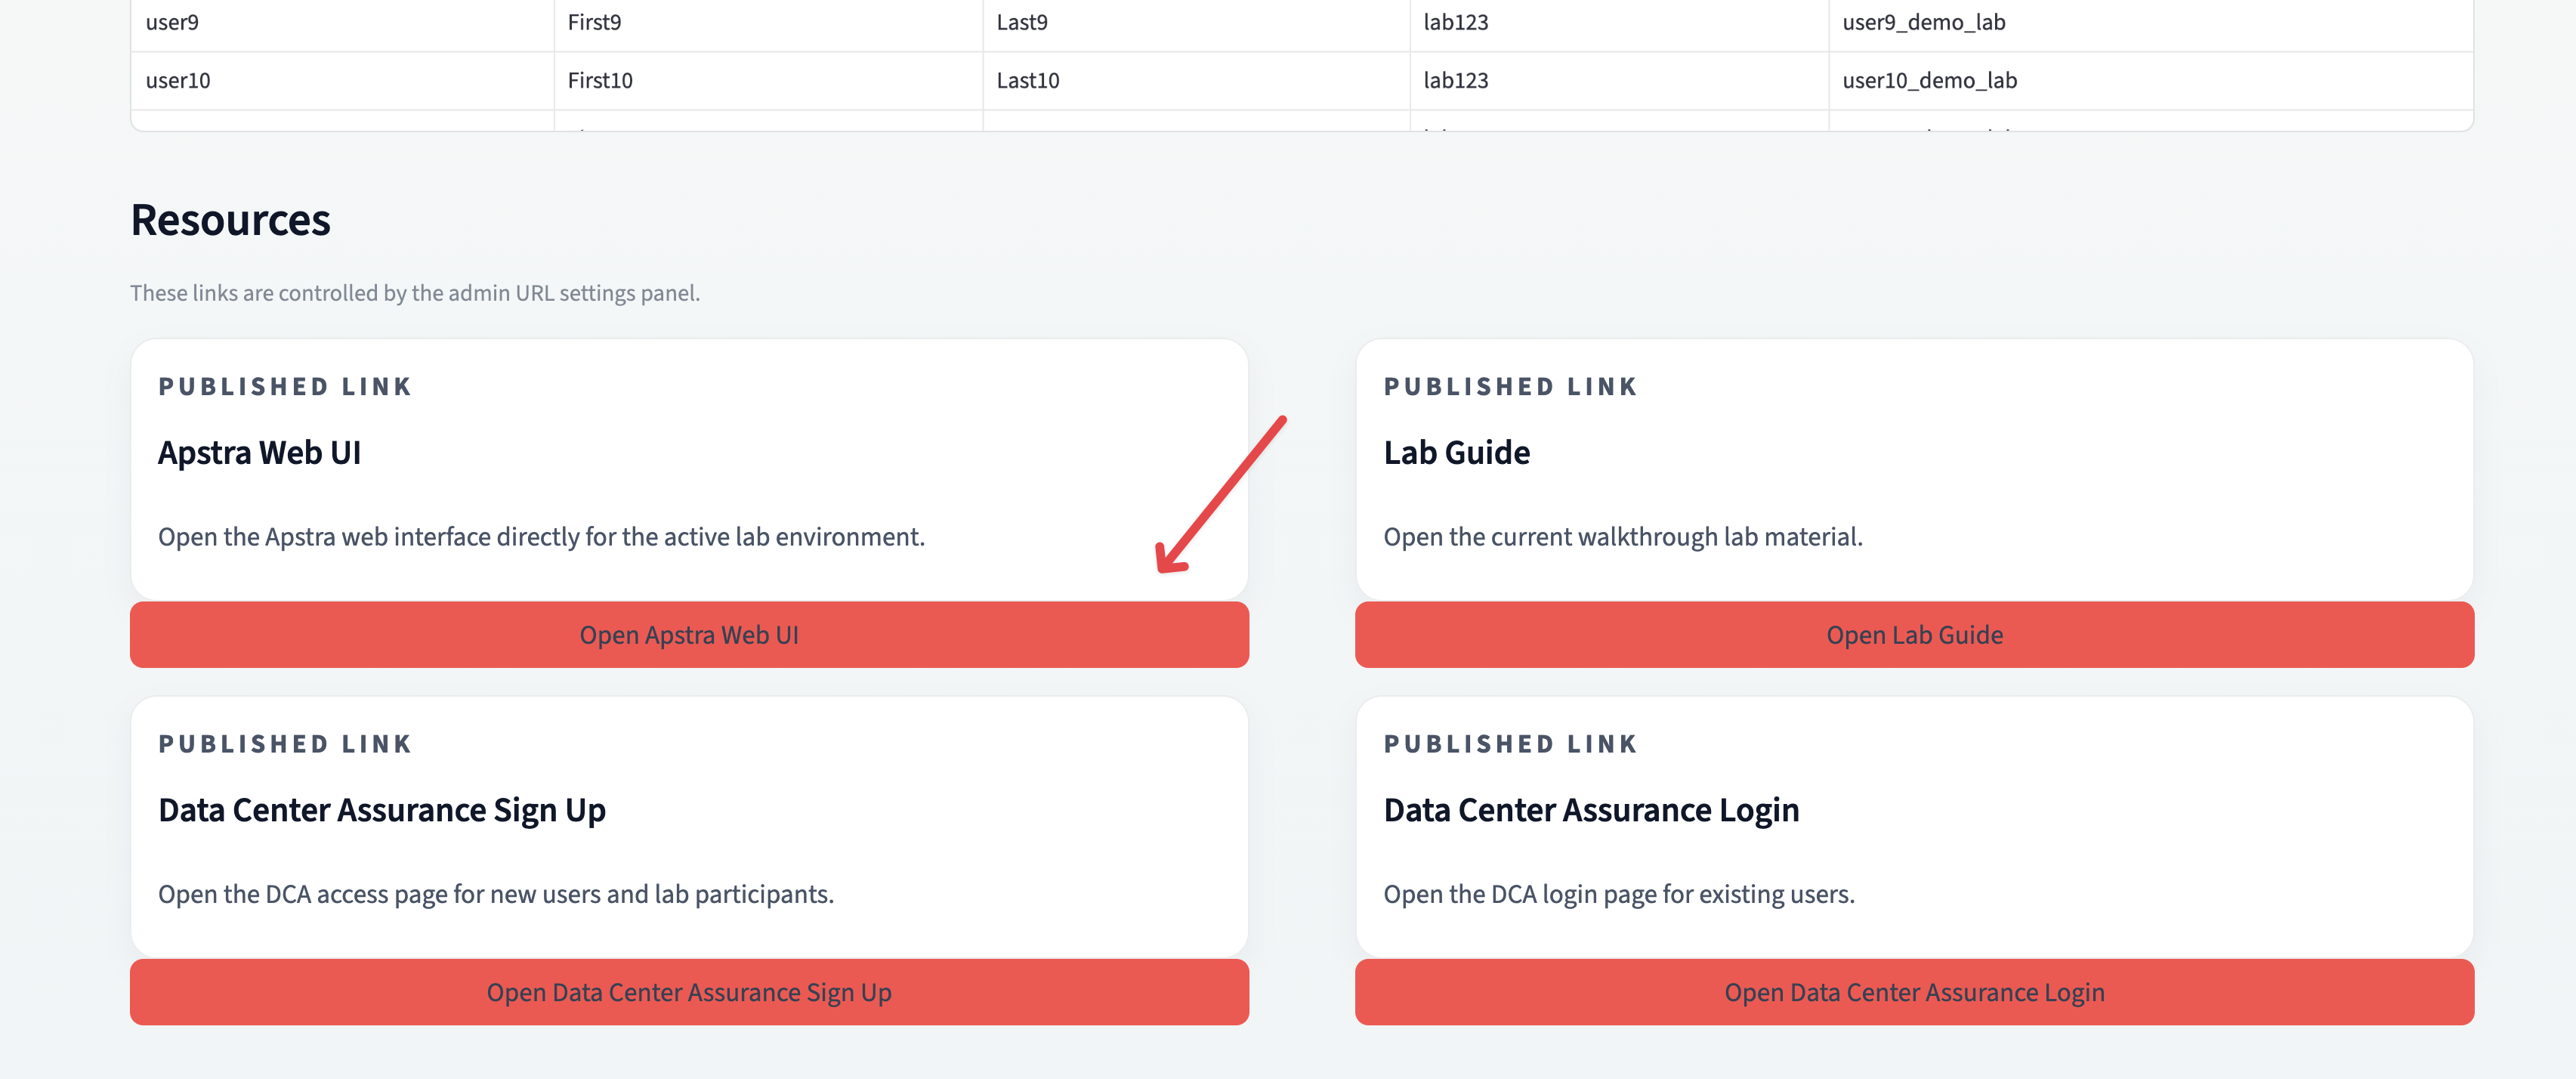
Step 2: Open the Apstra Web UI
-
In the same discover page, scroll down.
-
Click Open Apstra Web UI.
-
Sign in using the username and password from the table.
Step 3: Locate your blueprint
After login, go to Blueprints.
There may be multiple blueprint pages. By default, only 25 entries are shown per page.
Use either method below to find your lab quickly:
-
Browse the pages and locate your blueprint name.
-
Click search at the top and enter your name or paste the blueprint name from the discover table.
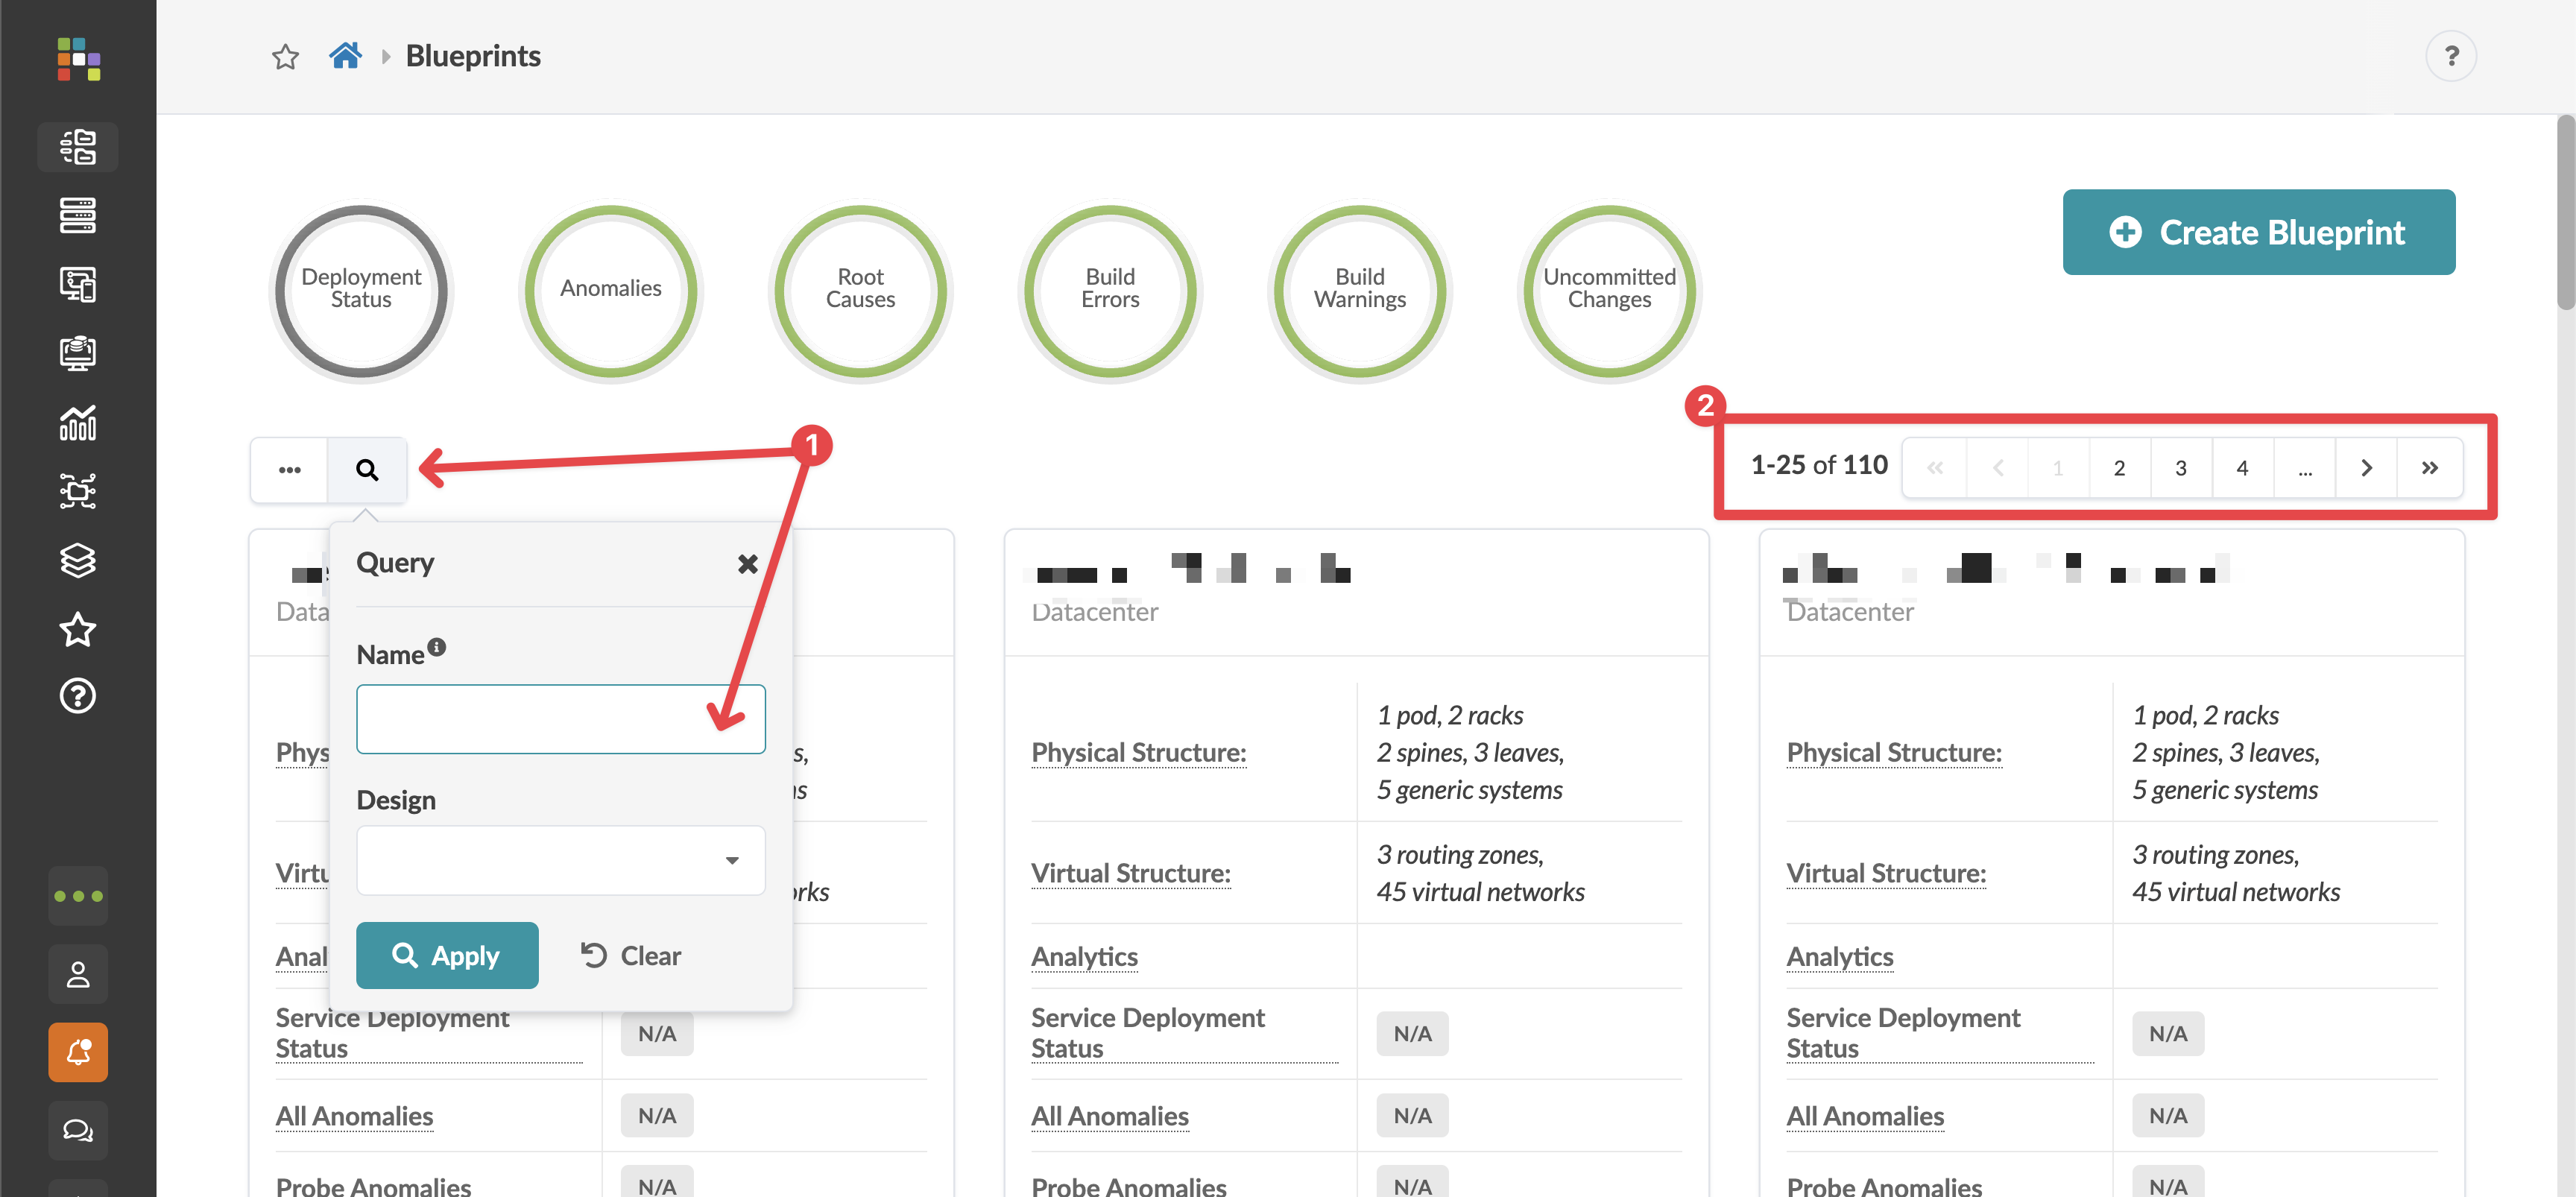
Once you find it, click your blueprint to enter the lab.
|
Your lab user account is restricted to your assigned blueprint only. You can make changes only within that blueprint. |