Lab Guide 1 - Juniper
Creating Templates
Templates are where we bring together the rack types we’ve built and define how they connect to form a complete data centre fabric. Think of templates as the architectural blueprint for your network design.
A template allows you to:
-
Specify how many of each rack type you’ll deploy
-
Define spine switches to connect your racks
-
Configure global networking policies
-
Set the foundation for routing and switching protocols
Let’s create a template that uses both rack types we built in the previous exercise.
Exercise: Create a Fabric Template
-
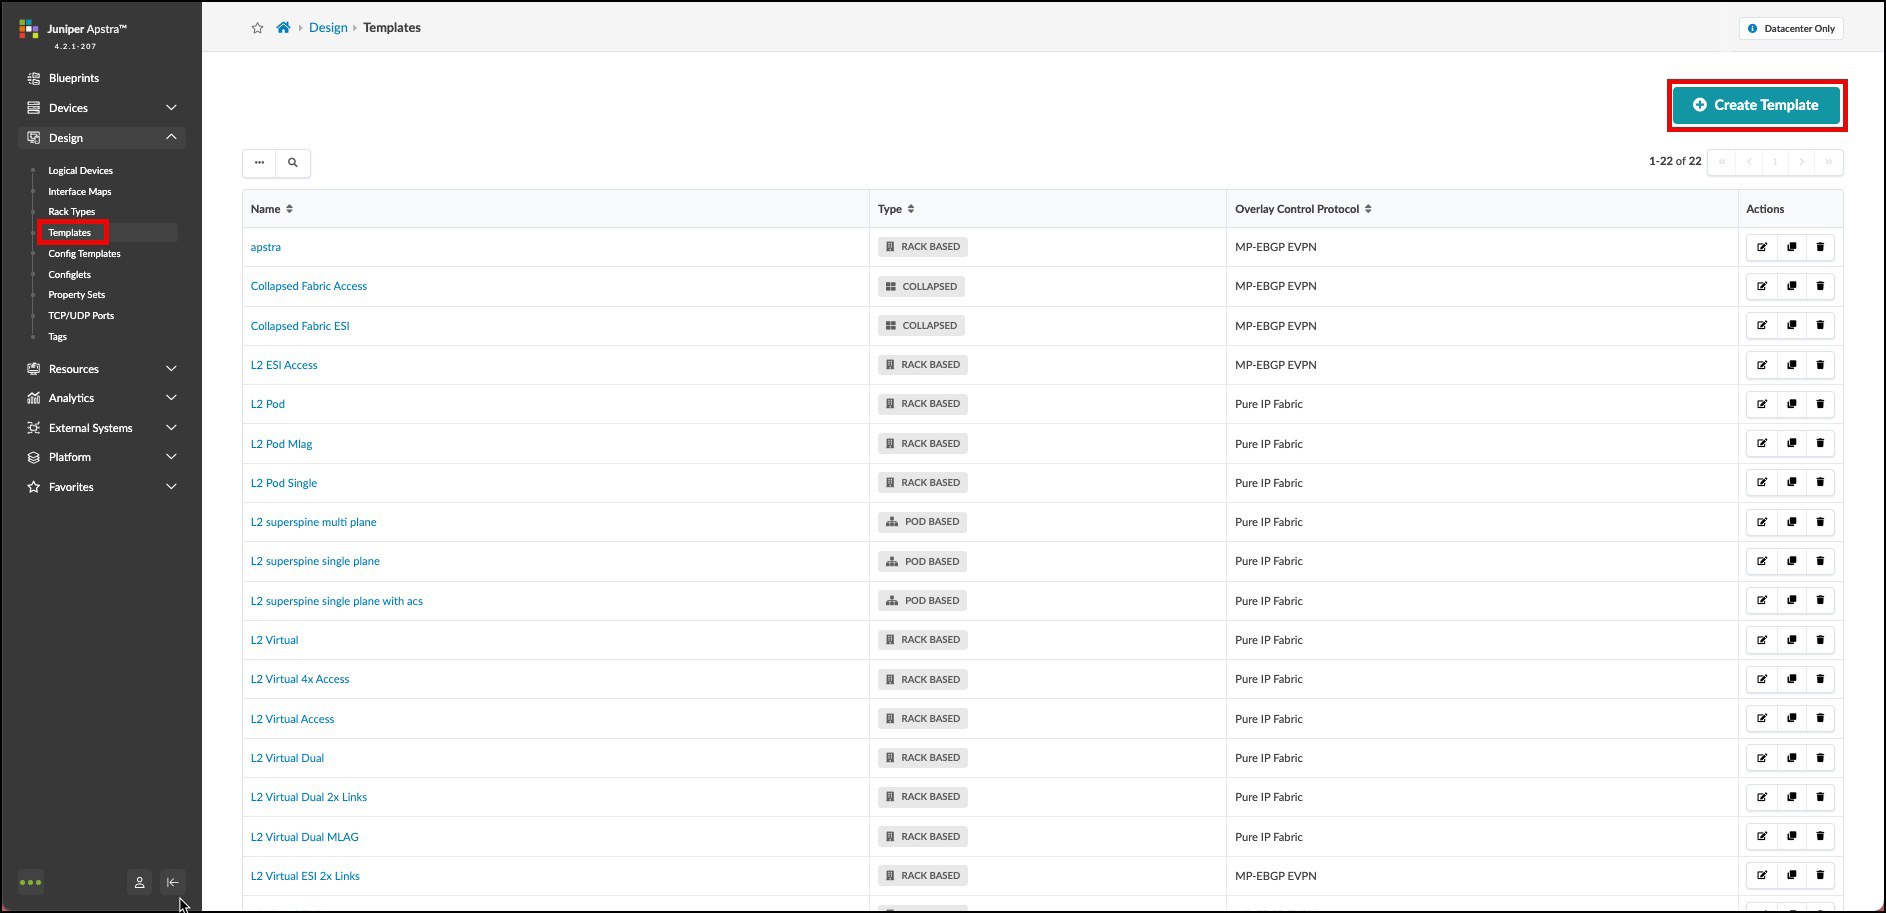
Navigate to and click Create Template

-
In the Common Parameters section, configure:
Common Parameters Value Name
your_name_fabric
Type
RACK BASED
-
In the Policies section, configure:
Policies Value ASN Allocation Scheme (spine)
Unique
Overlay Control Protocol
MP-EBGP EVPN
These settings define:
-
How ASNs (Autonomous System Numbers) will be assigned to spine switches
-
That MP-EBGP EVPN will be used as the overlay protocol for virtual networks
-
-
In the Structure section, build your fabric topology:
Structure Value Rack Types
your_name-esi (1x10 Gbps links to spines)
Number of Racks
1
Click Add racks
Rack Types
your_name-single (1x10 Gbps links to spines)
Number of Racks
1
Spine Logical Device
slicer-7x10⁻¹
(Spine) Count
2
Links per Superspine Count
leave as is
Link to Superspine Speed
leave as is
As you add these elements, notice how the topology preview on the right updates to visualise your fabric design.
-
Click Create to generate your template.
-
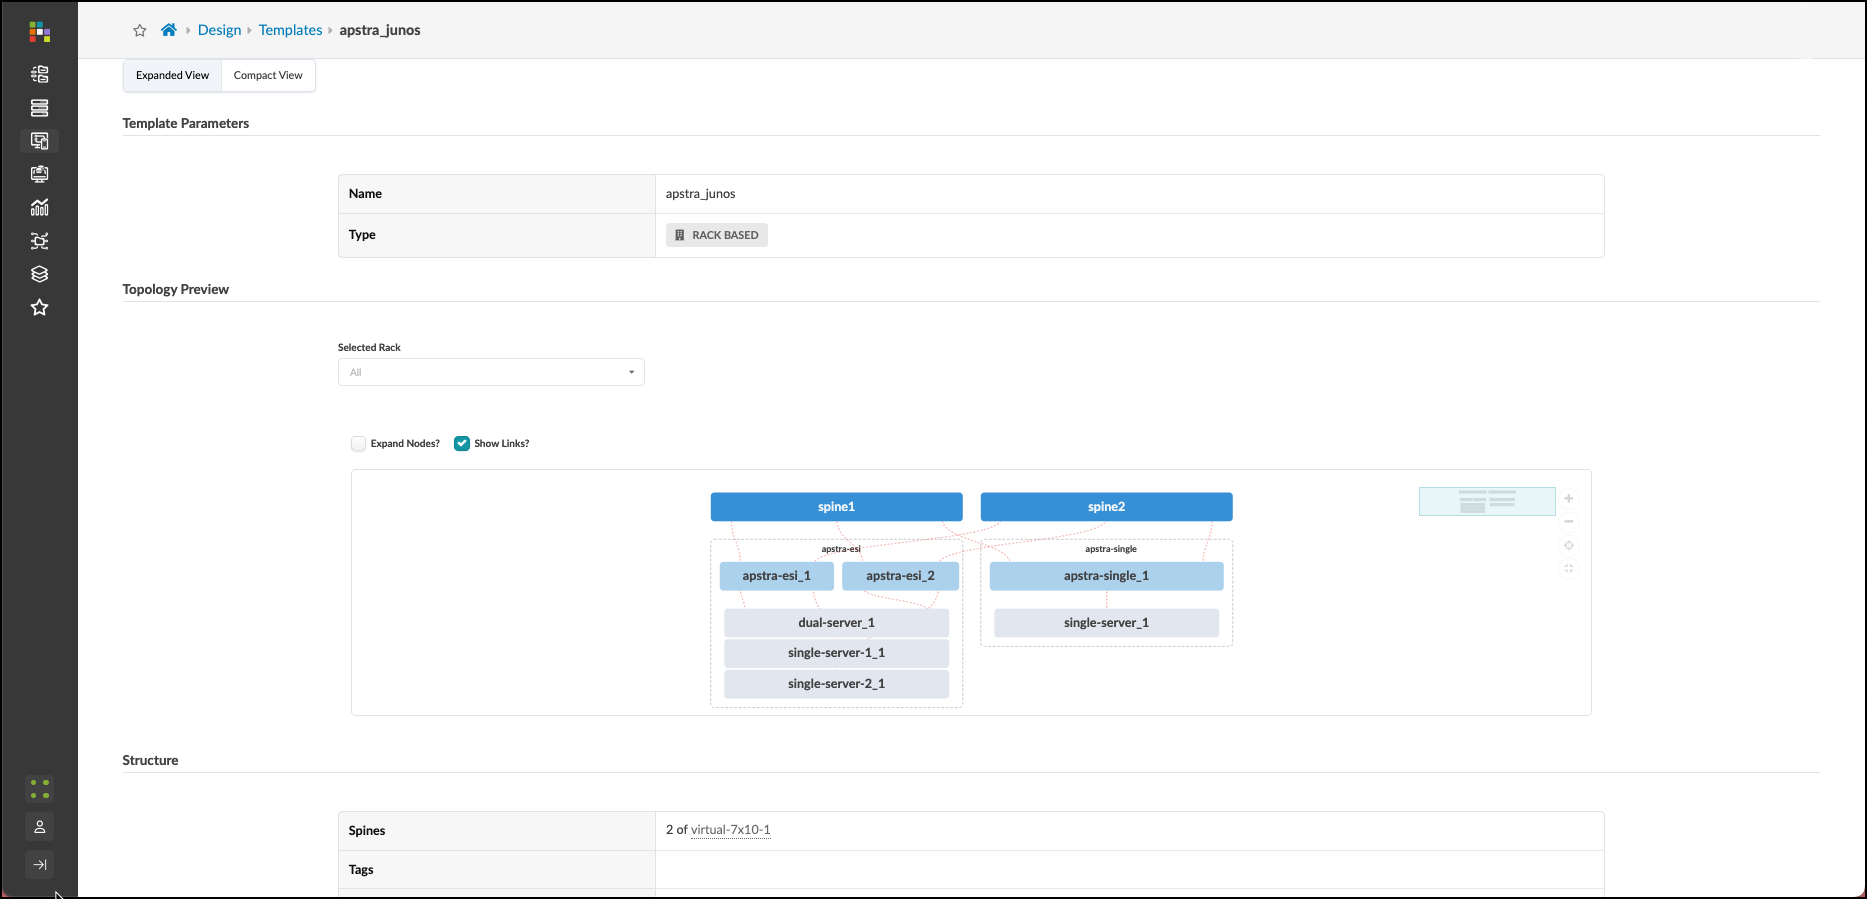
To view the details of your template, click its name in the template list. Check the Show Links? box to see the connections between devices.

This diagram shows:
-
Your dual-leaf rack (ESI) and single-leaf rack
-
Two spine switches
-
All interconnections between leafs and spines
-
Device roles within the fabric
-
Understanding Your Template
Let’s take a moment to understand what you’ve created:
-
A 2-tier Clos fabric (spine-leaf architecture)
-
Two spine switches providing redundant connections between all leafs
-
One dual-switch rack with ESI (Ethernet Segment Identifier) for high availability
-
One single-switch rack for lower-cost deployment
-
MP-EBGP EVPN as the overlay protocol for network virtualisation
This design provides:
-
High availability through redundant paths
-
Scalability - you can add more racks without redesigning the network
-
Flexibility - different rack types for different needs
-
Standardisation - consistent configuration across all devices
Next Steps
You’ve now created a complete software model of your network design! In the next exercise, we’ll instantiate this template as a blueprint - which is a deployable instance of your design - and assign resources to make it ready for deployment.
|
Pro Tip: Templates are reusable - you can create multiple blueprints from the same template. This makes it easy to deploy consistent network designs across multiple environments or data centres. |