Lab Guide 1 - Juniper
Day 2 Operations: Adding New Servers
1. Scenario: Deploying Analytics Platform Servers
Now that we have our physical capacity expanded and our virtual networks created, we need to deploy the actual servers that will run our Big Data Analytics platform. Specifically, we need to add servers to the new rack we created earlier.
In Apstra, servers are represented as Generic Systems and can be easily connected to your fabric.
2. Task: Add a New Analytics Server to the Fabric
|
Reflection Point: In traditional networking, adding a new server would involve:
Each step is manual and error-prone, especially across a large data centre. |
Let’s see how Apstra makes this simple!
2.1. Step 1: Navigate to the Topology View
-
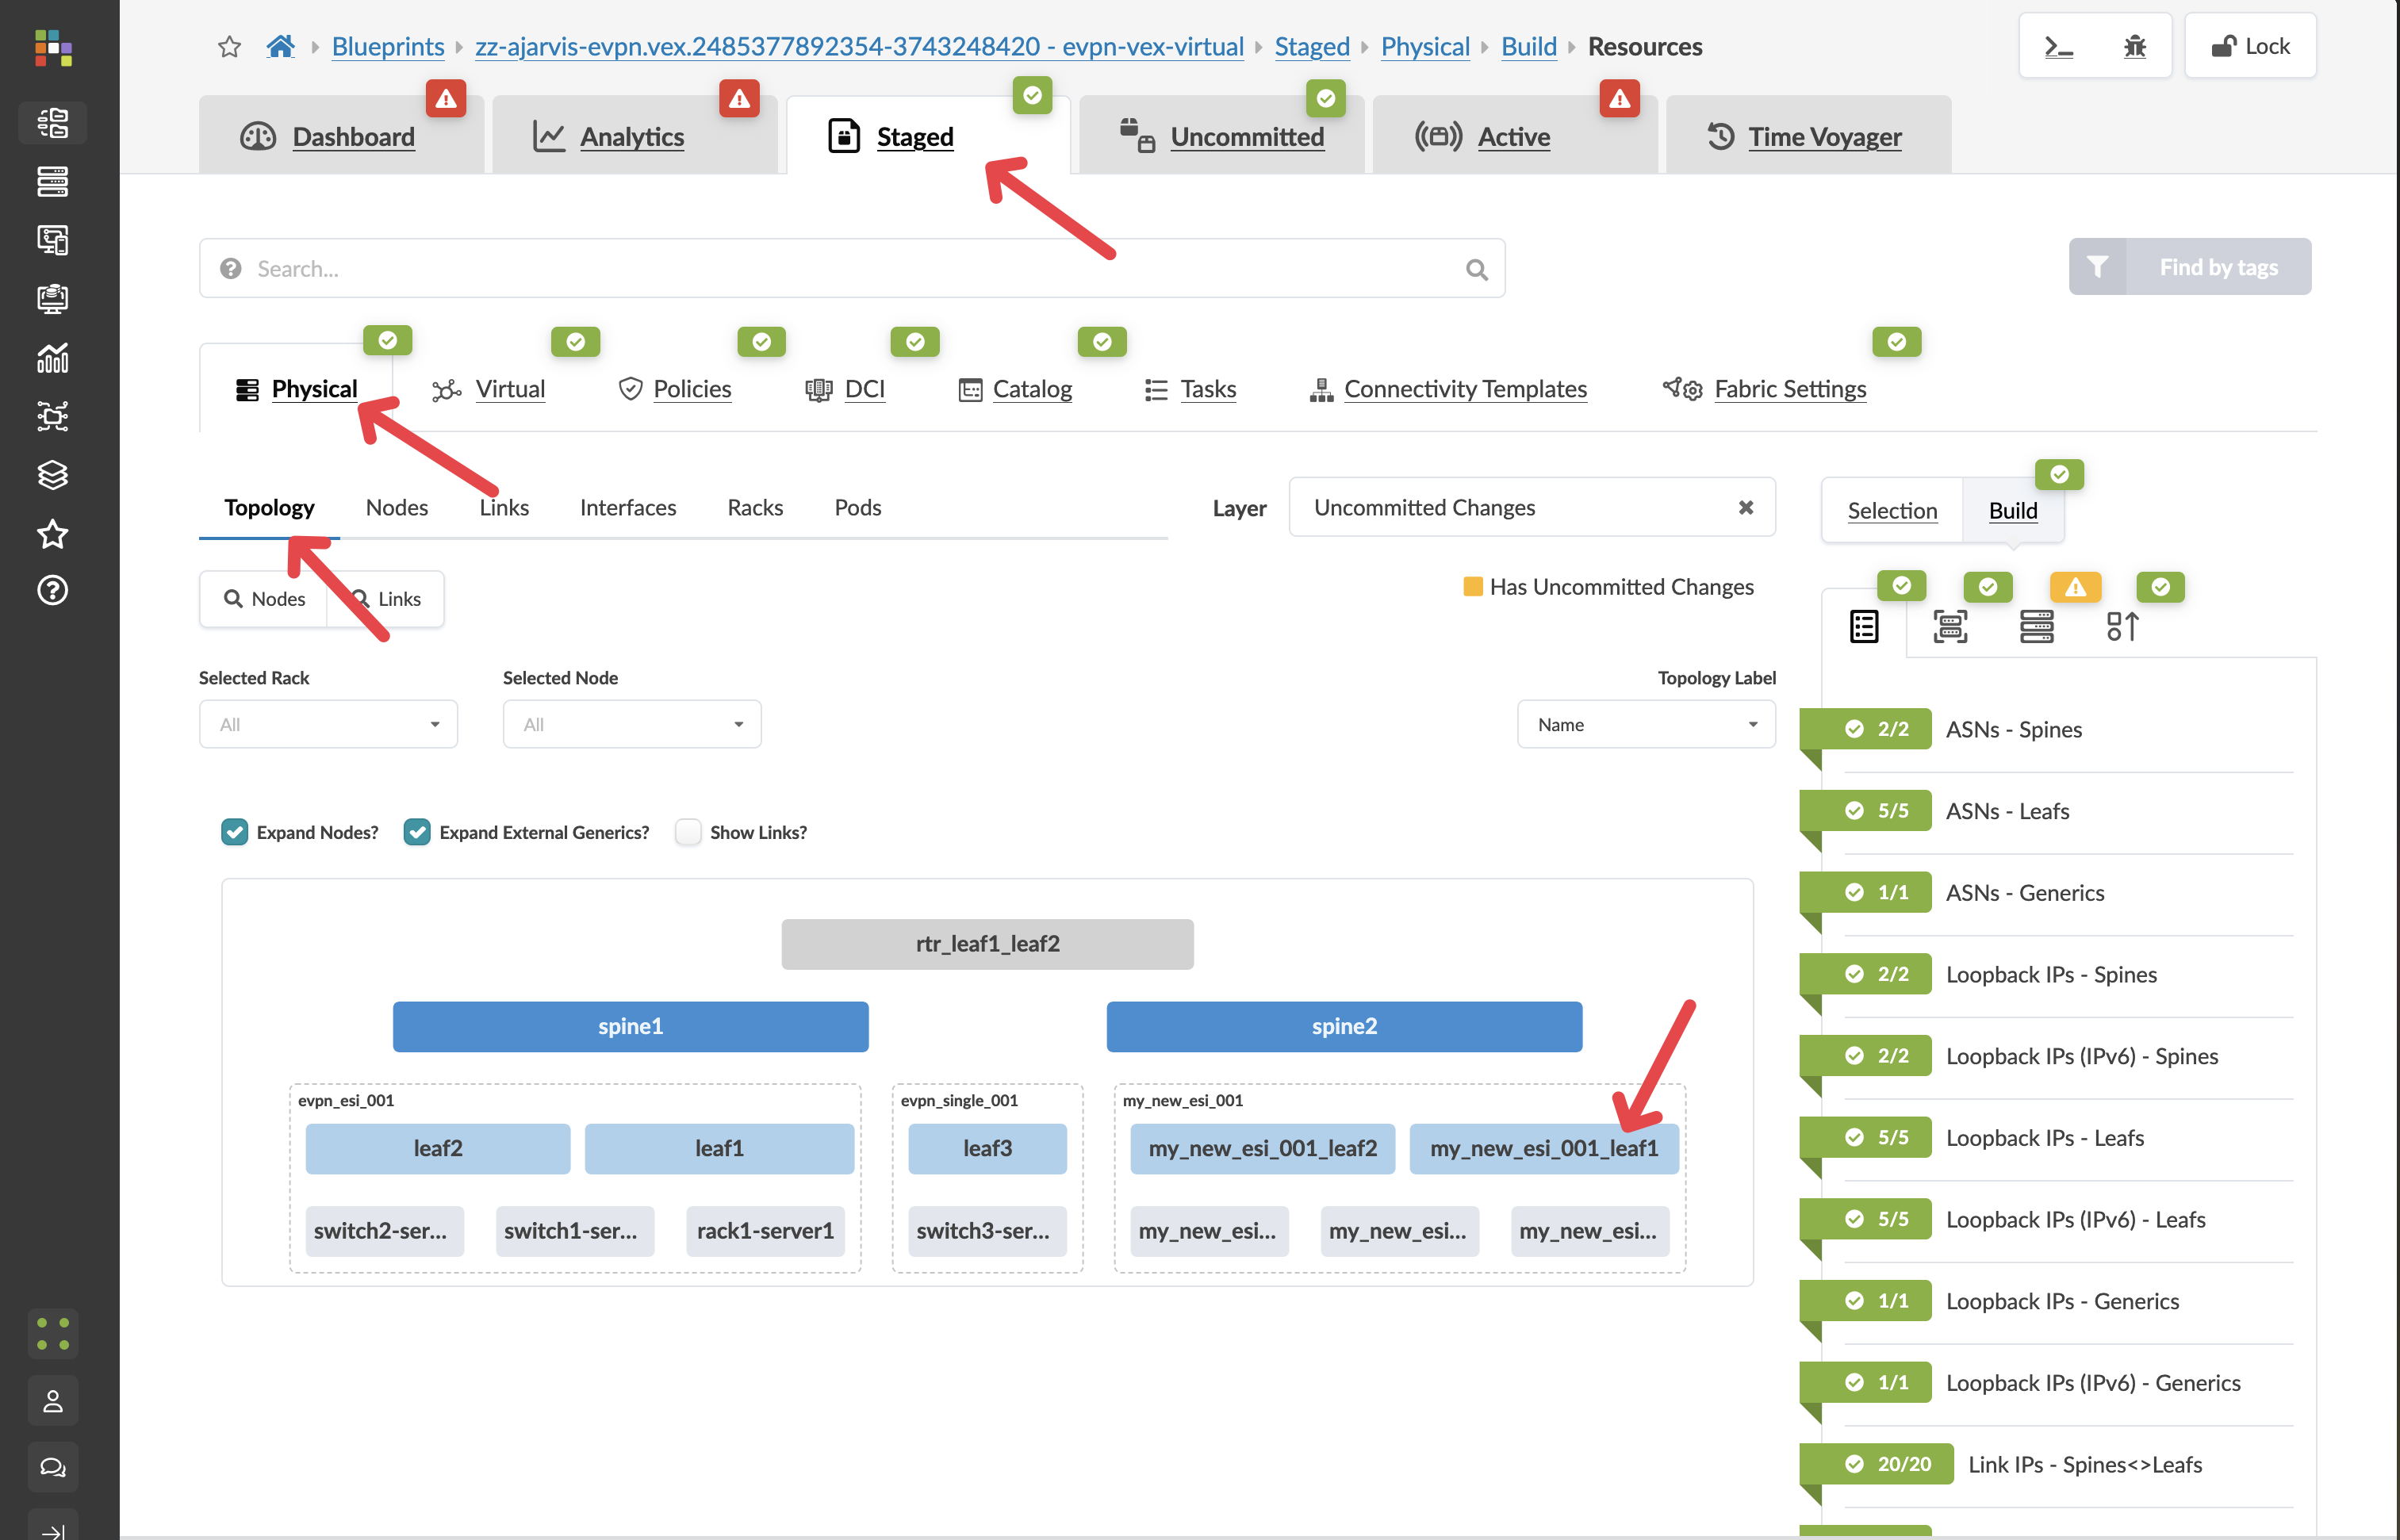
From the SE Demo blueprint, navigate to
-
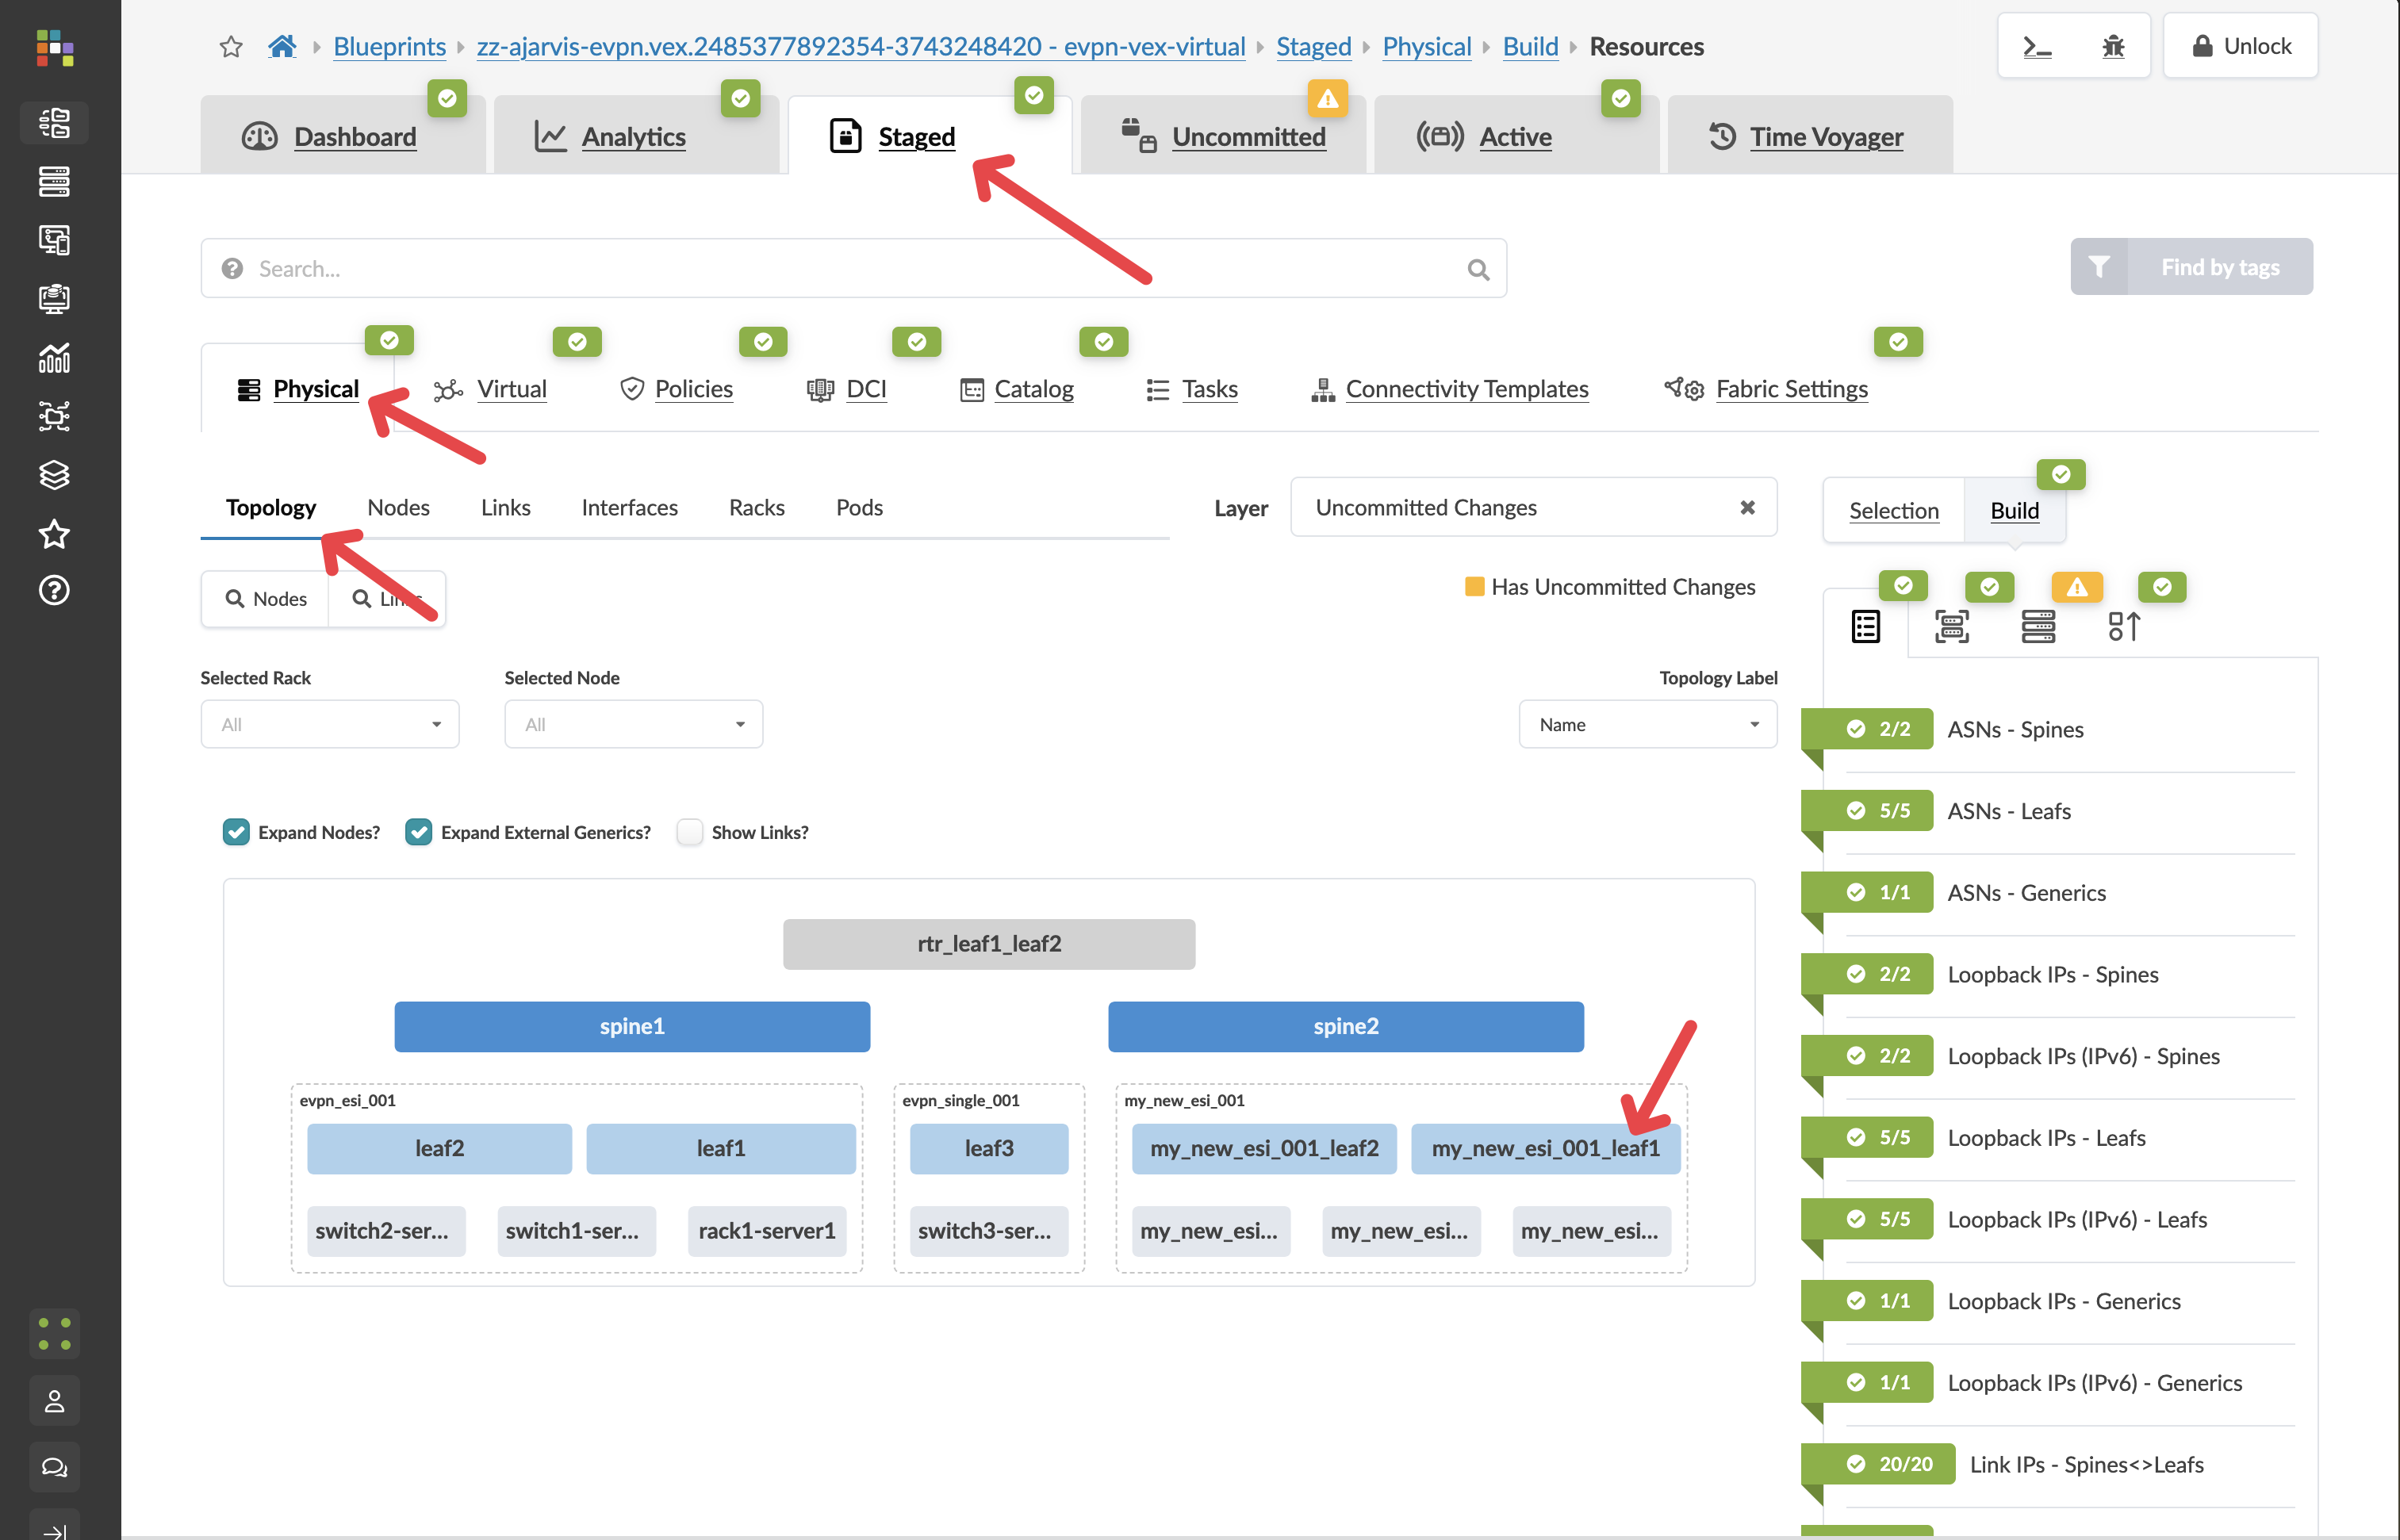
Locate the new rack you added earlier in the topology view
-
Click on one of the leaf switches in the new rack to select it
2.2. Step 2: Add a Generic System
-
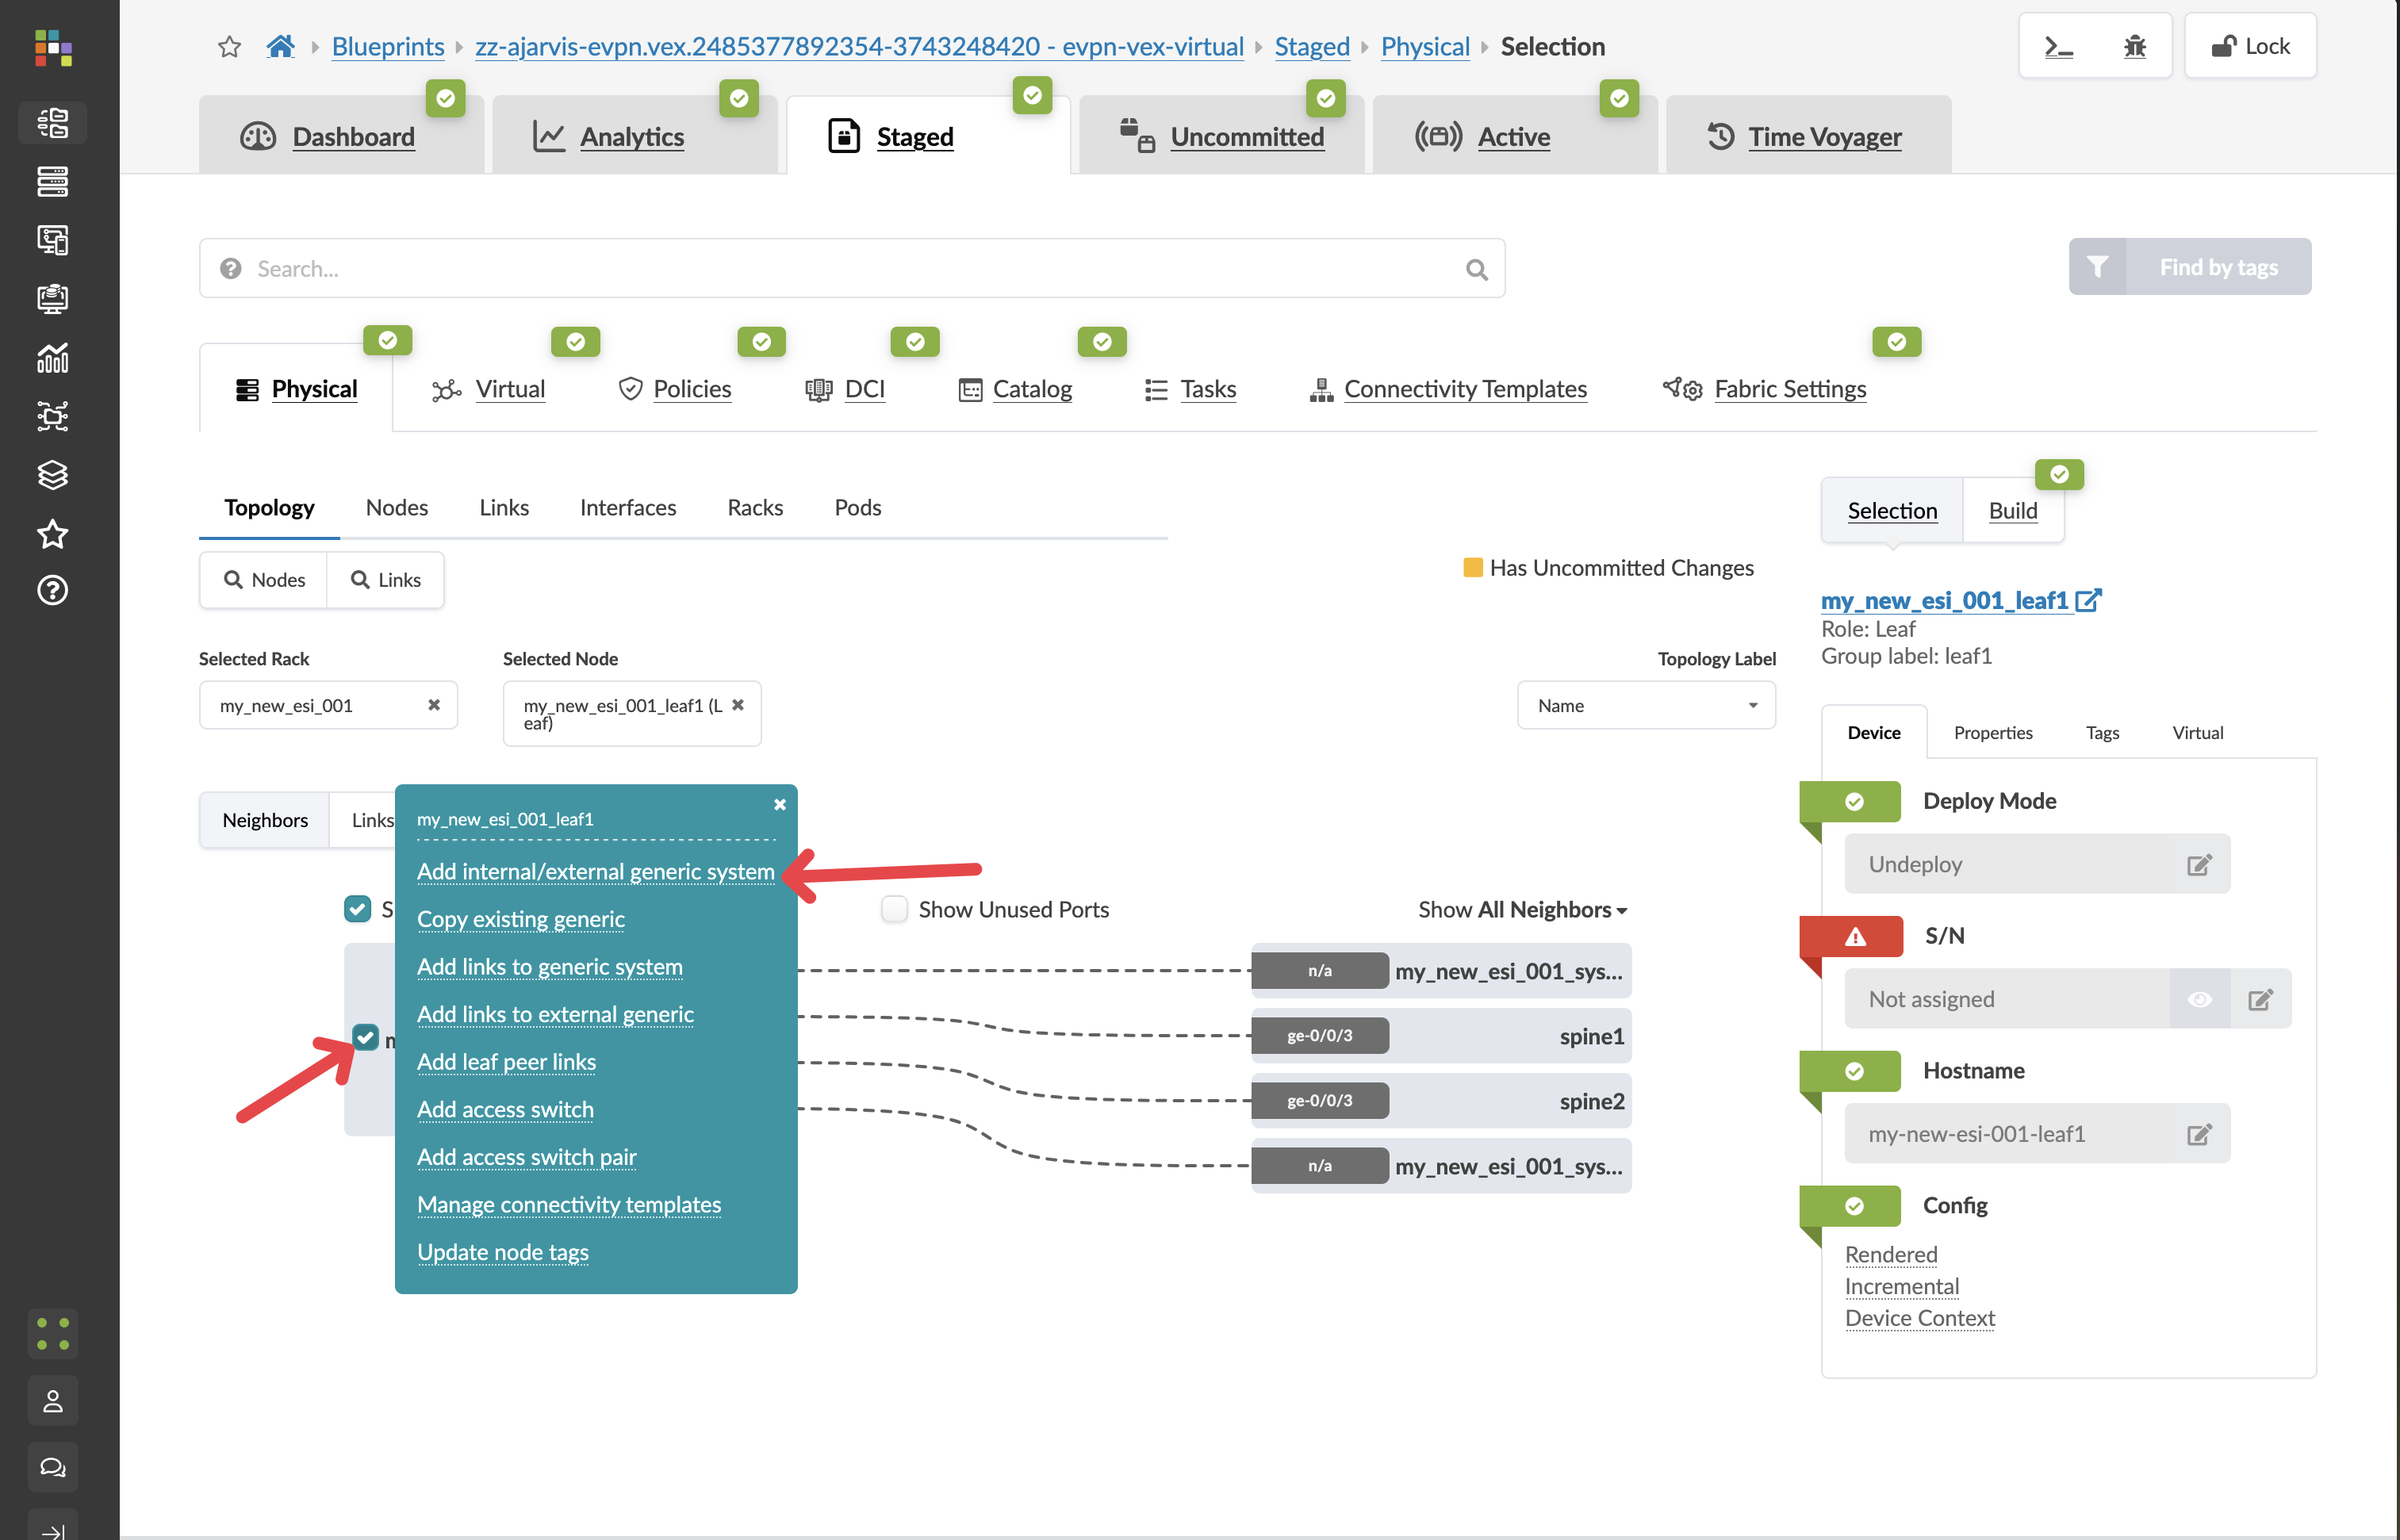
With the leaf switch selected, click the box to the left of the device’s name
-
From the menu that appears, select Add internal/external generic system
-
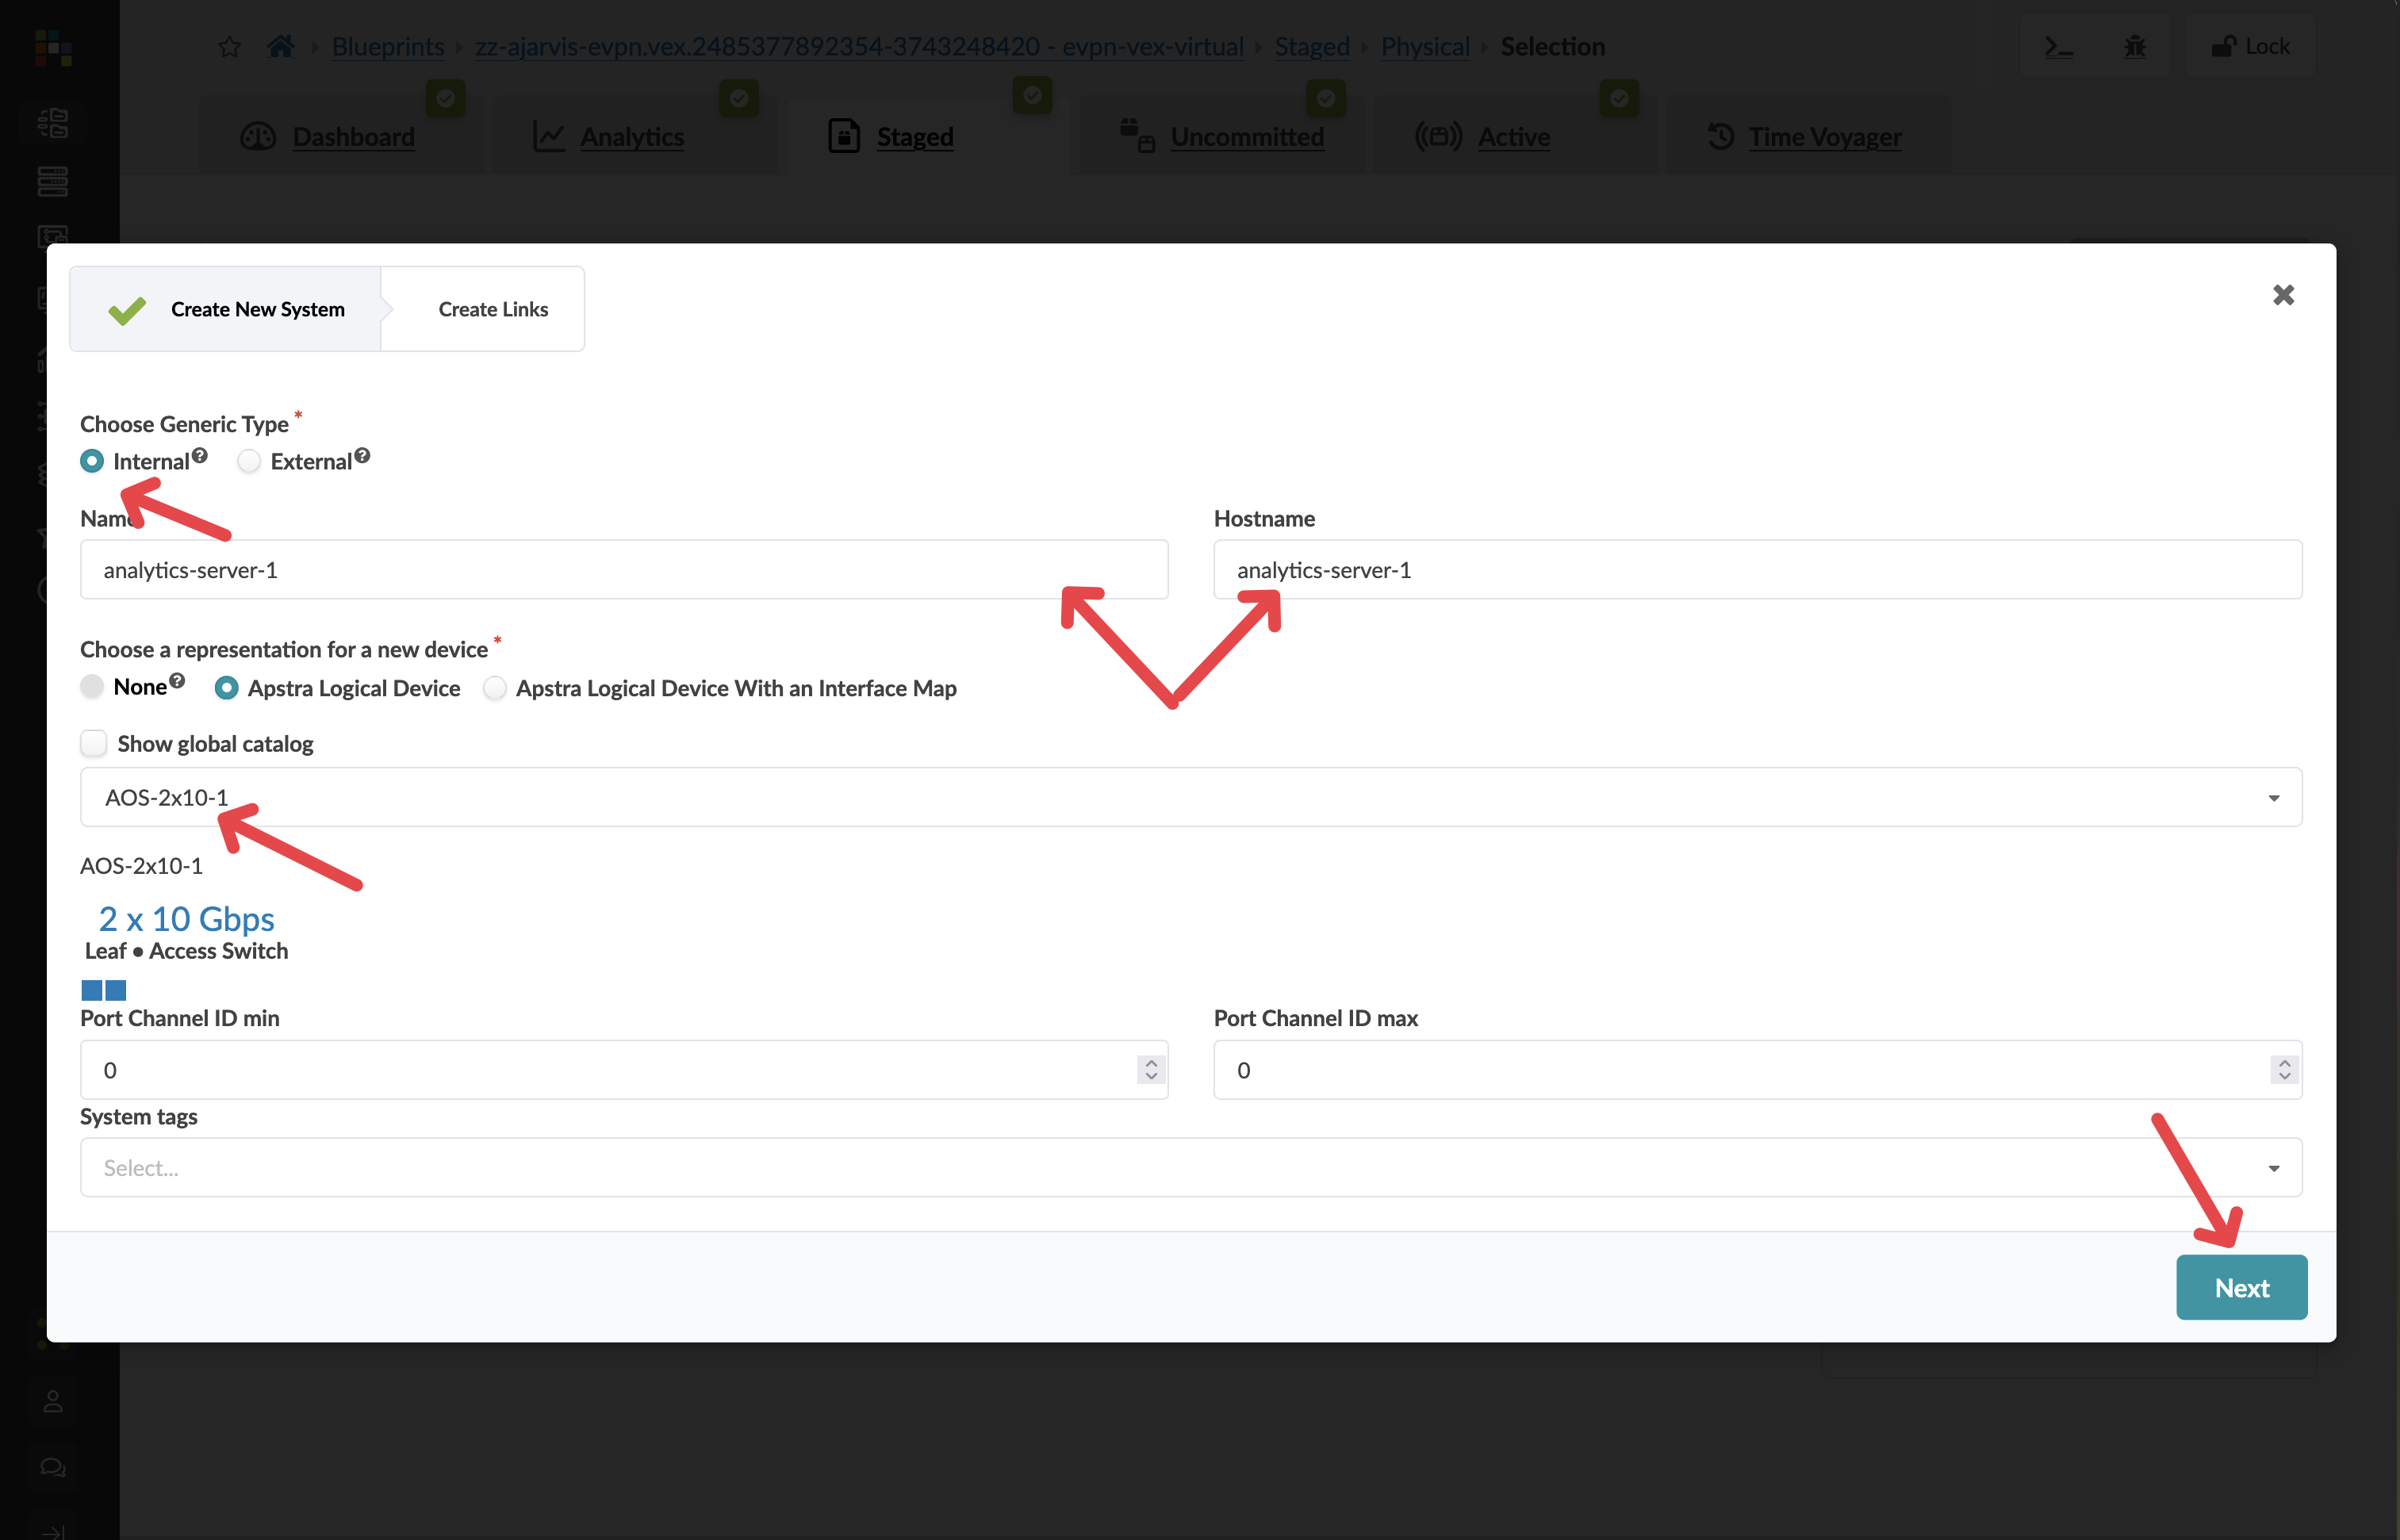
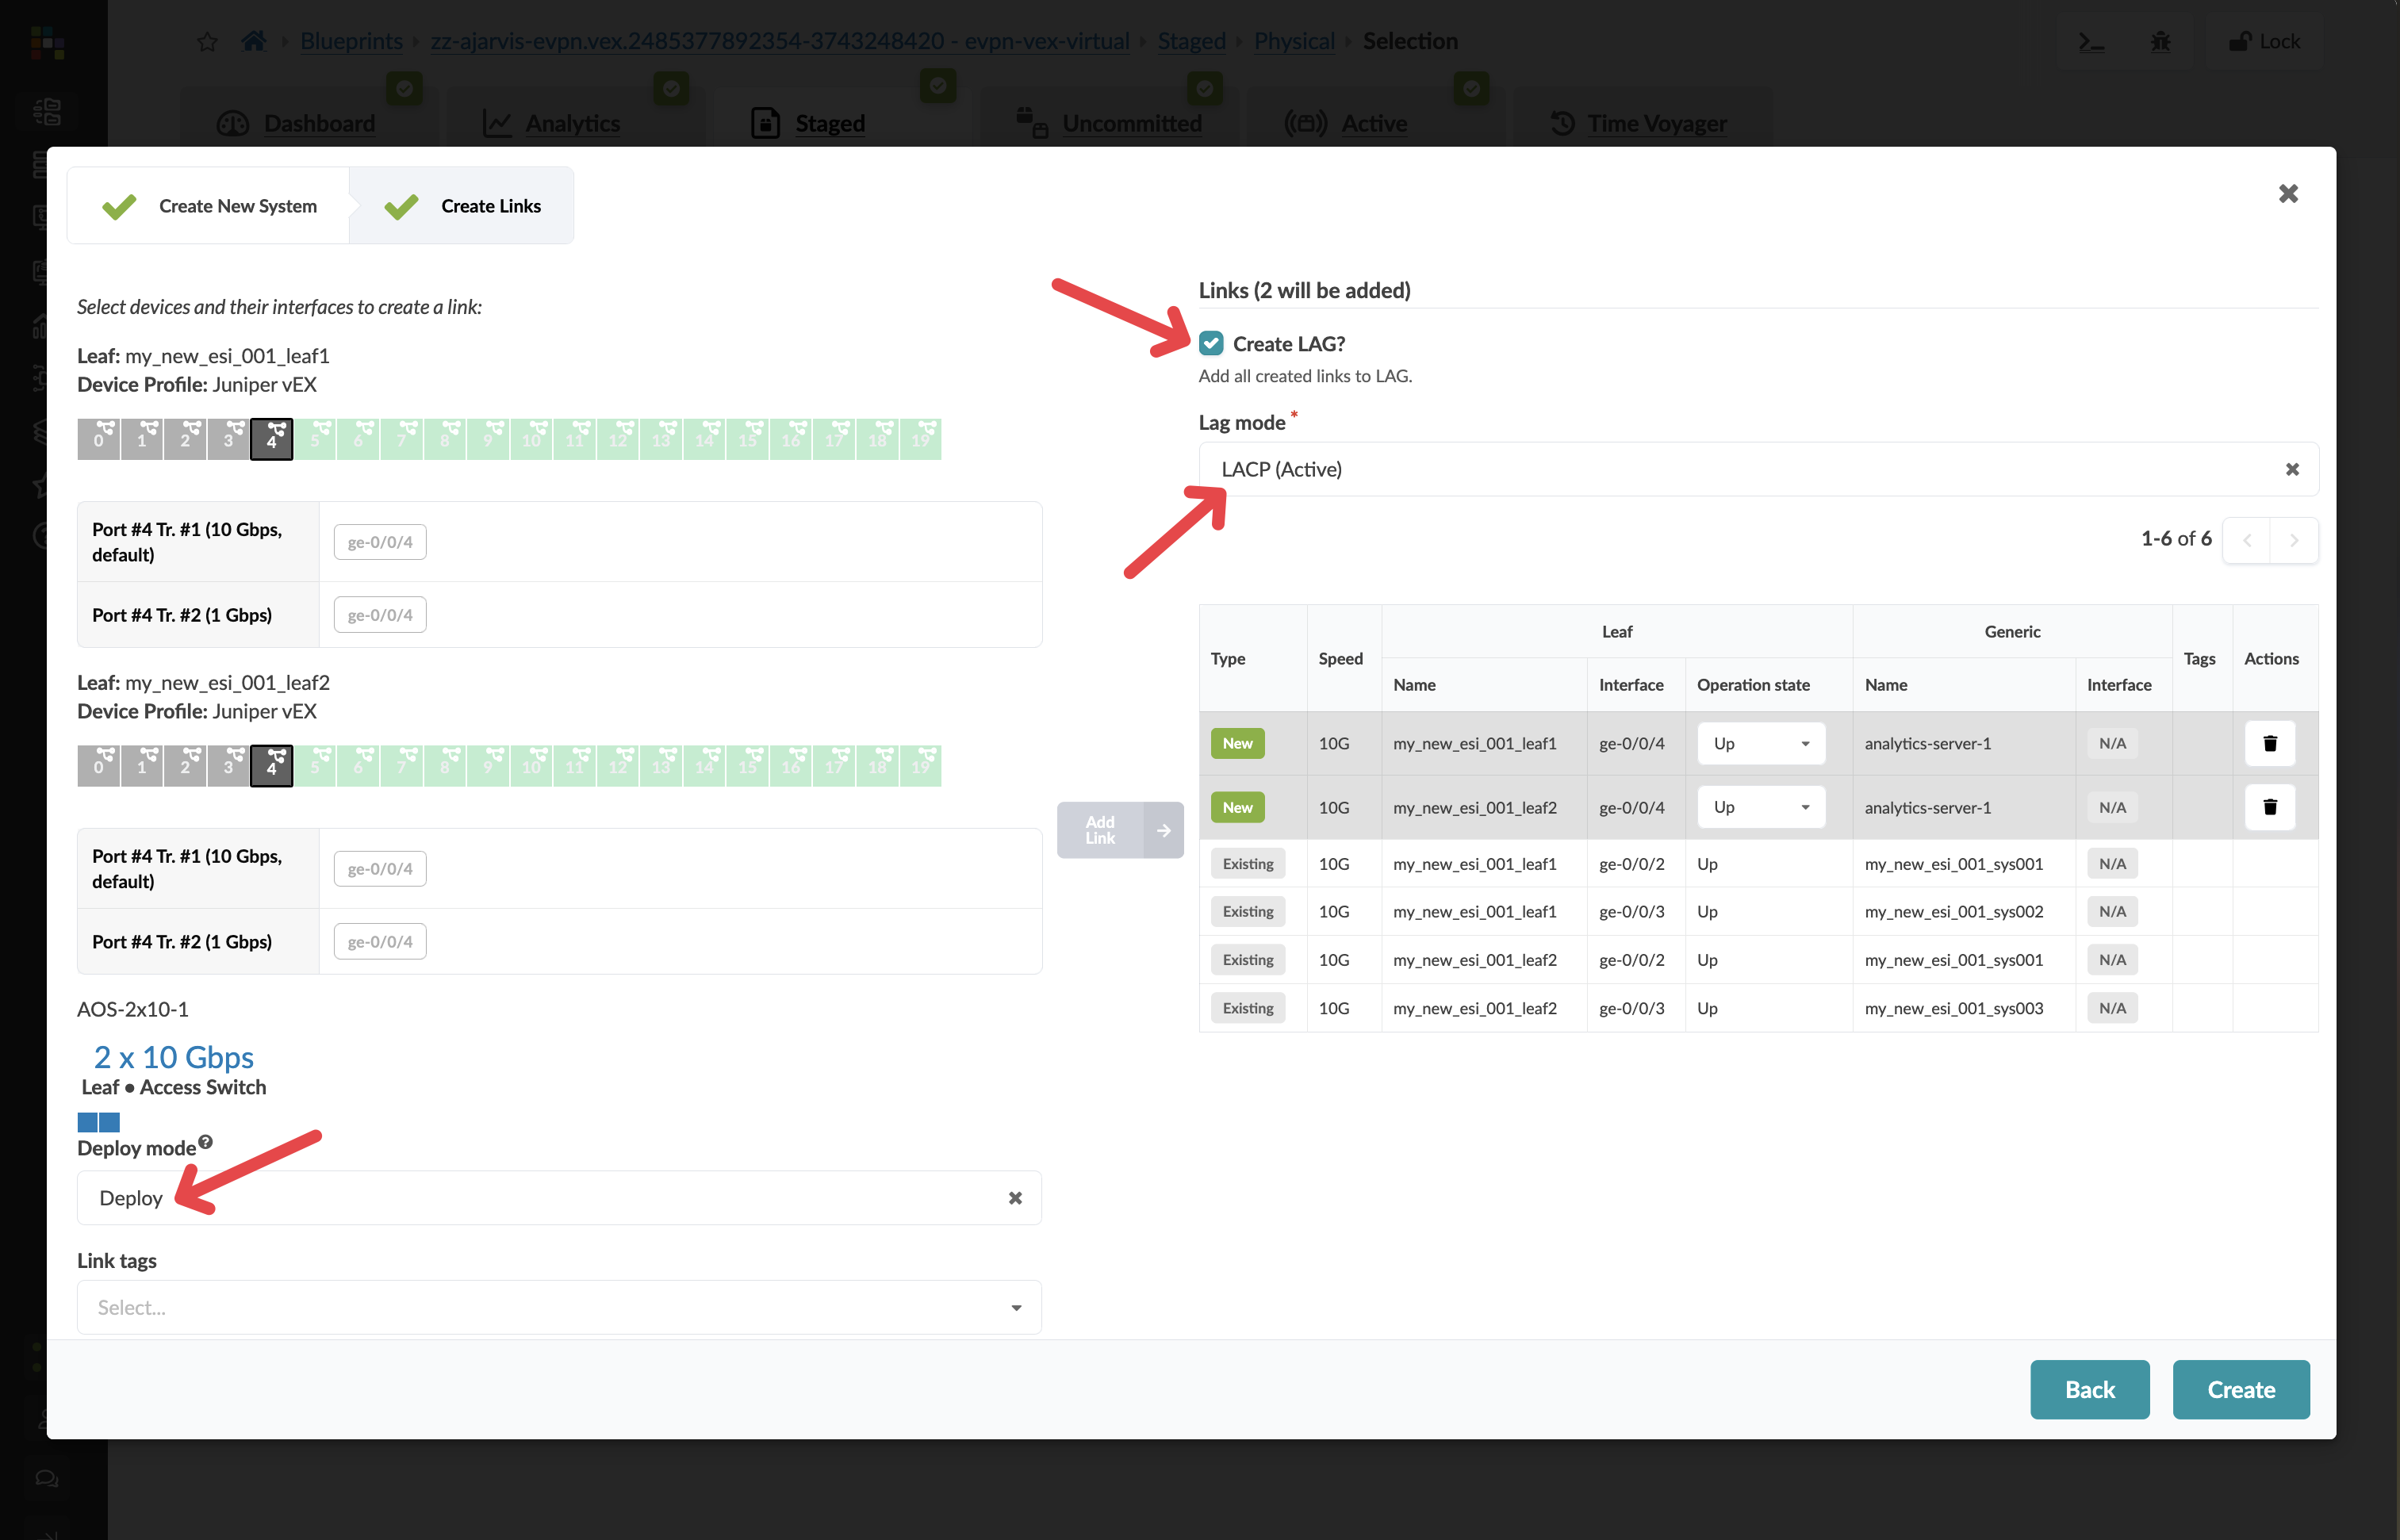
In the dialog that appears, configure the system:
Parameter Value Generic Type
Internal
Name
analytics-server-1
Hostname
analytics-server-1
Logical Device
AOS-2x10⁻¹ (a dual-interface server)
-
Click Next to proceed to the link configuration
2.3. Step 3: Configure the Connections
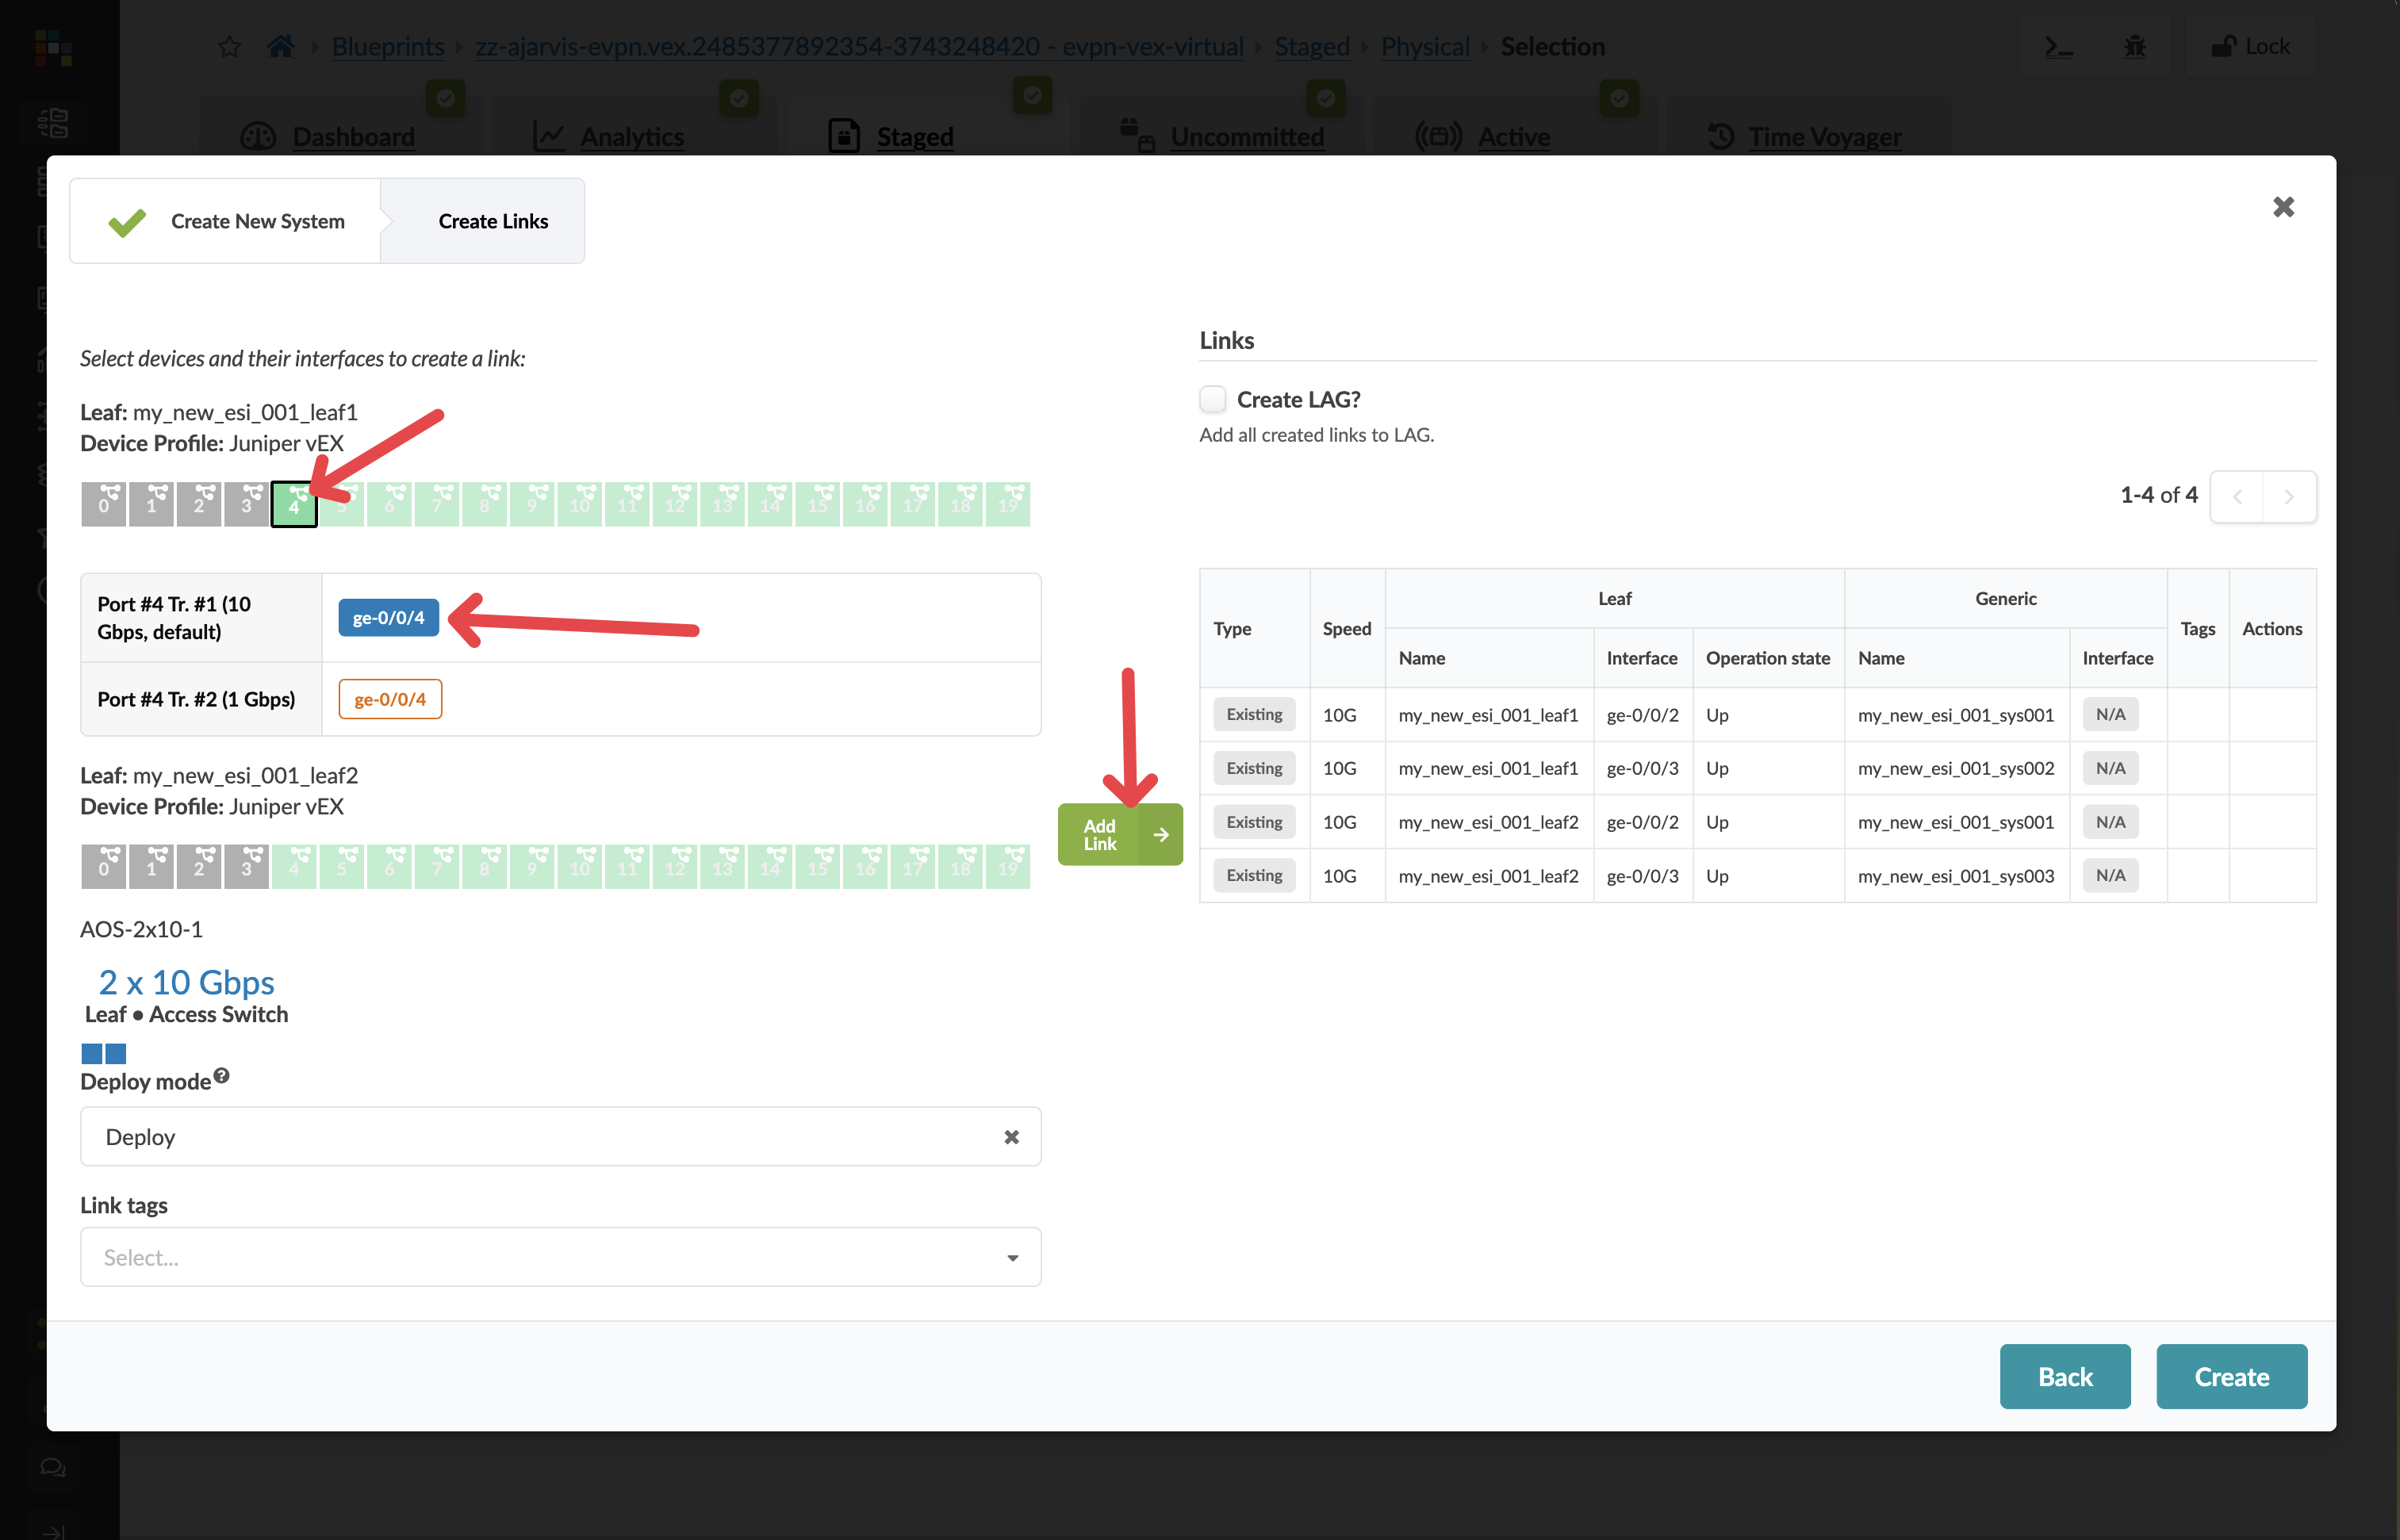
Since we selected a dual-interface logical device, we’ll need to create redundant connections to both leaf switches in our rack:
| Step | Action | Details |
|---|---|---|
1 |
For the first leaf switch |
* Select an available port (e.g., port 4) * Set speed to 10Gbps |
2 |
Add to link list |
Click Add Link to add this connection to your link list |
3 |
For the second leaf switch |
* Select an available port (e.g., port 4) * Set speed to 10Gbps |
4 |
Add to link list |
Click Add Link to add this connection to your link list |
-
Set Deploy mode to Deploy
-
Select LACP mode active
-
Review both links to ensure they’re configured correctly
-
Click Create to add the generic system and its connections to your fabric
2.4. Step 4: Verify the Generic System
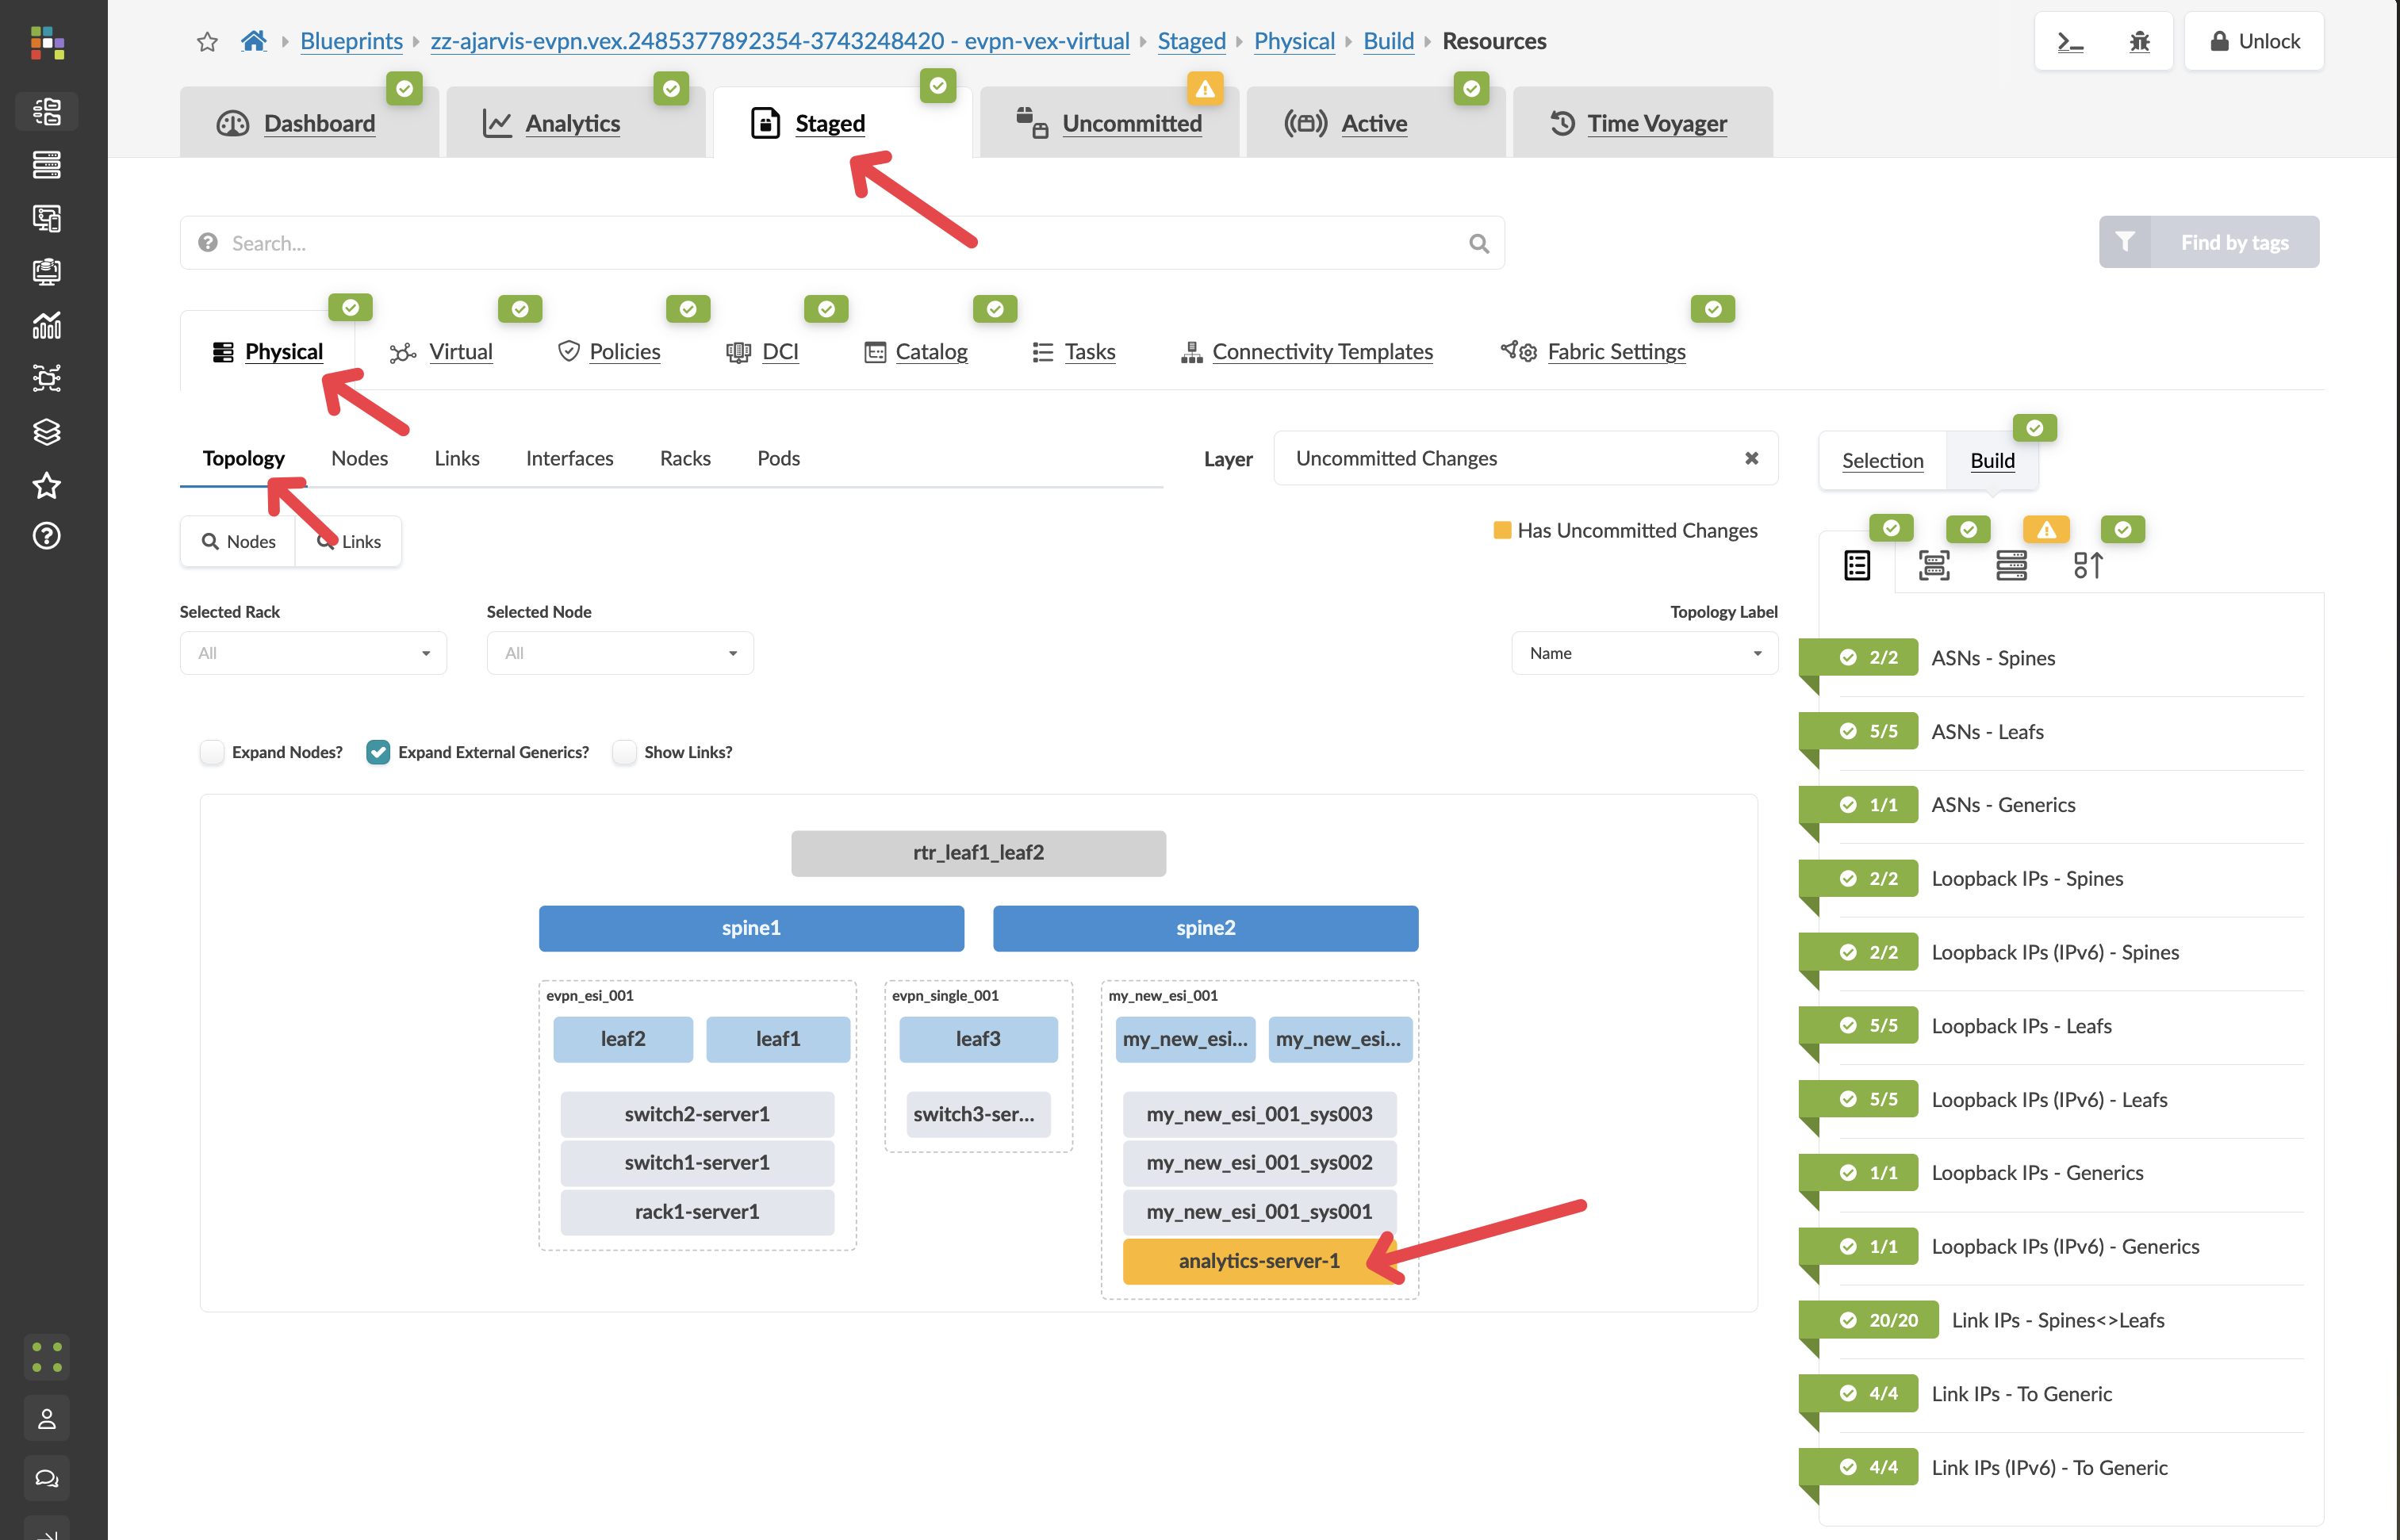
After adding the server, you should see it appear in the topology view connected to both leaf switches in your new rack:
-
The links should appear as connections in the topology
-
You can click on the server to see its details
-
Navigate to to see a list of all generic systems, including your new server
2.5. Step 5: Understanding the Benefits
By modelling servers in Apstra as generic systems, you gain several advantages:
-
Documentation: The physical connectivity is documented in your single source of truth
-
Visibility: You can see exactly where each server is connected in your fabric
-
Automation: Port configurations can be automated based on your intent
-
Consistency: All server connections follow the same design patterns
2.6. Step 6: Review and Commit Your Changes
Before you commit on your blueprint, let’s examine how Apstra has automated the complete configuration of your devices:
-
Navigate to Staged > Physical > Devices
-
Select one of your leaf switches by clicking on it
-
Click on the Incrimental Configuration tab
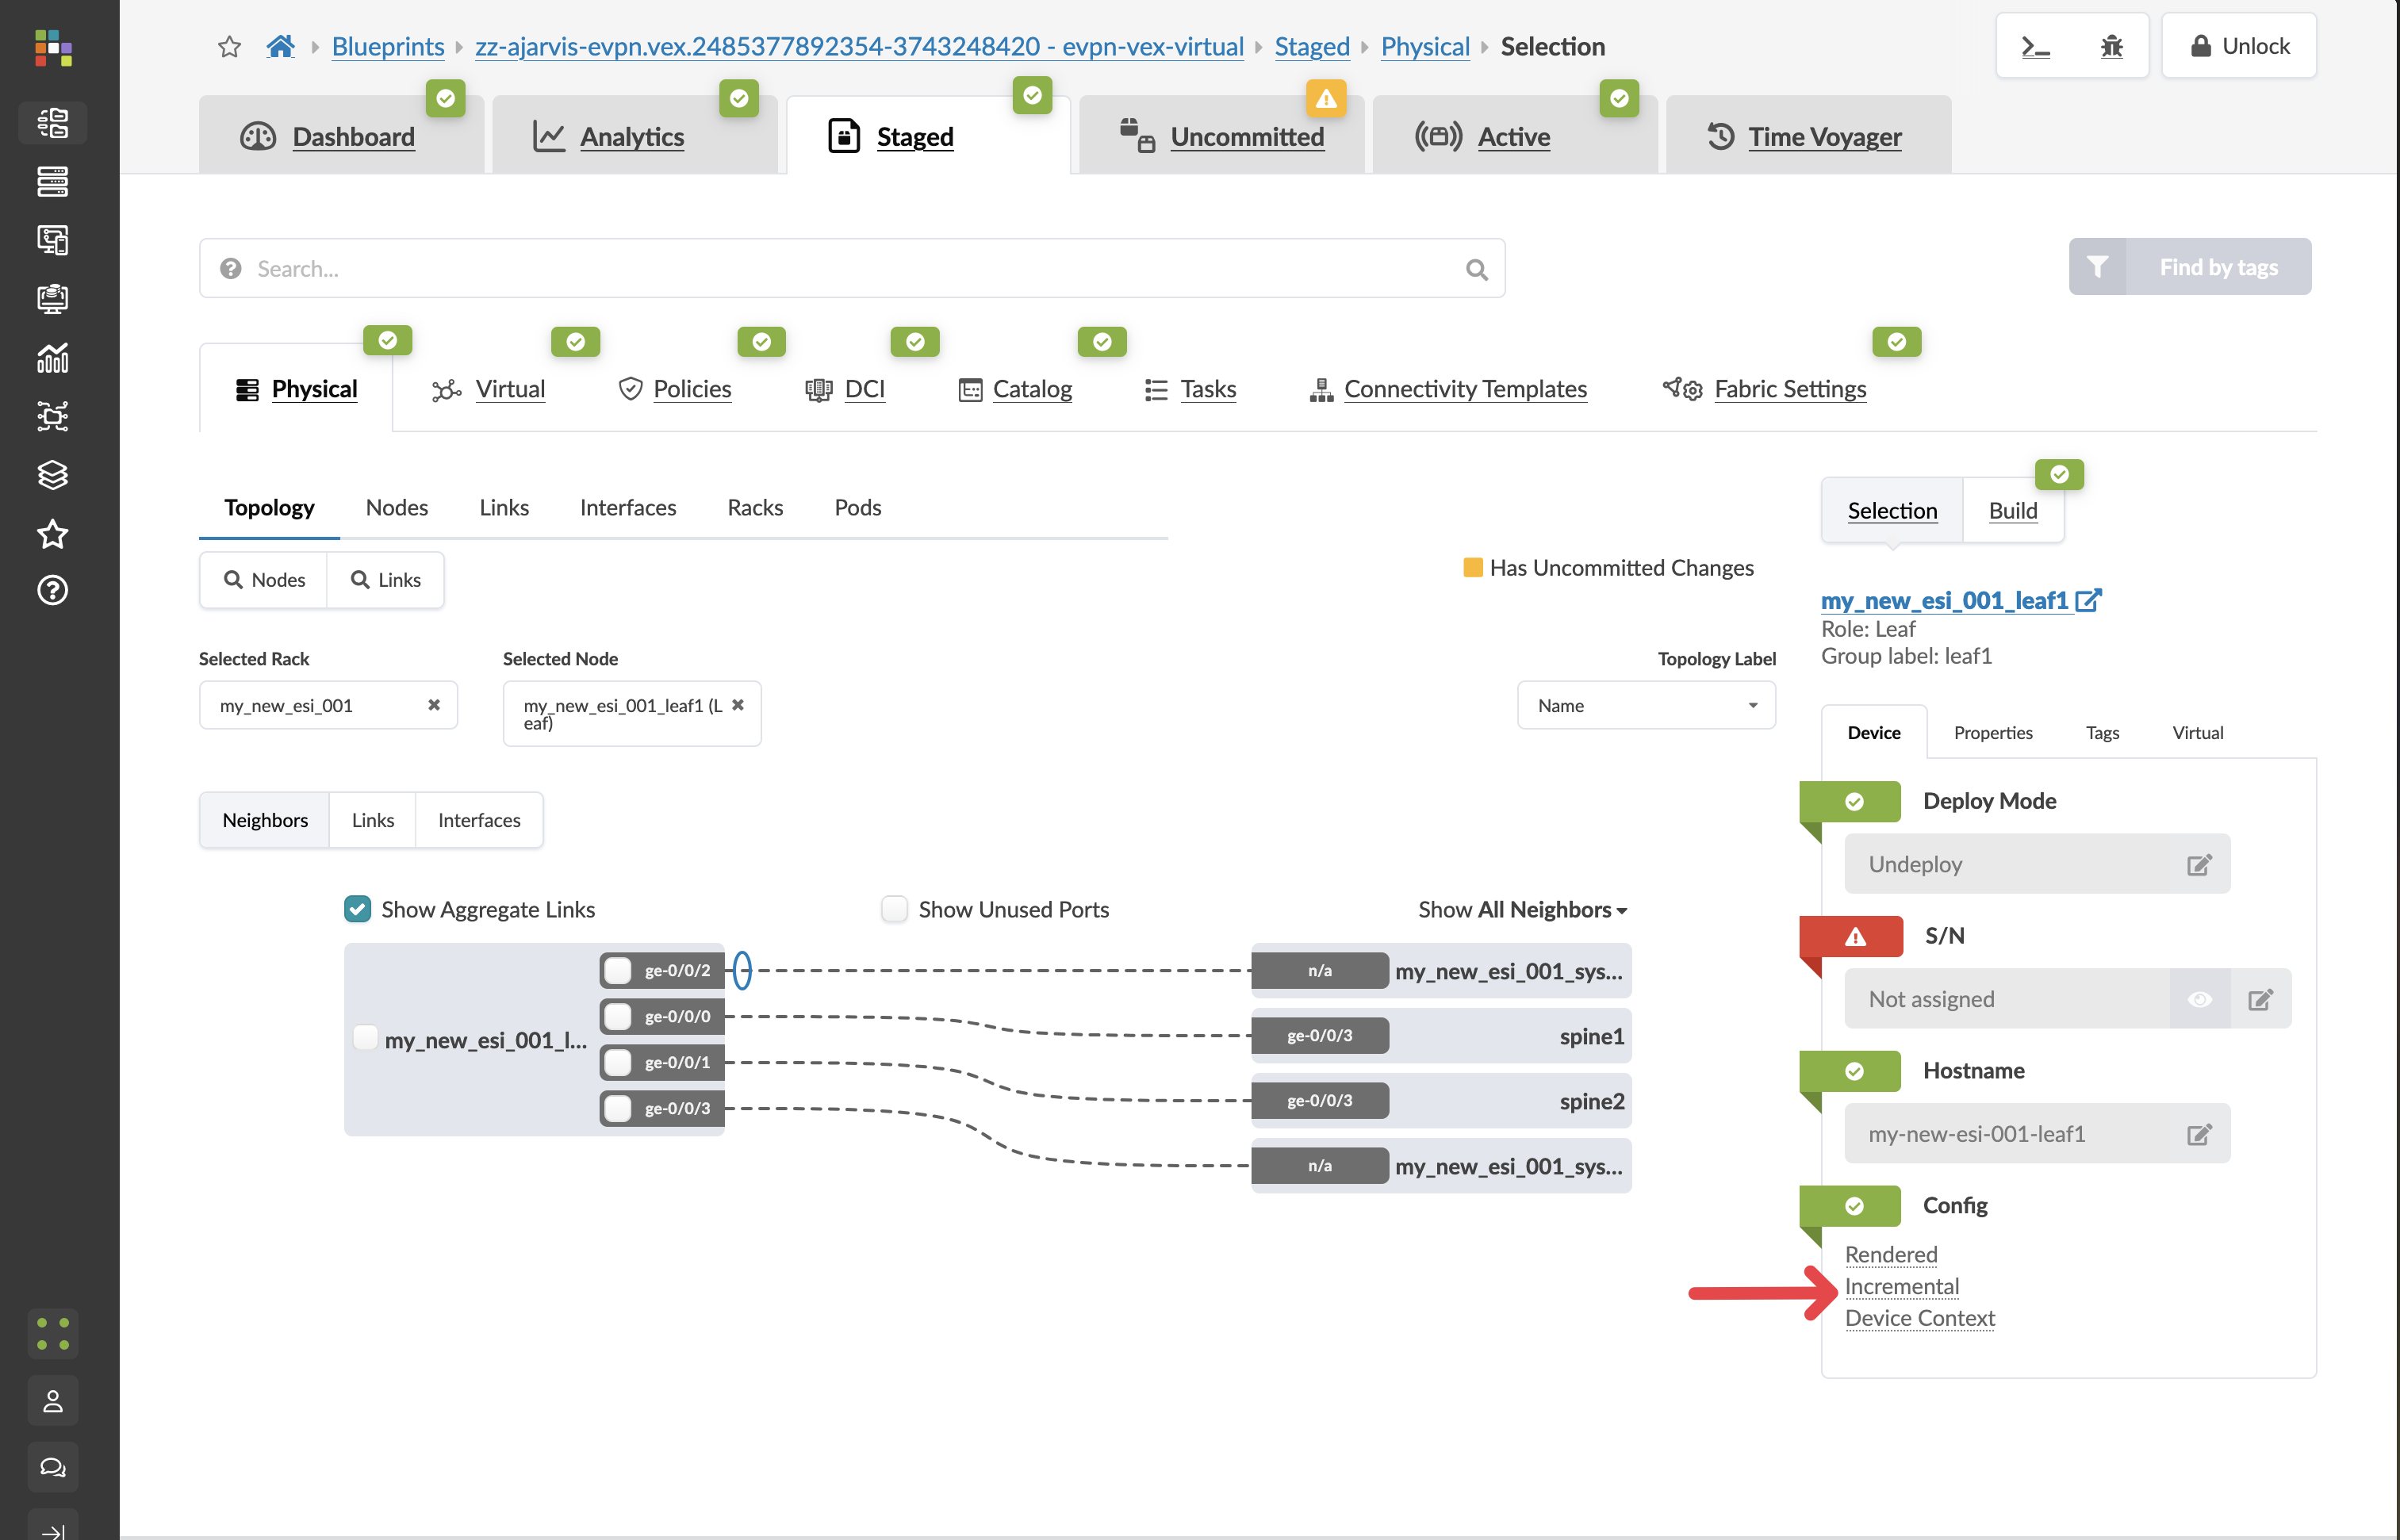
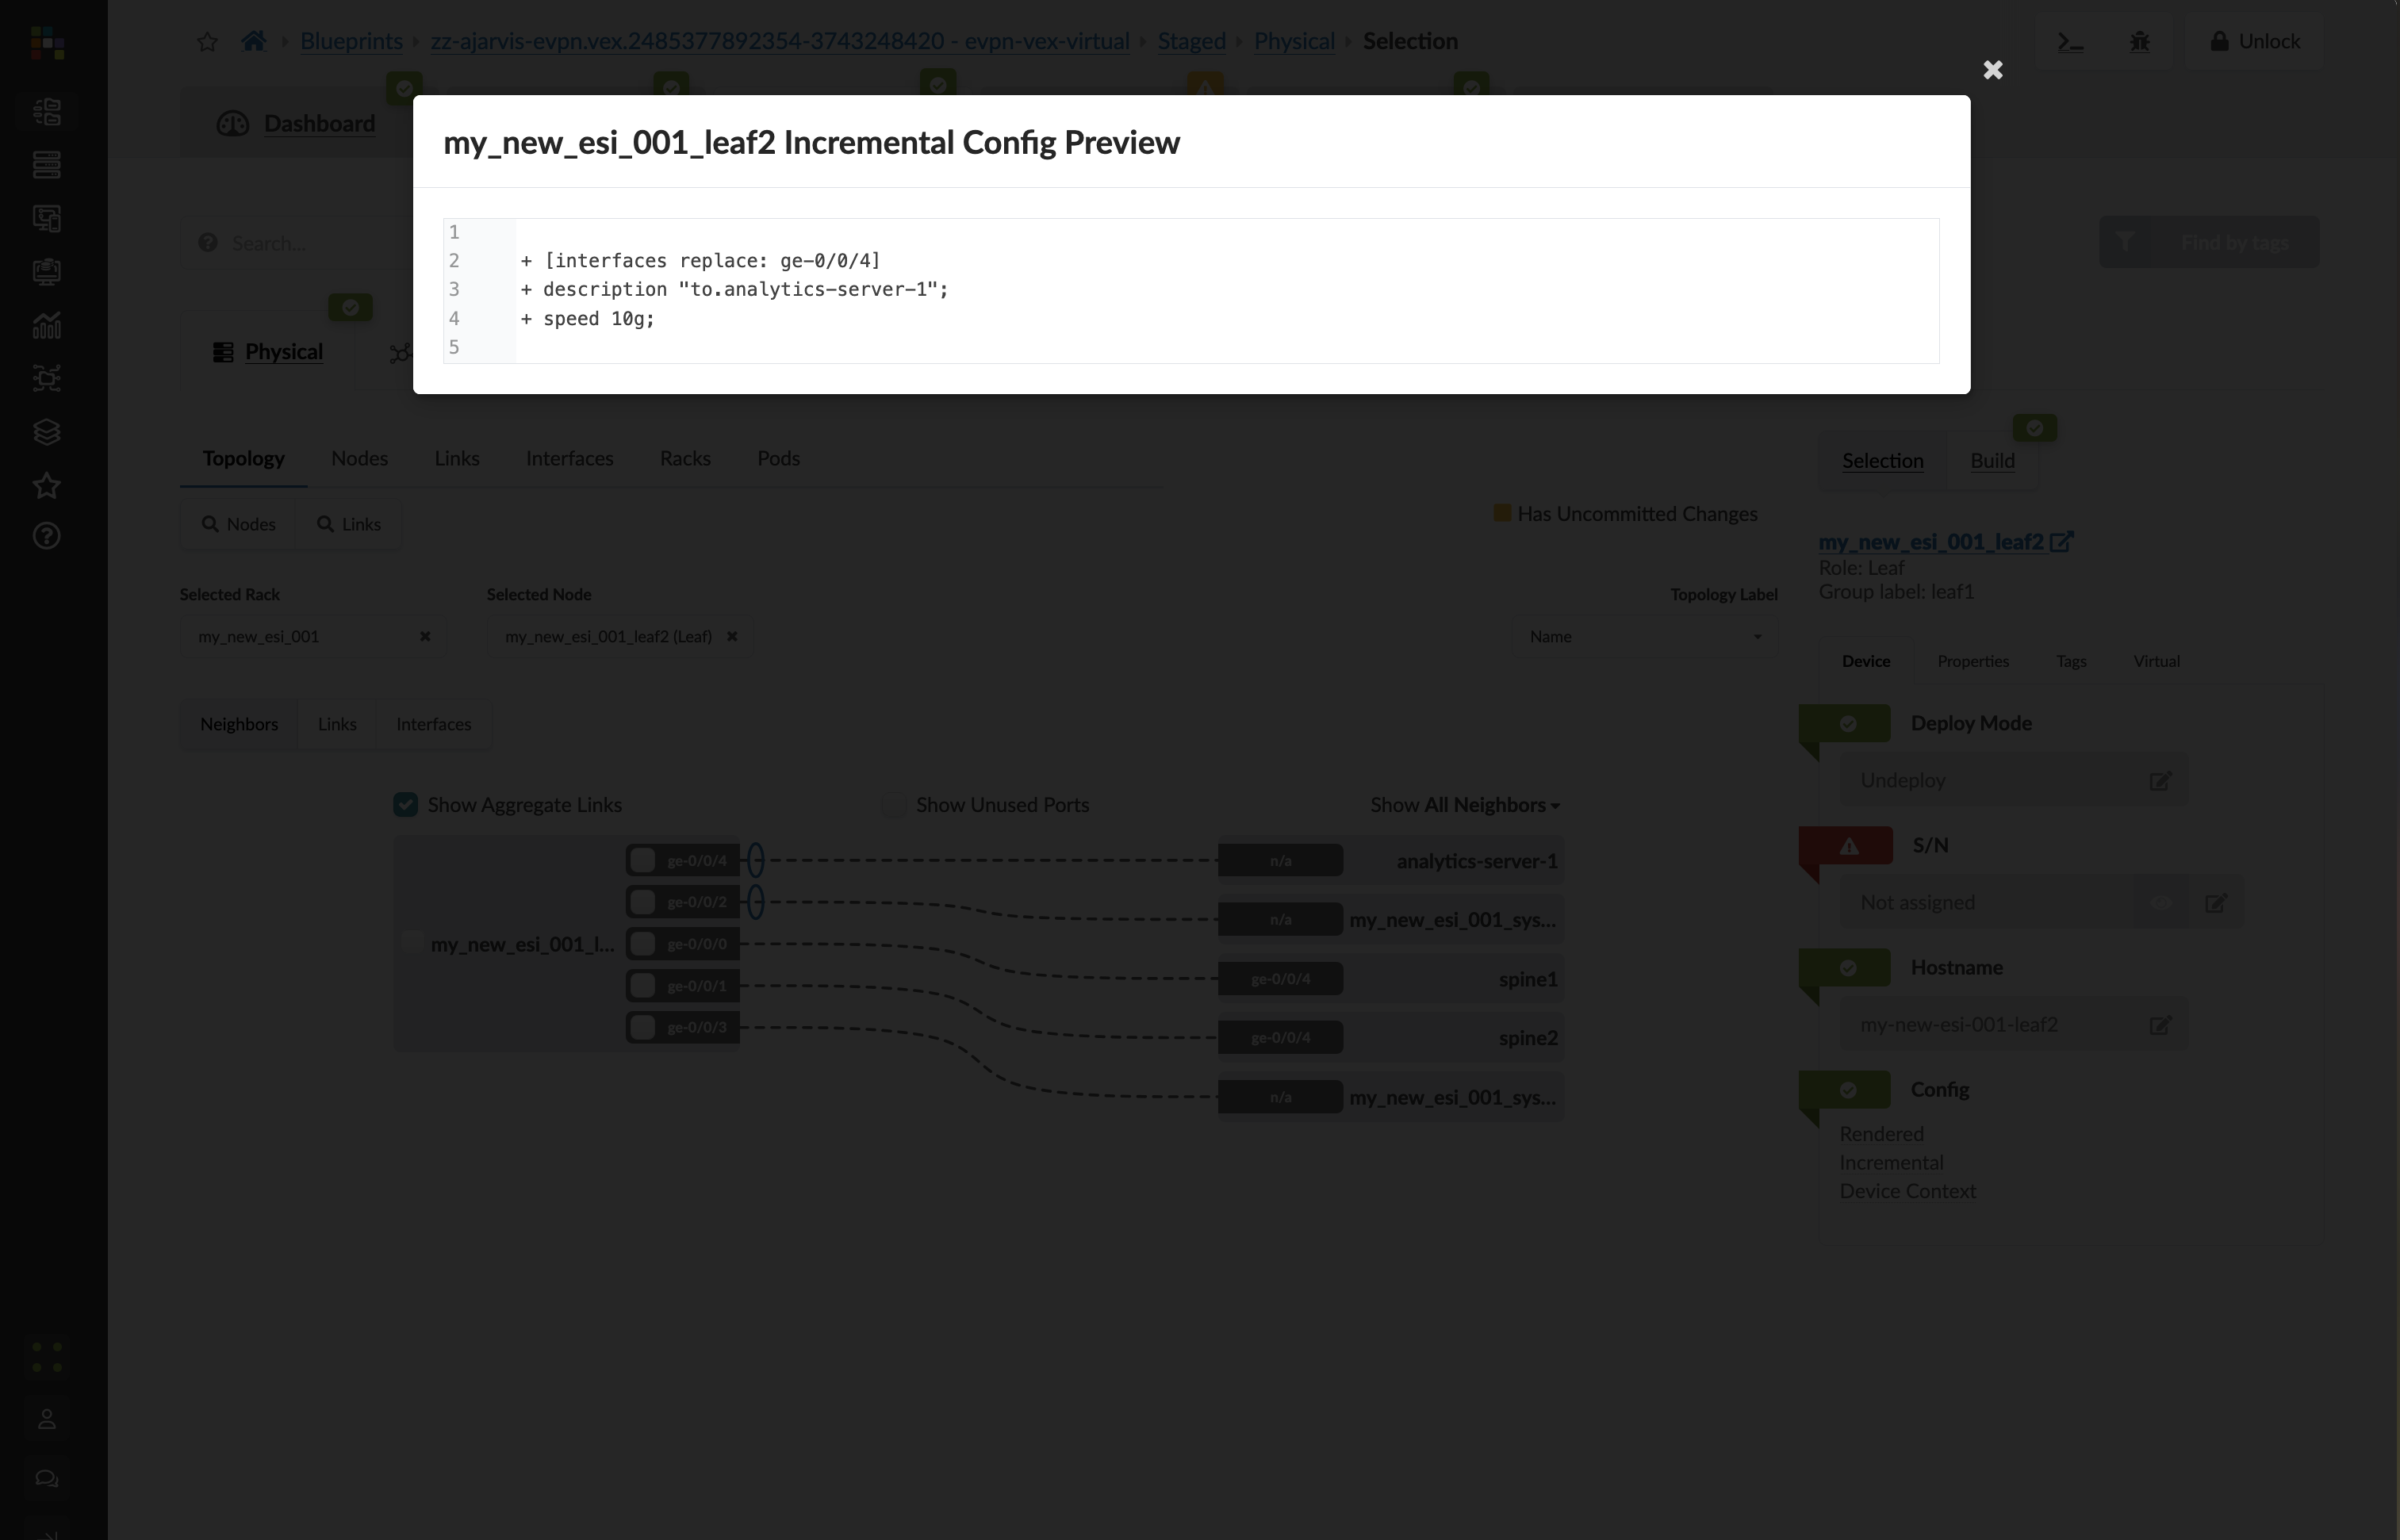
This will show you all of the incremental configuration that has been generated. As all we have done is added the server, and not attached it to any of our VXLAN overlays only the speed and description has been set.
-
Click the Uncommitted tab to see your staged changes
-
Review the changes Apstra will make to implement your server addition
-
Enter a commit message like "Added analytics server to new rack" and click Commit
3. What You’ve Accomplished
You’ve just:
-
Added a new server to your fabric with redundant connections
-
Documented this server in your network’s single source of truth
-
Prepared the physical connectivity for your Analytics platform
In the next task, we’ll use Connectivity Templates to connect this server to our virtual networks, so it can serve as part of our Analytics platform.