Lab Guide 1 - Juniper
Creating Rack Types
Rack Types are modular definitions that represent the physical structure of your data centre racks, including:
-
Top-of-rack switches
-
Servers and workloads
-
Connections between devices
-
Redundancy settings
Think of Rack Types as the building blocks you’ll use to assemble your complete data centre design. By creating reusable Rack Types, you can quickly scale your network design by adding new instances of the same rack configuration.
In this exercise, we’ll create two common rack configurations:
-
A single-switch rack (single leaf)
-
A dual-switch rack with redundant connectivity (dual leaf)
Exercise 1: Create Single Leaf Rack Type
Let’s create a simple rack with a single top-of-rack switch and one connected server:
-
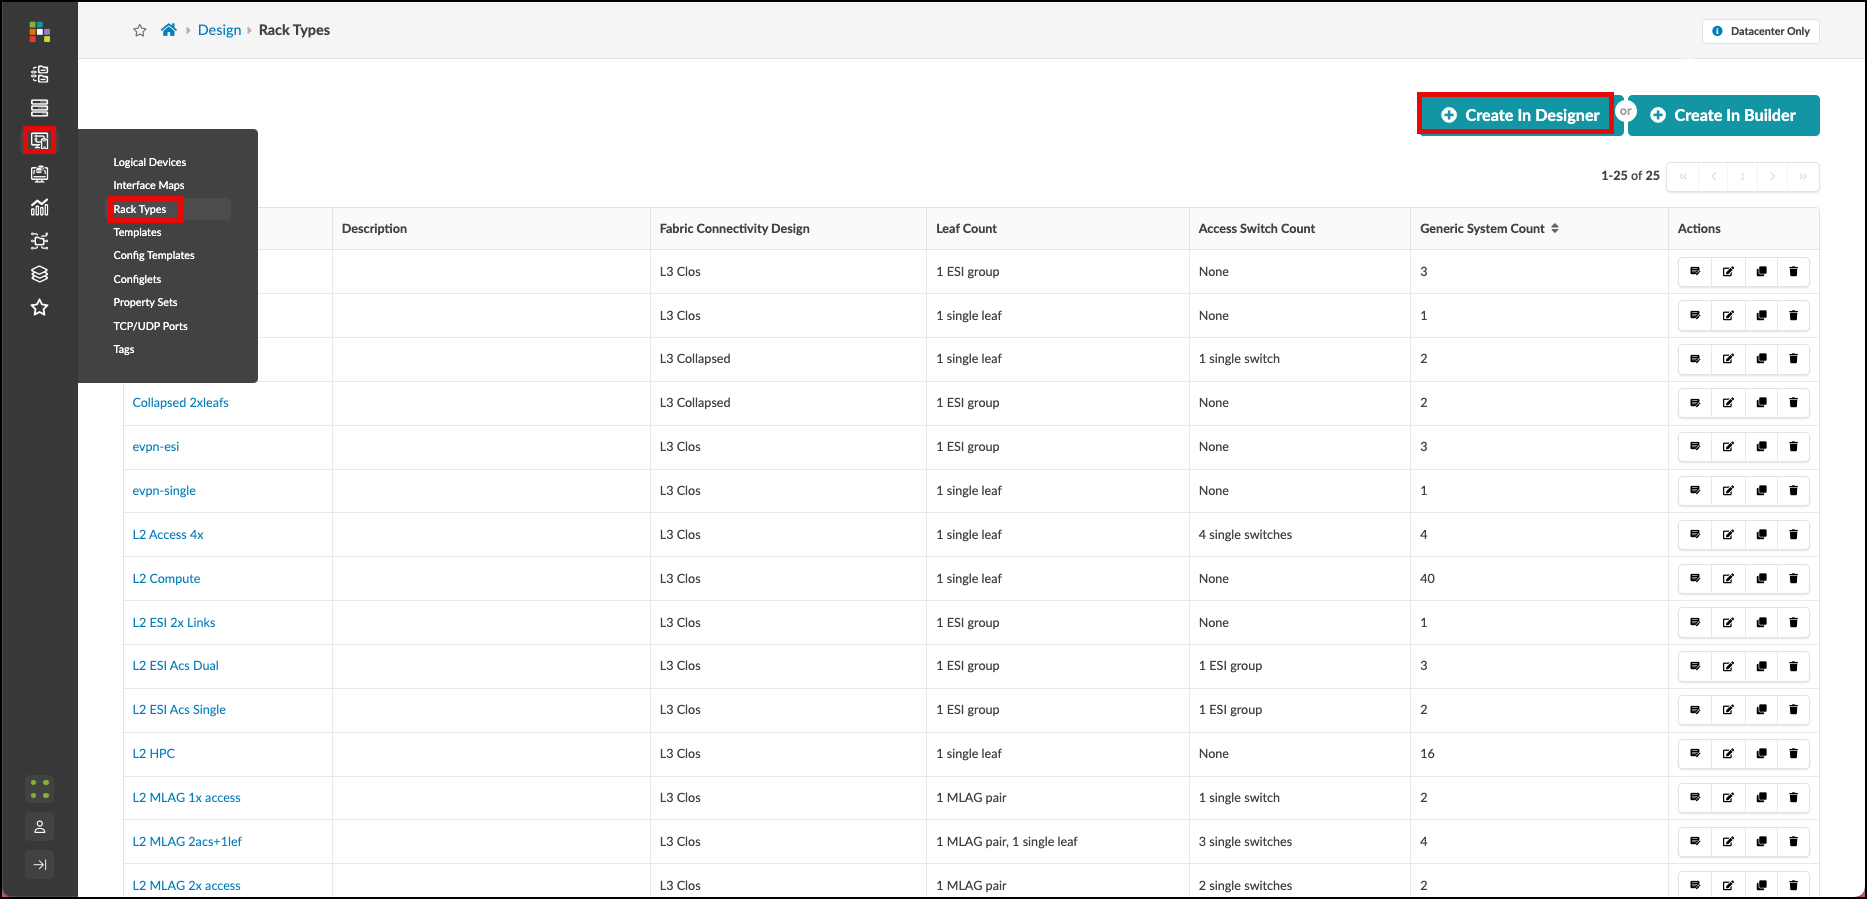
Navigate to and click Create in Designer
-
In the Summary section, configure:
Summary Value Name
your_name-single
Fabric connectivity design
L3 Clos
-
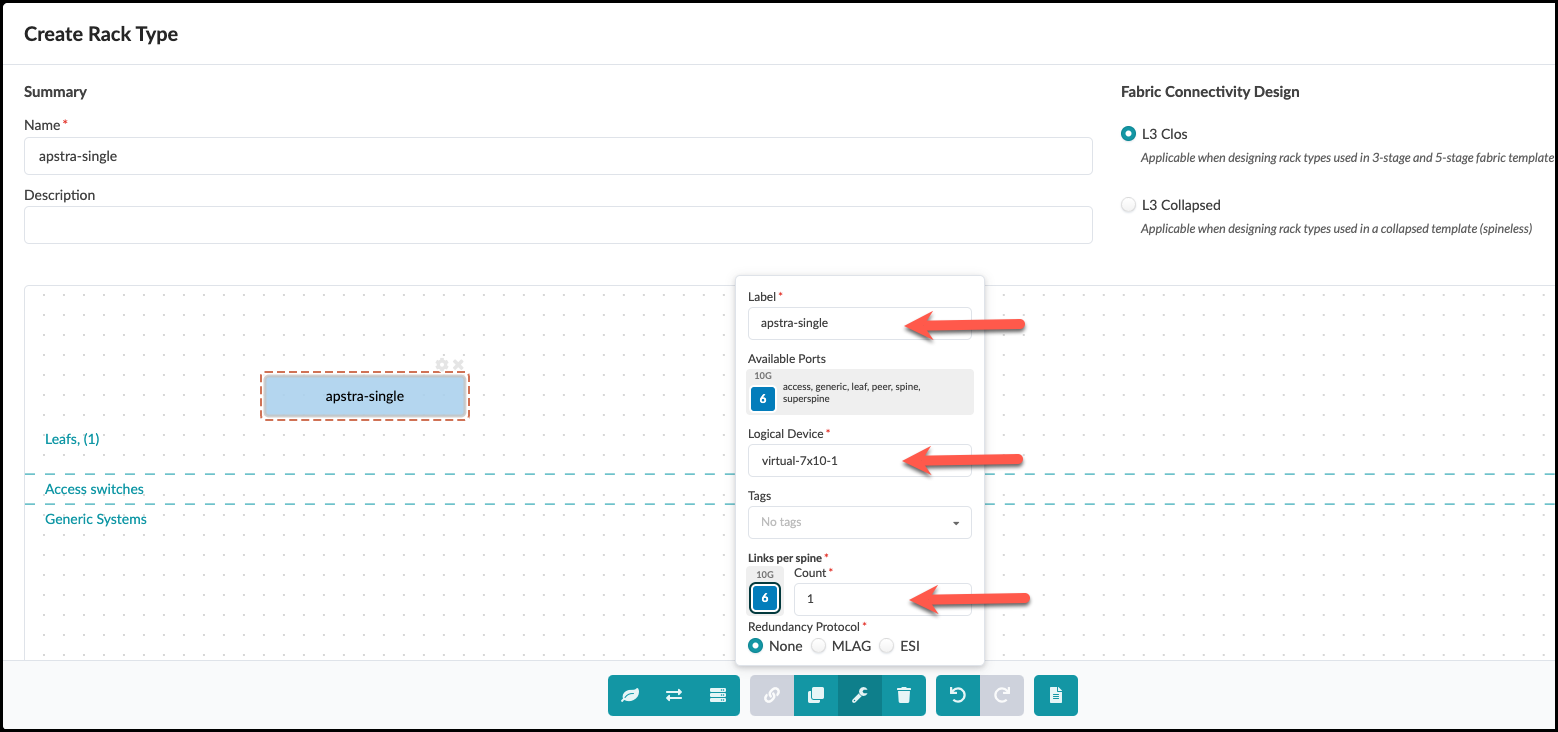
Add a leaf switch by clicking the leaf icon in the bottom menu. With the node selected, click the wrench icon to configure:
Leafs Values Name
your_name-single
Logical Device
slicer-7x10⁻¹
Links per spine
1
-
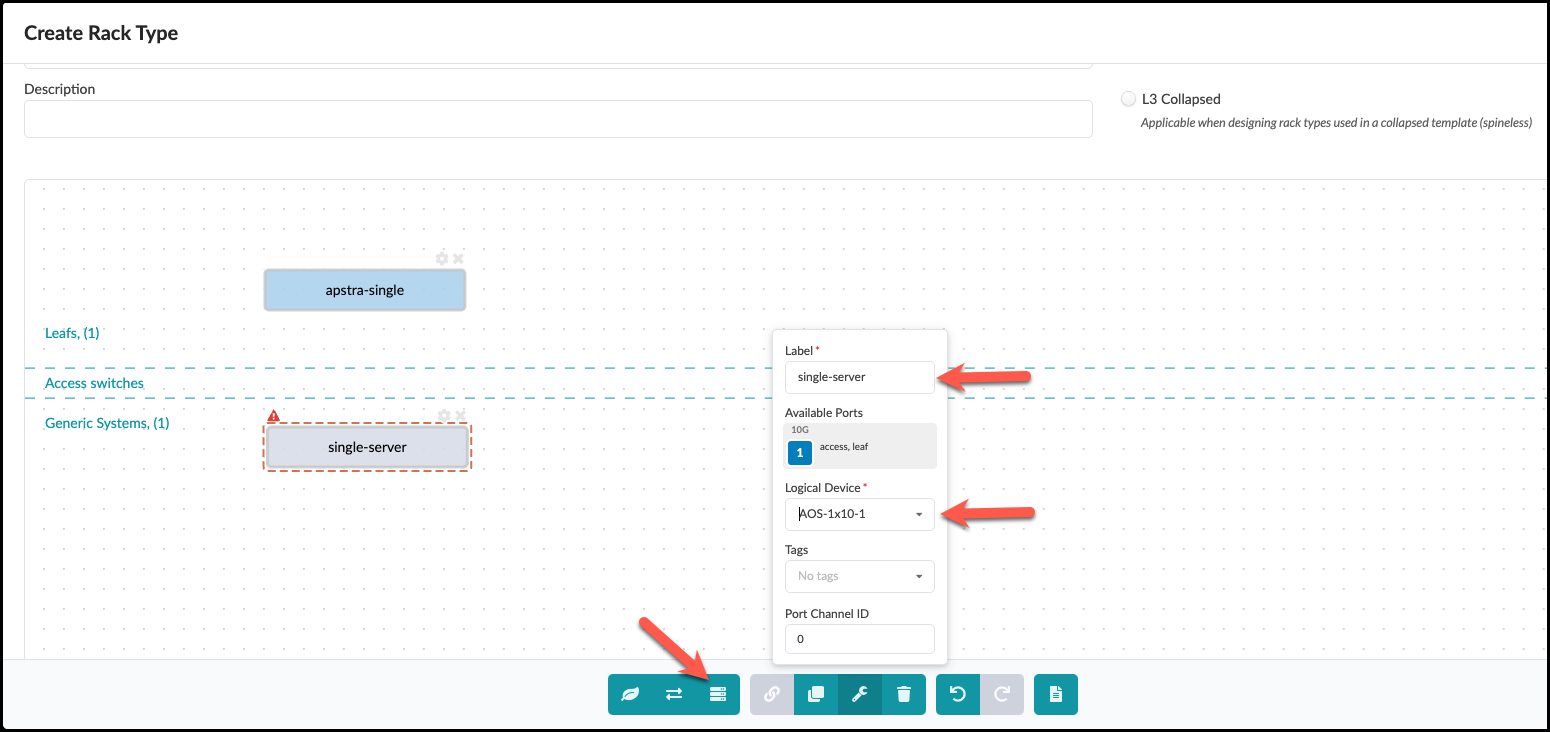
Add a server by clicking the Add Generic icon in the menu. After it appears, configure it with the wrench icon:
Server Values Name
single-server
Logical Device
AOS-1x10⁻¹
-
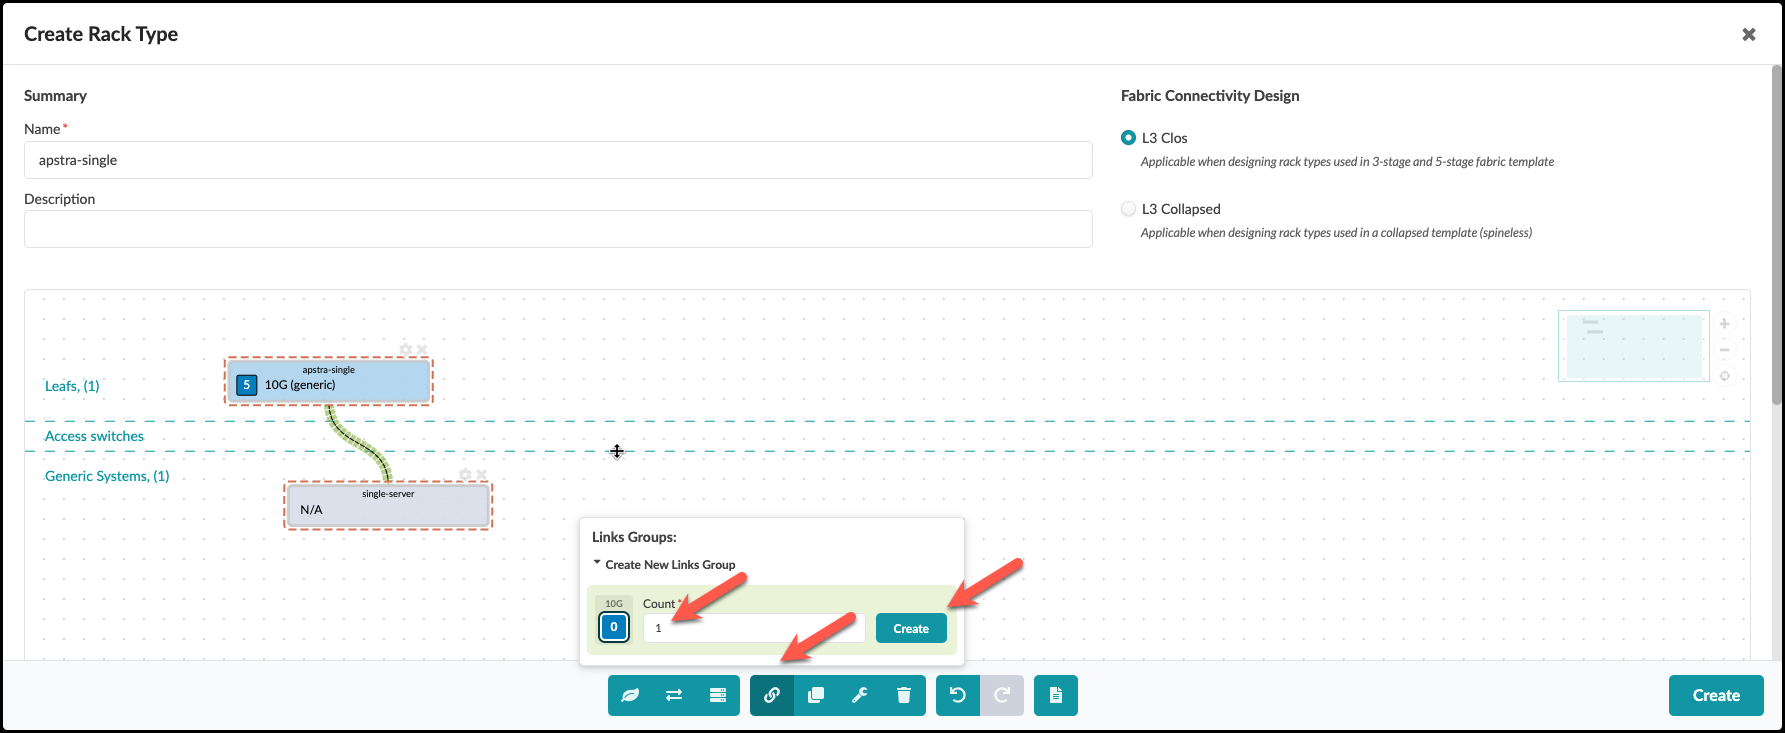
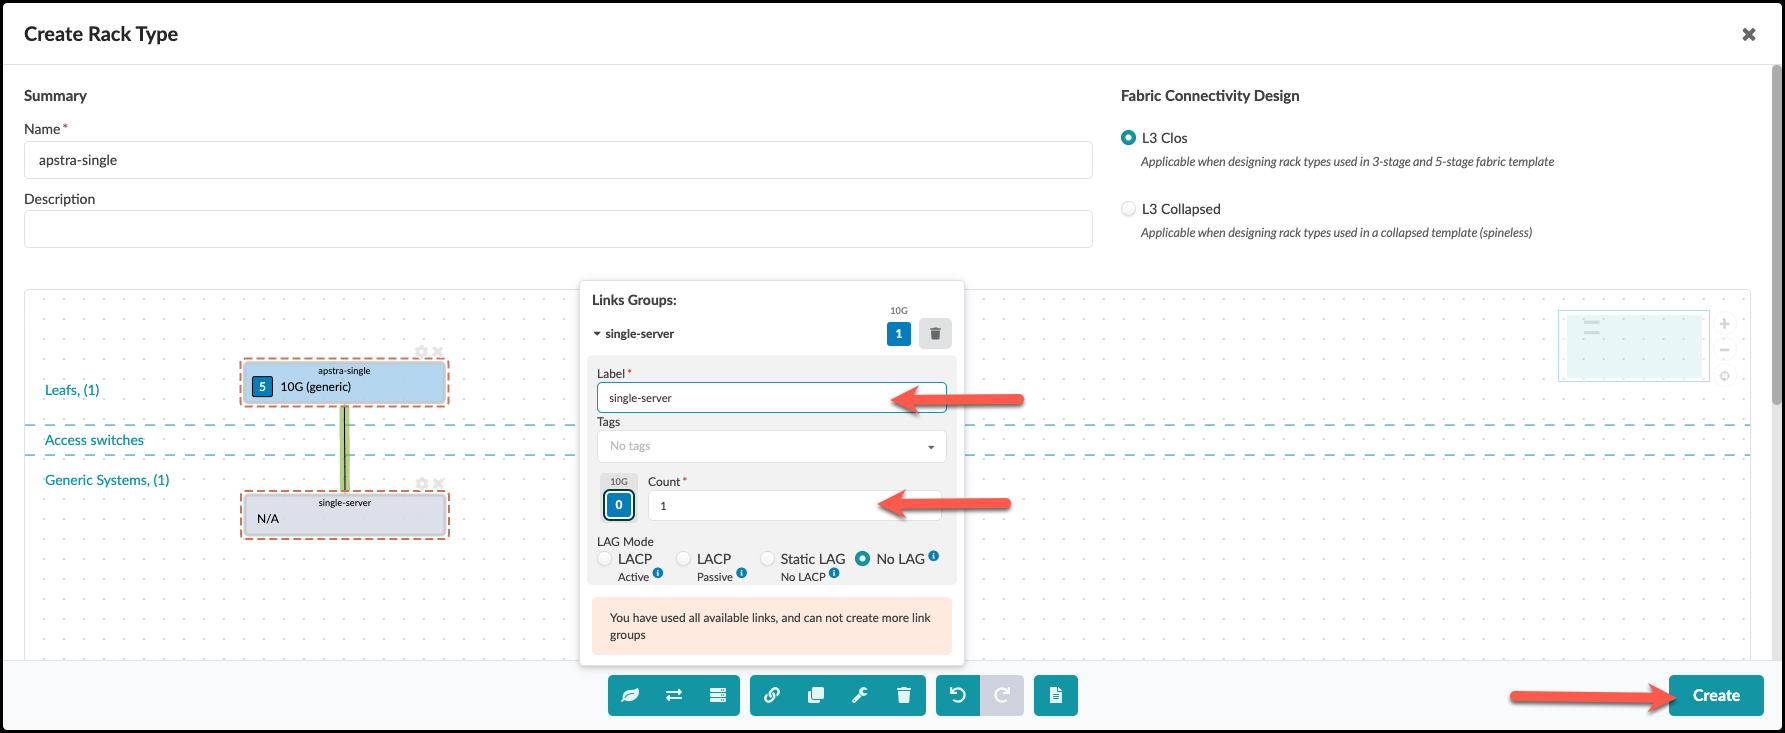
Connect the devices by:
-
Click and drag to select both the switch and server
-
Click the chain icon to create a link between them
-
Set Count to 1
-
Click Create
-
-
In the next view, you can optionally modify the link label, then click Create
-
Your completed rack should look like this:

Exercise 2: Create Dual-Homed Rack Type
Now let’s create a more complex rack with redundant switches for high availability:
-
From , click Create in Designer
-
Configure the rack summary:
Summary Value Name
your_name-esi
Fabric connectivity design
L3 Clos
-
Add a leaf node and configure it:
Leafs Value Label
your_name-esi
Logical Device
slicer-7x10⁻¹
Links per spine
1
Redundancy Protocol
esi
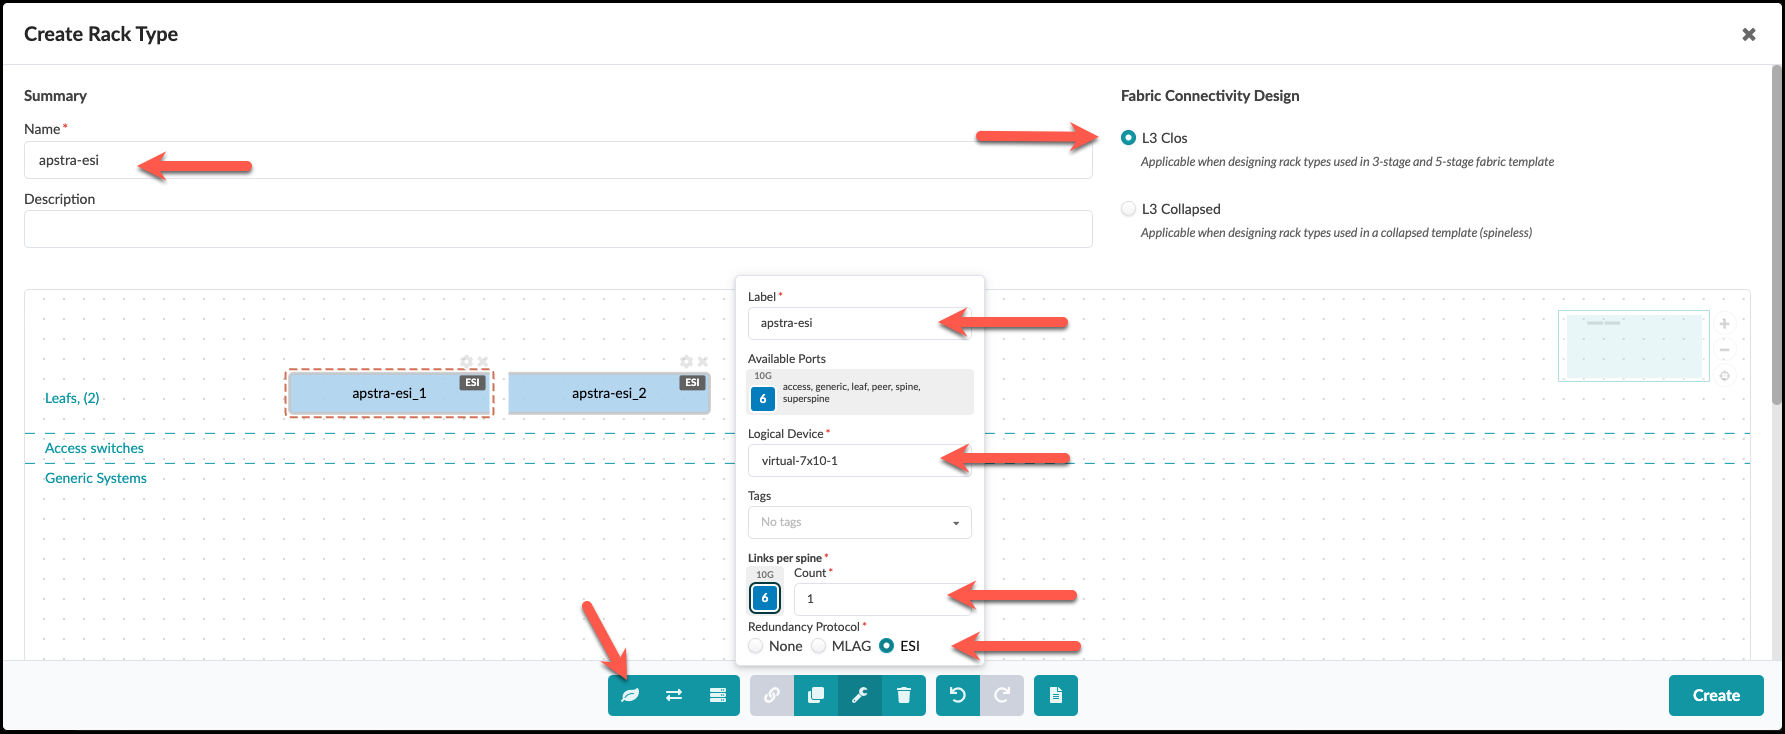
Notice how selecting "esi" automatically adds a second leaf switch to your design!
-
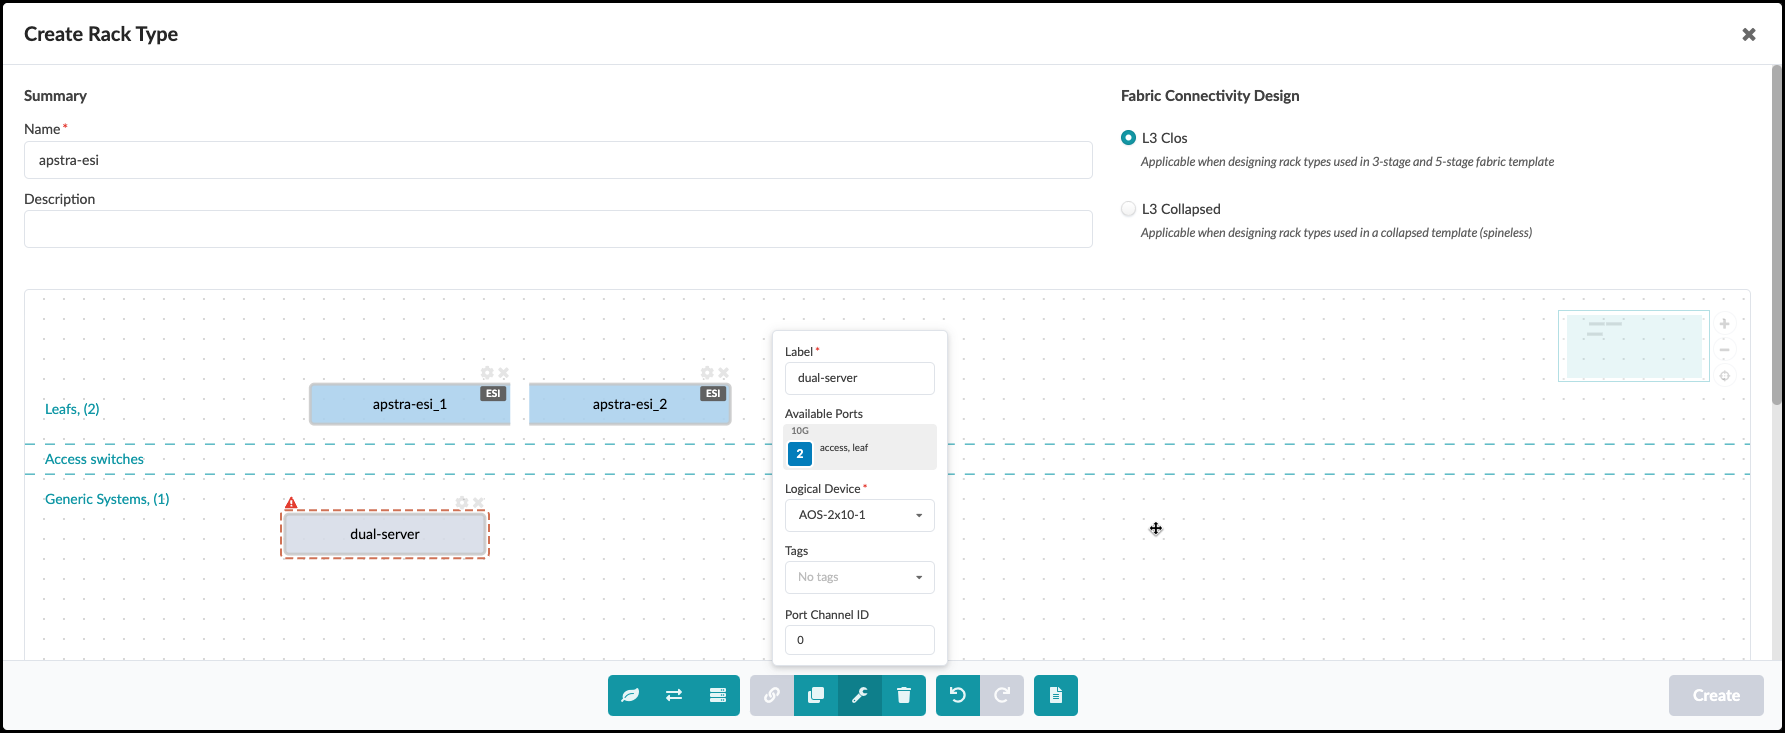
Add a dual-connected server:
Parameter Values Label
dual-server
Logical Device
AOS-2x10⁻¹
-
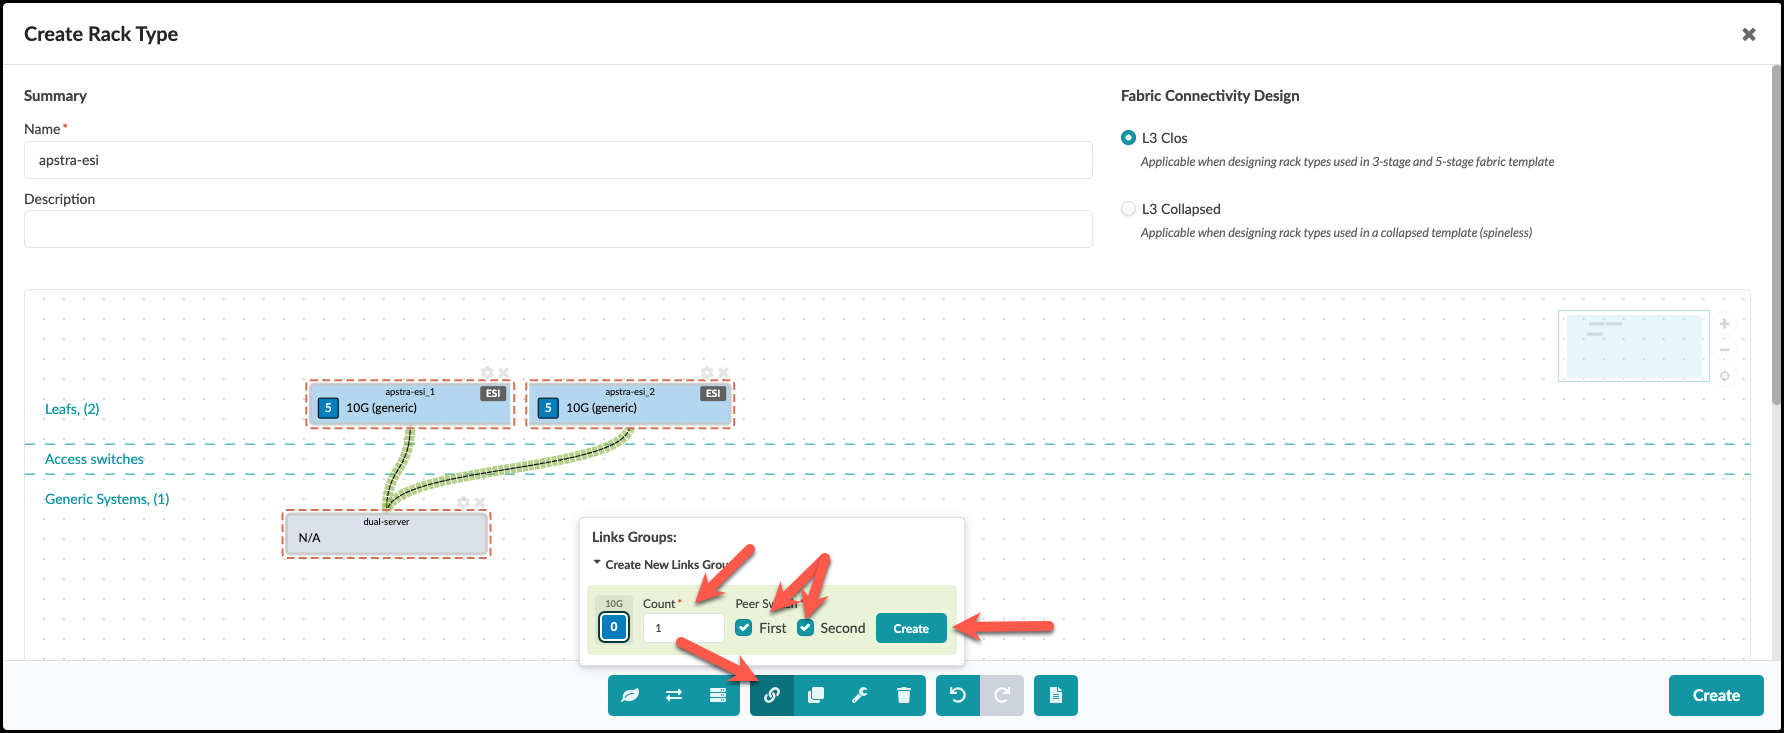
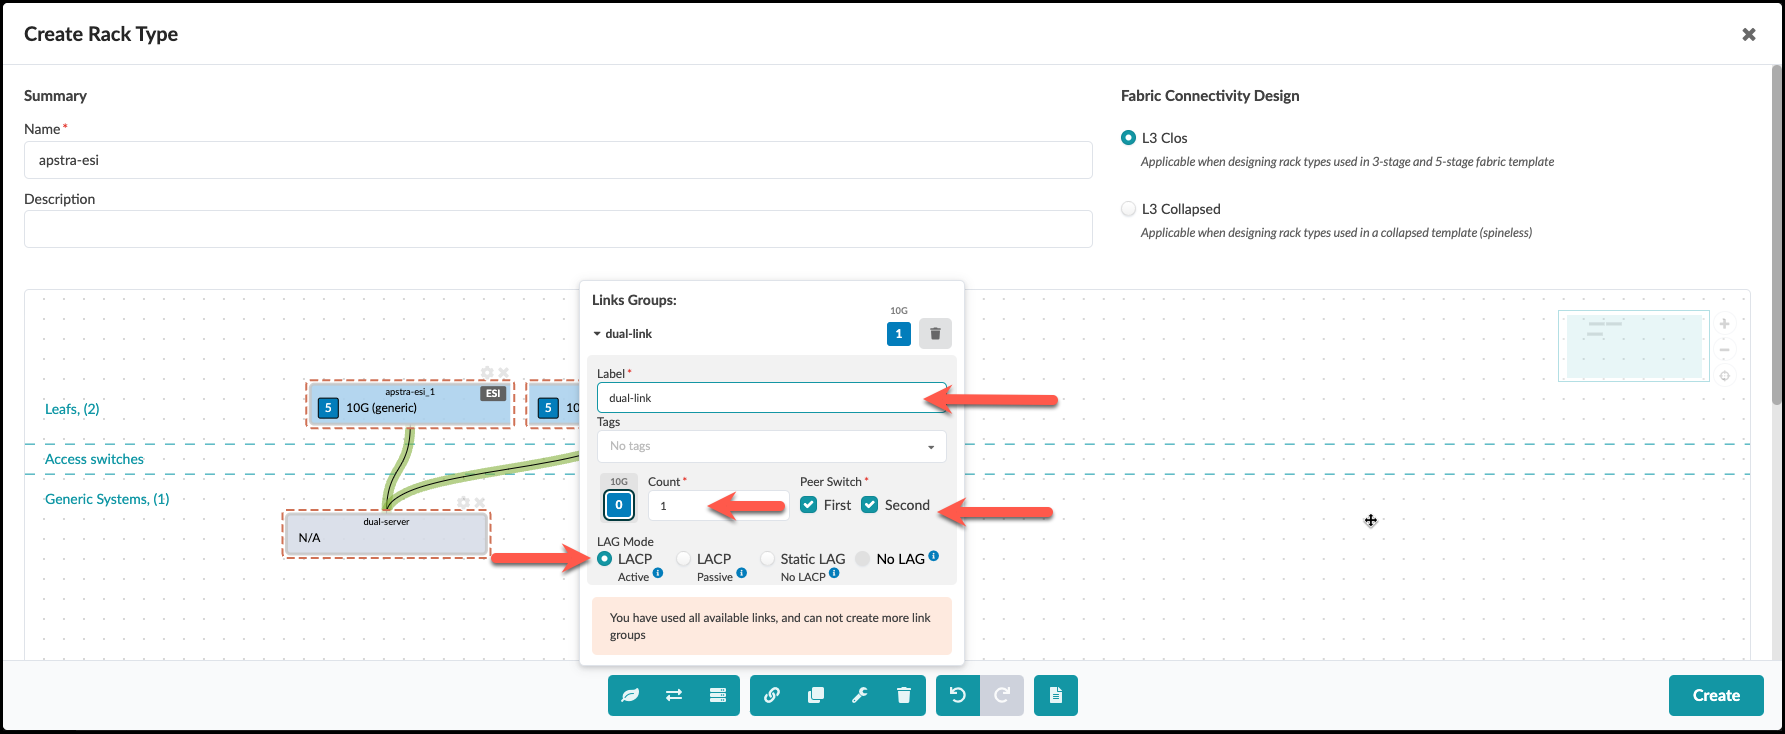
Create connections by selecting both leaf switches and the server, then:
-
Ensure both "First" and "Second" peer switches are checked
-
Click Create
-
-
In the next screen, set LAG Mode to "LACP Active" and click Create
-
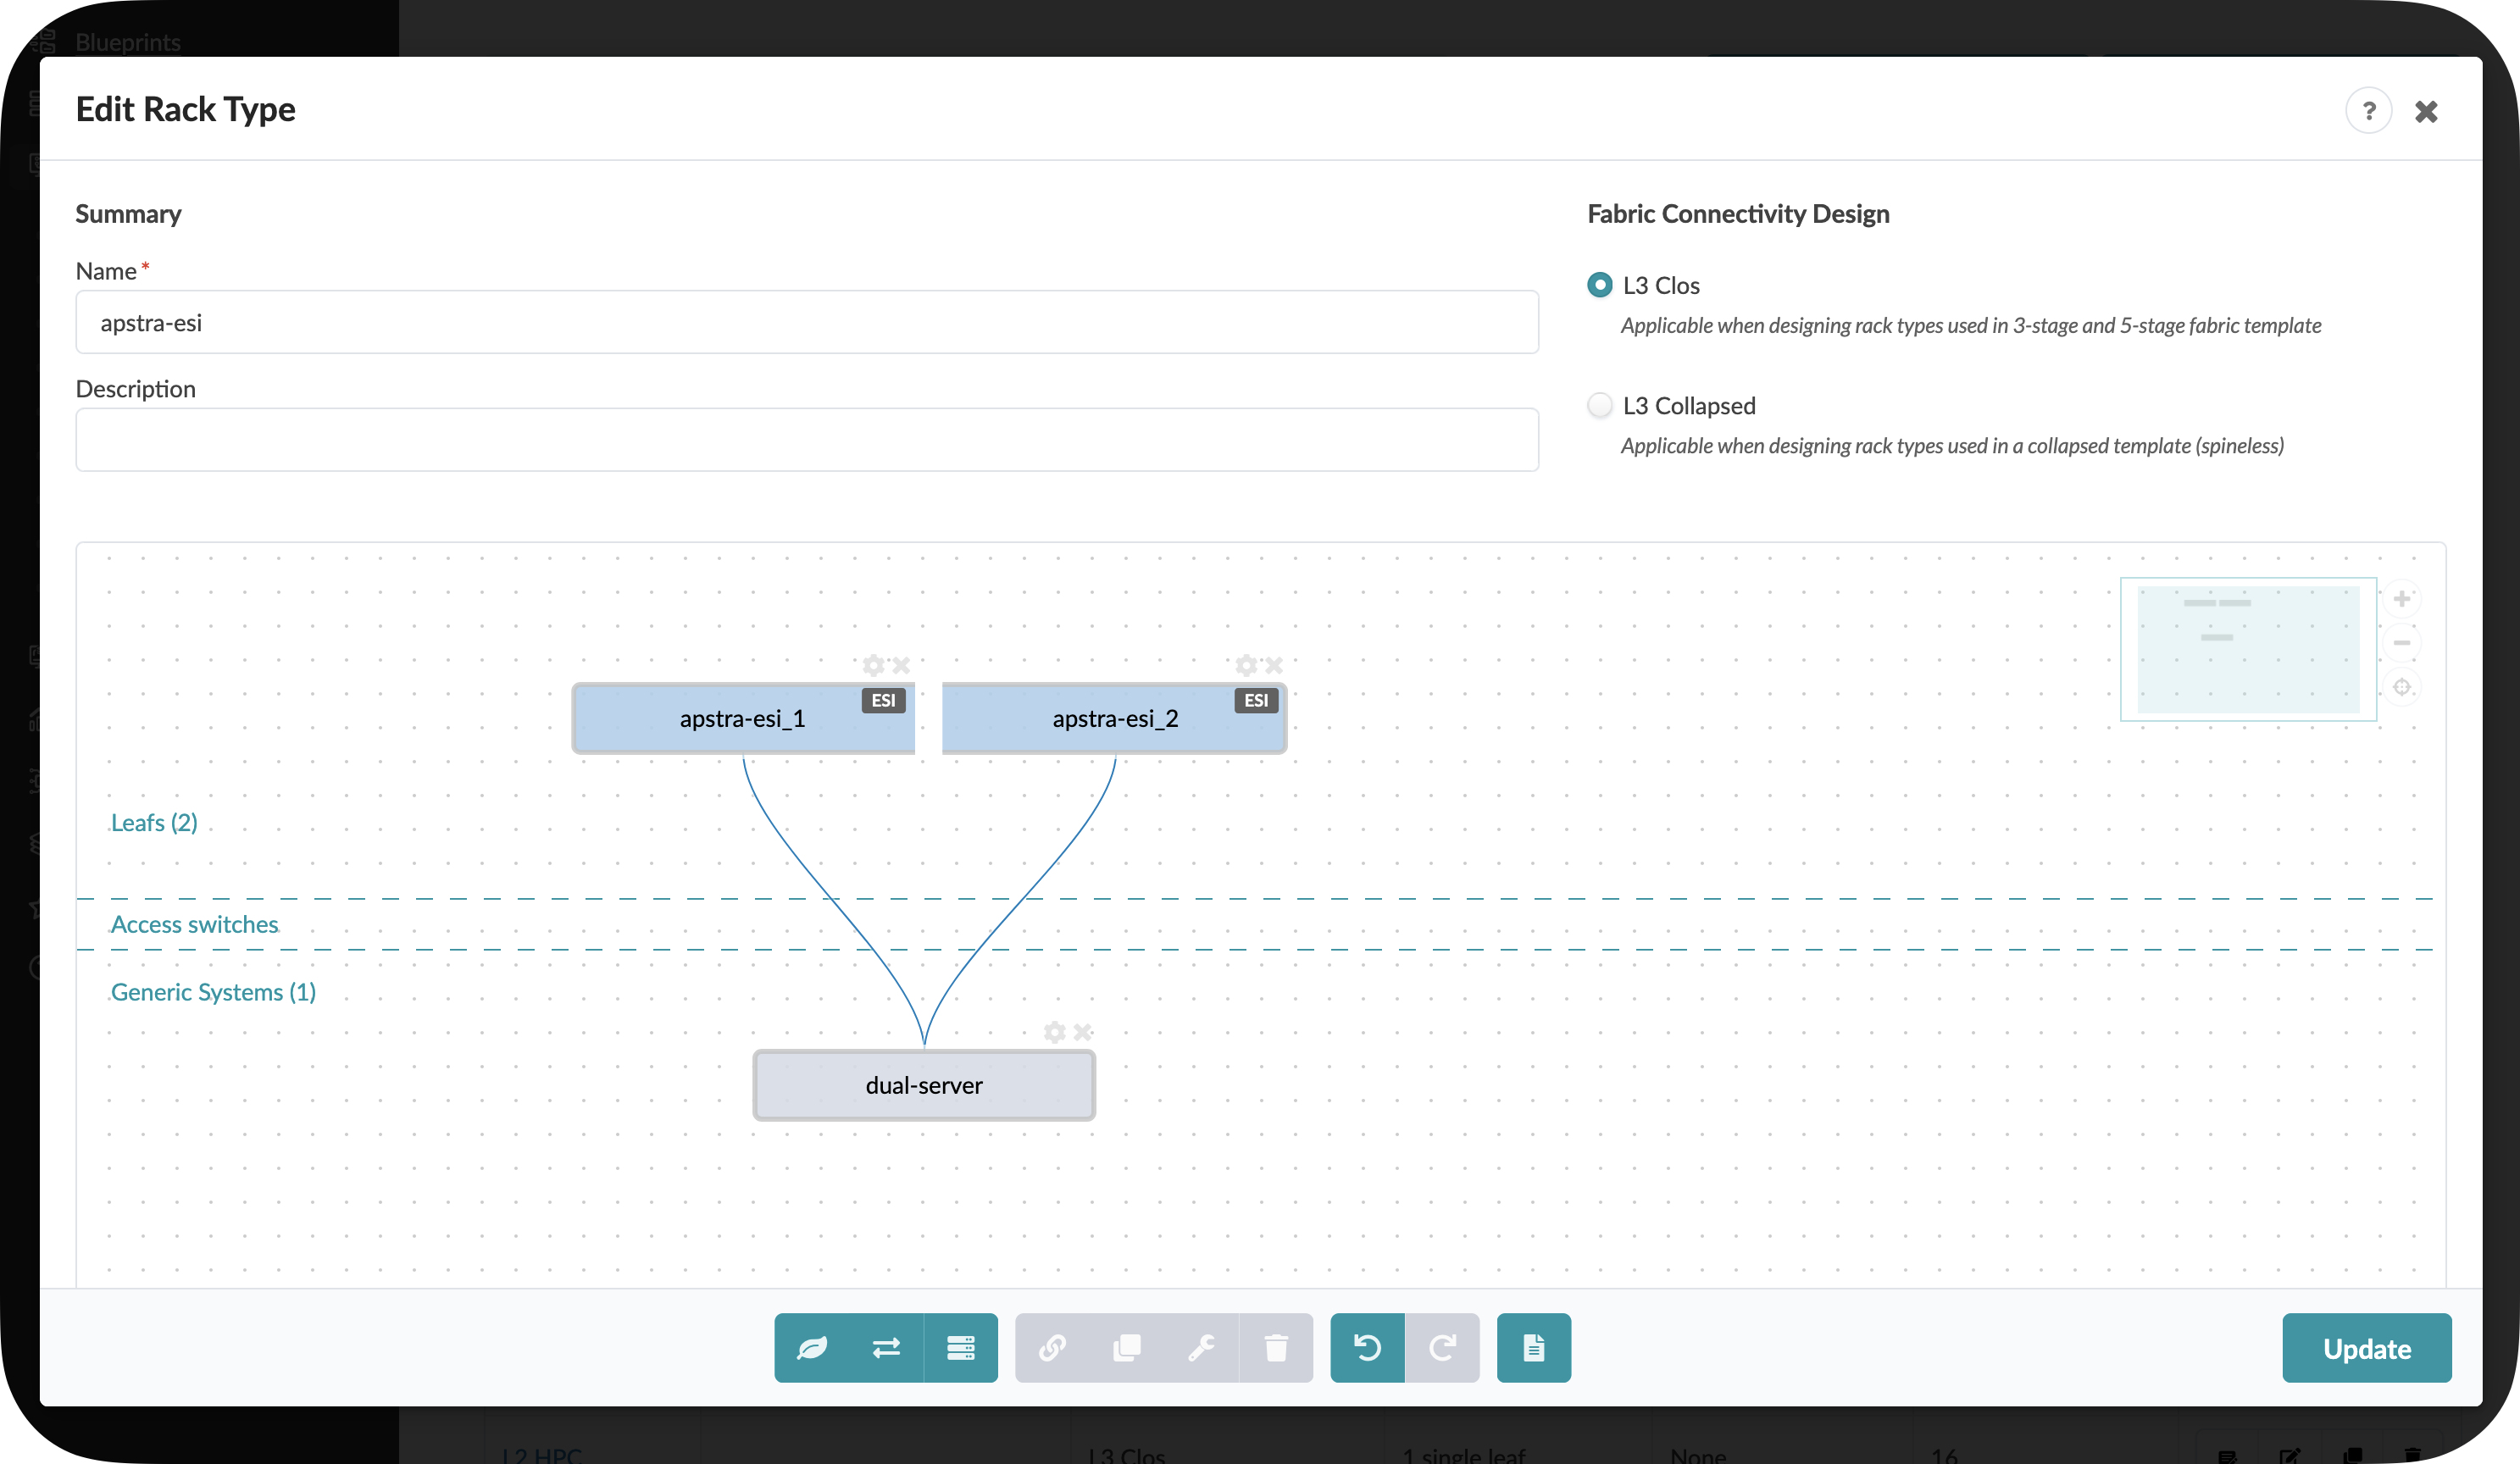
Your completed dual-switch rack should look like this:
Congratulations! You’ve created two rack types that can be used as building blocks for your data centre fabric design. In the next section, we’ll use these rack types to create a complete network template.
|
Pro Tip: Rack Types are extremely flexible - you can design them to match exactly how your physical racks are configured, with different server types, connection patterns, and redundancy options. For large data centres, well-designed Rack Types dramatically simplify the network design process. |