Lab Guide 1 - Juniper
Day 2 Operations: Using Time Voyager for Configuration Rollbacks
Scenario: Rolling Back Changes with Confidence
As a final exploration of Apstra’s powerful Day 2 capabilities, let’s examine one of its most valuable features: Time Voyager. This feature allows you to roll back your entire fabric to a previous known-good state with just a few clicks.
Throughout this lab, you’ve made several commits to your blueprint as you’ve built out the Analytics service. Each of these commits represents a snapshot of your network’s intended state at that point in time. Time Voyager gives you the ability to travel back to any of these snapshots.
Understanding Time Voyager
Time Voyager is much more than a simple configuration backup and restore tool:
|
What makes Time Voyager different? Traditional backup/restore:
Apstra’s Time Voyager:
|
Time Voyager reflects Apstra’s understanding that your network is a system doing a job, not just a collection of individual devices.
Task: Explore and Use Time Voyager
Let’s see how Time Voyager works in practice by exploring our commit history and previewing a rollback:
Step 1: Access Time Voyager
-
From your blueprint, locate the Time Voyager tab on the far right-hand side of the screen
-
Click on Time Voyager to open the commit history view
-
You’ll see a list of all commits that have been made to this blueprint, with the most recent at the top
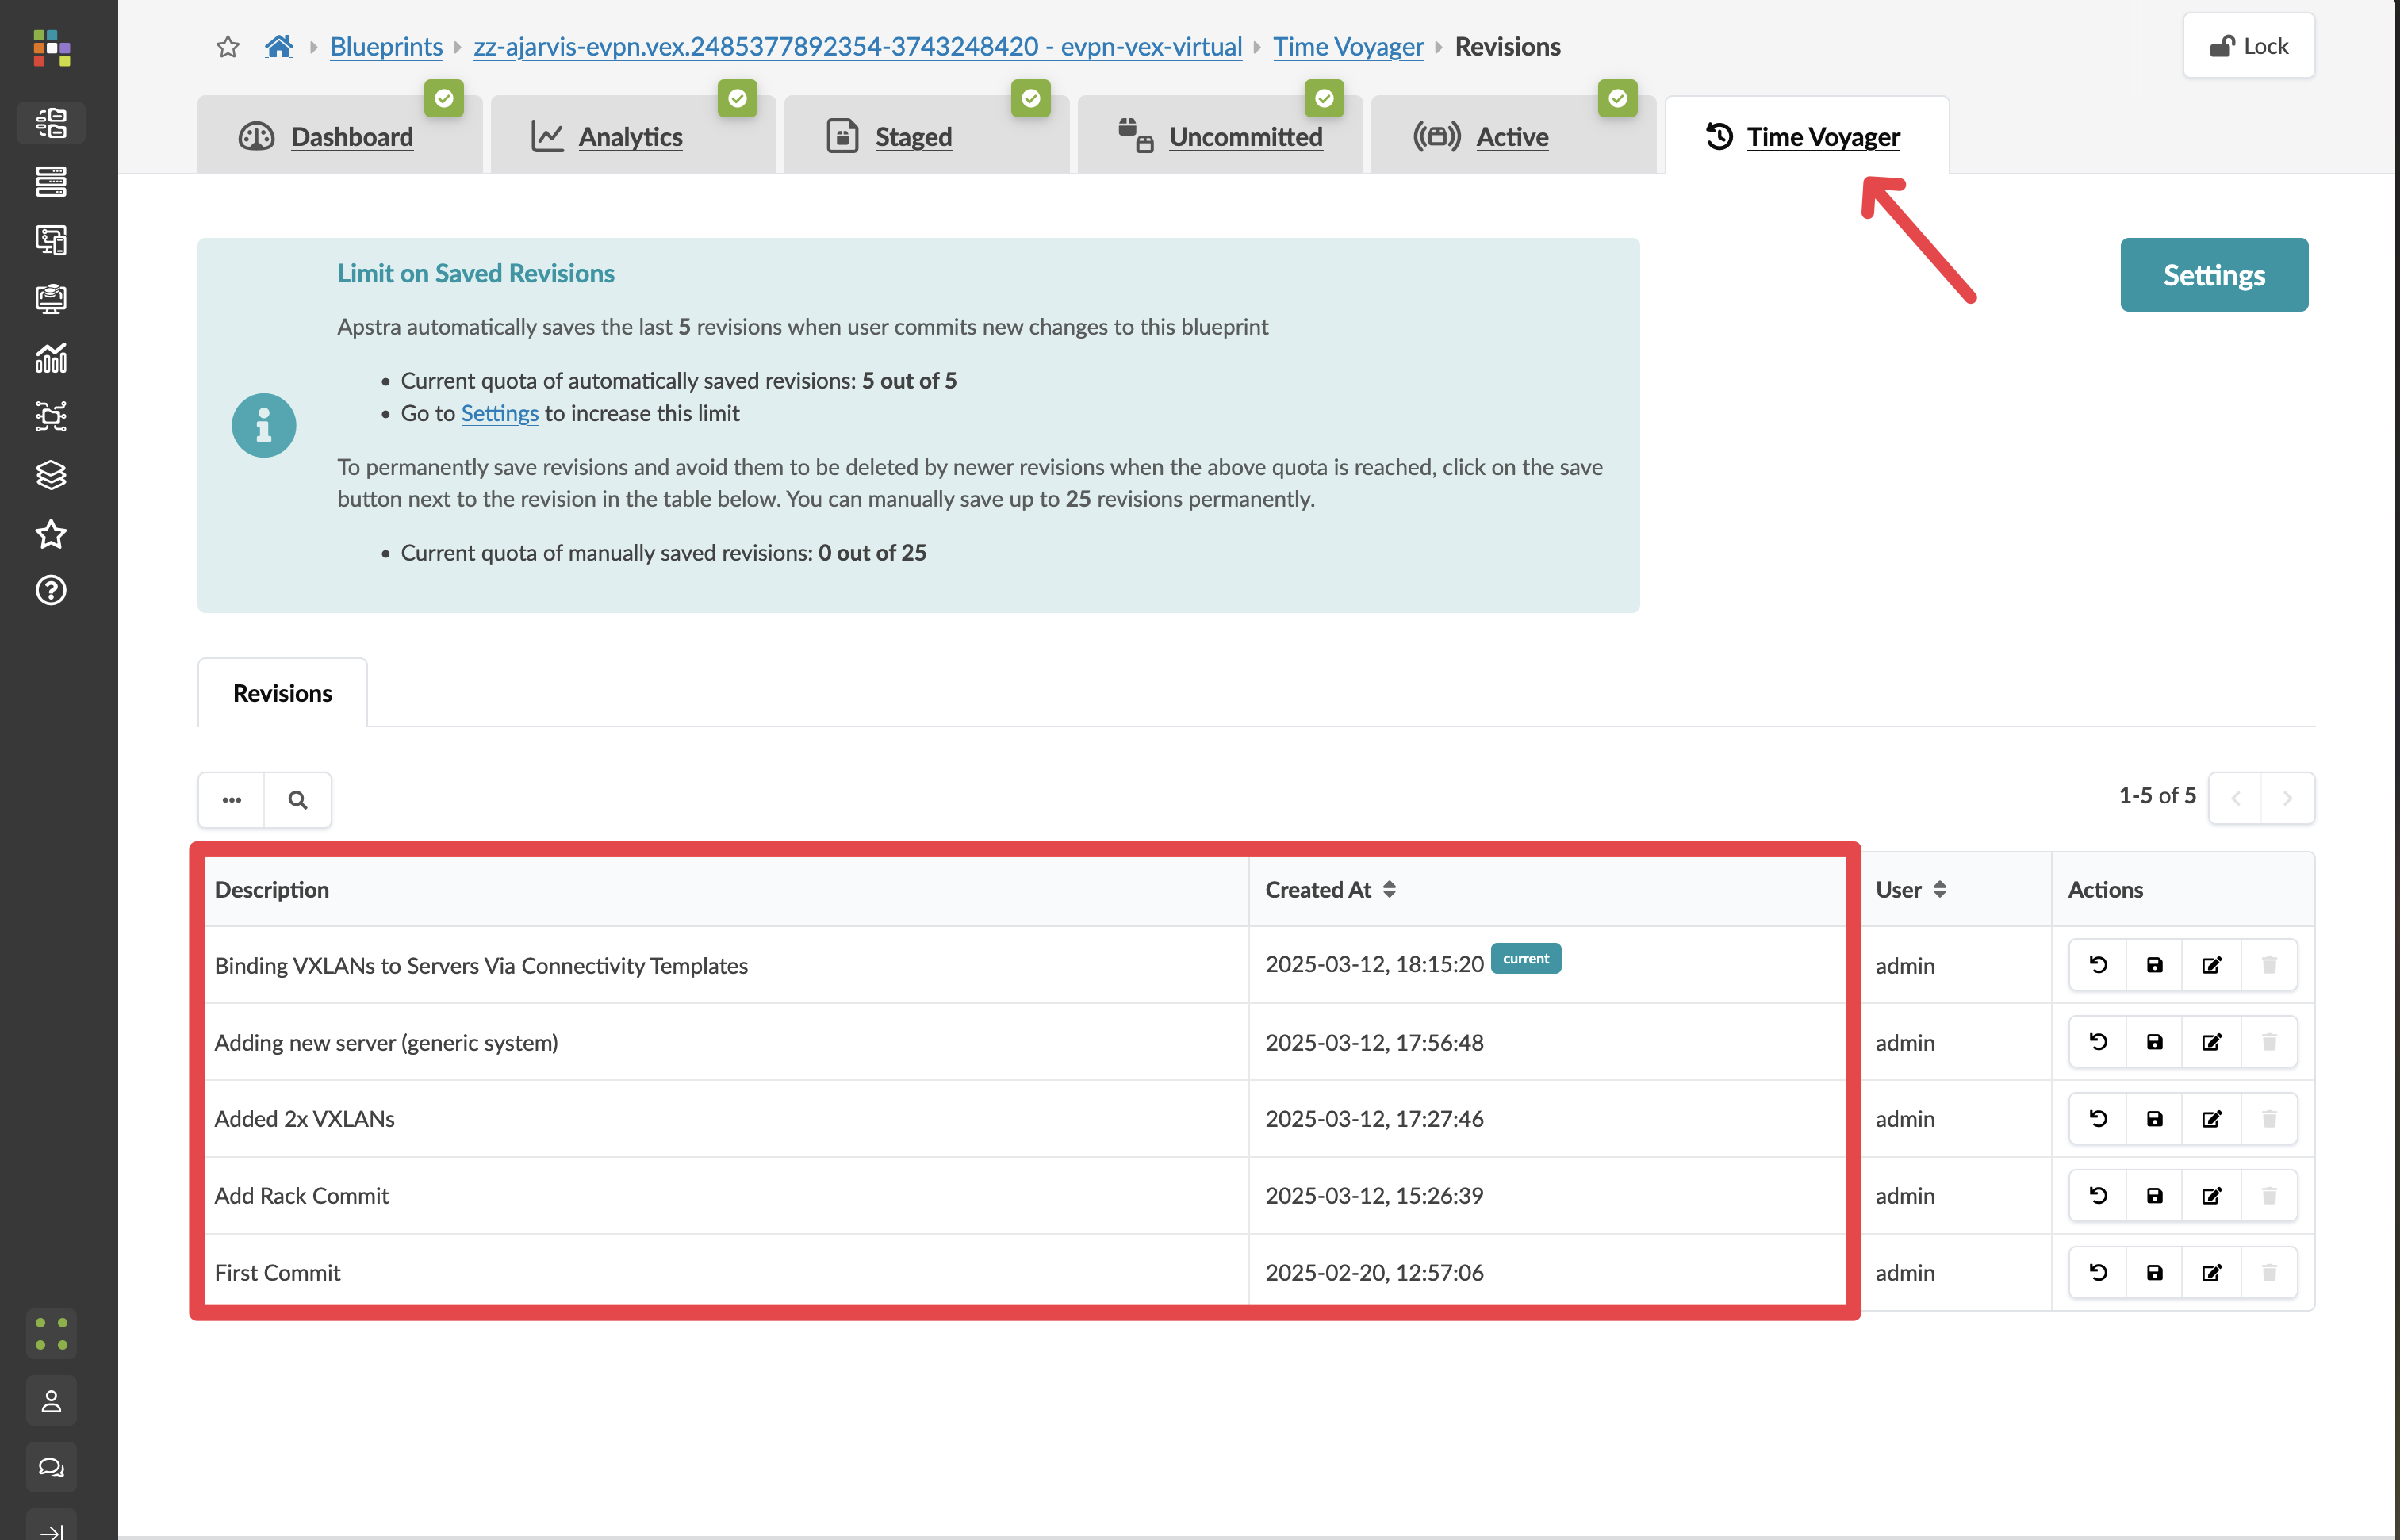
Each commit is labelled with:
-
A timestamp
-
The commit message you entered
-
The user who made the change
-
Step 2: Select a Previous Commit
-
Browse through your commit history to find a point you’d like to explore
For this exercise, try selecting the commit from before you added the Analytics service components
-
Click on the commit to select it
-
Click the Rollback button
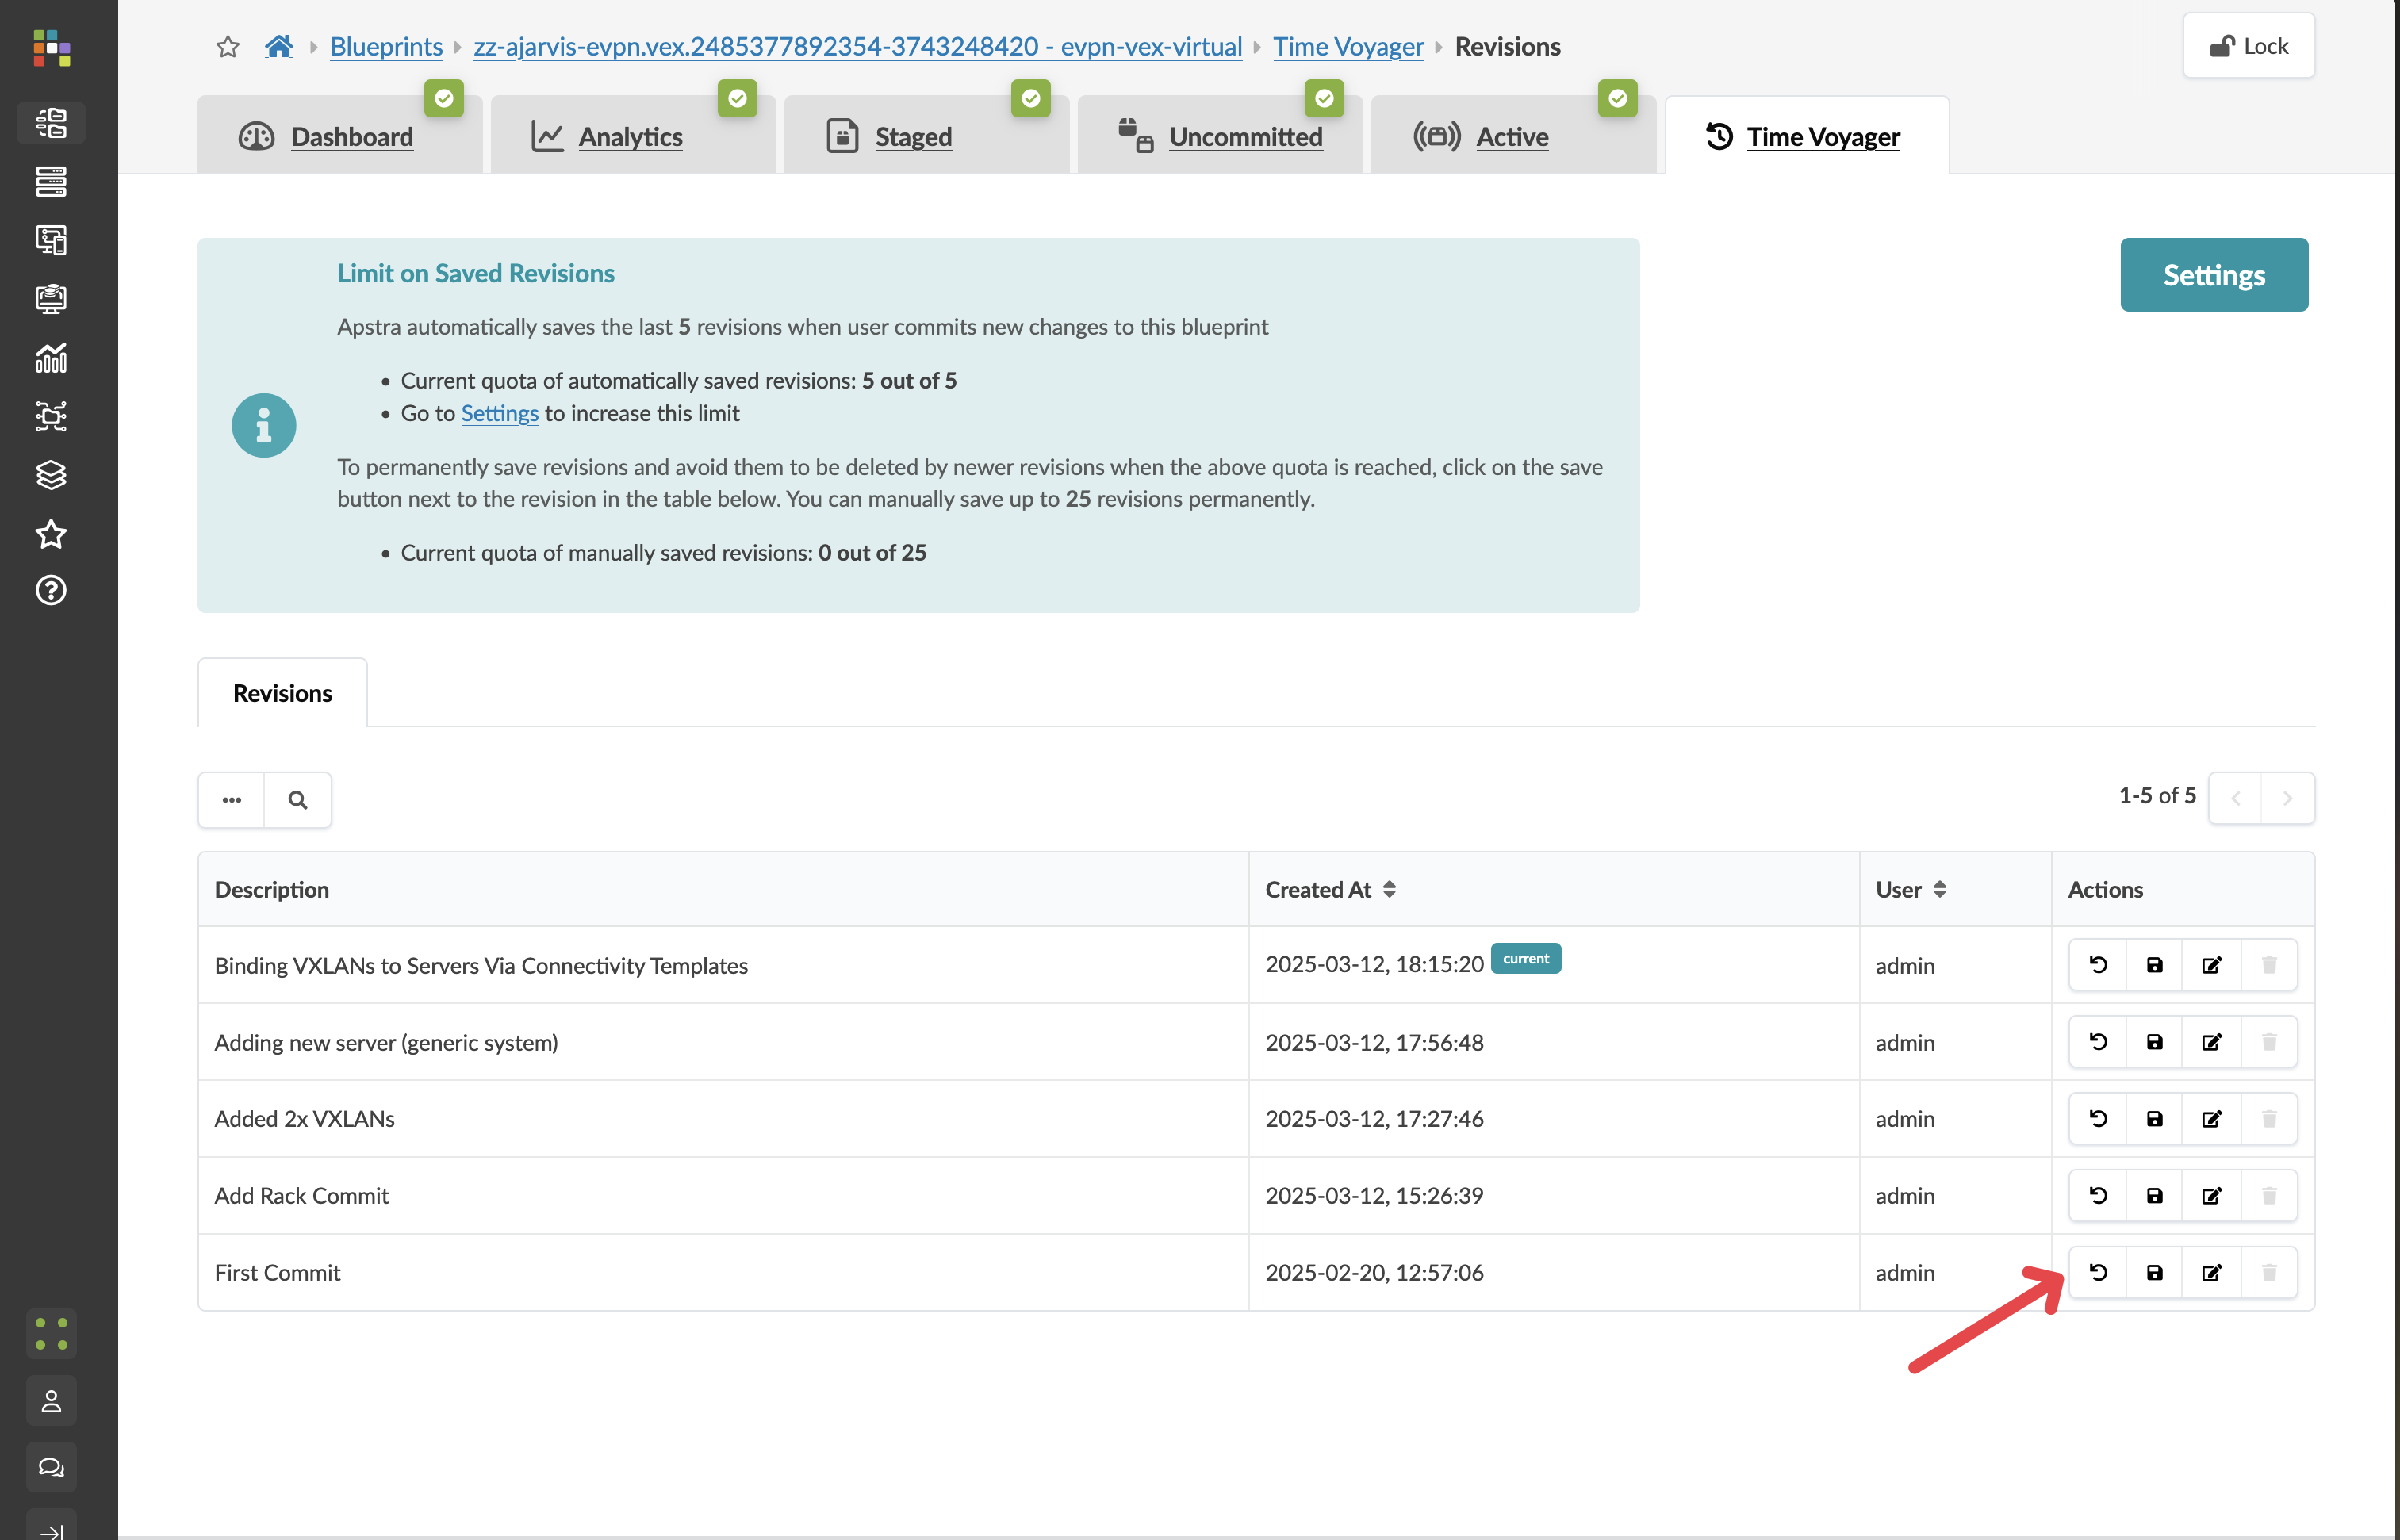
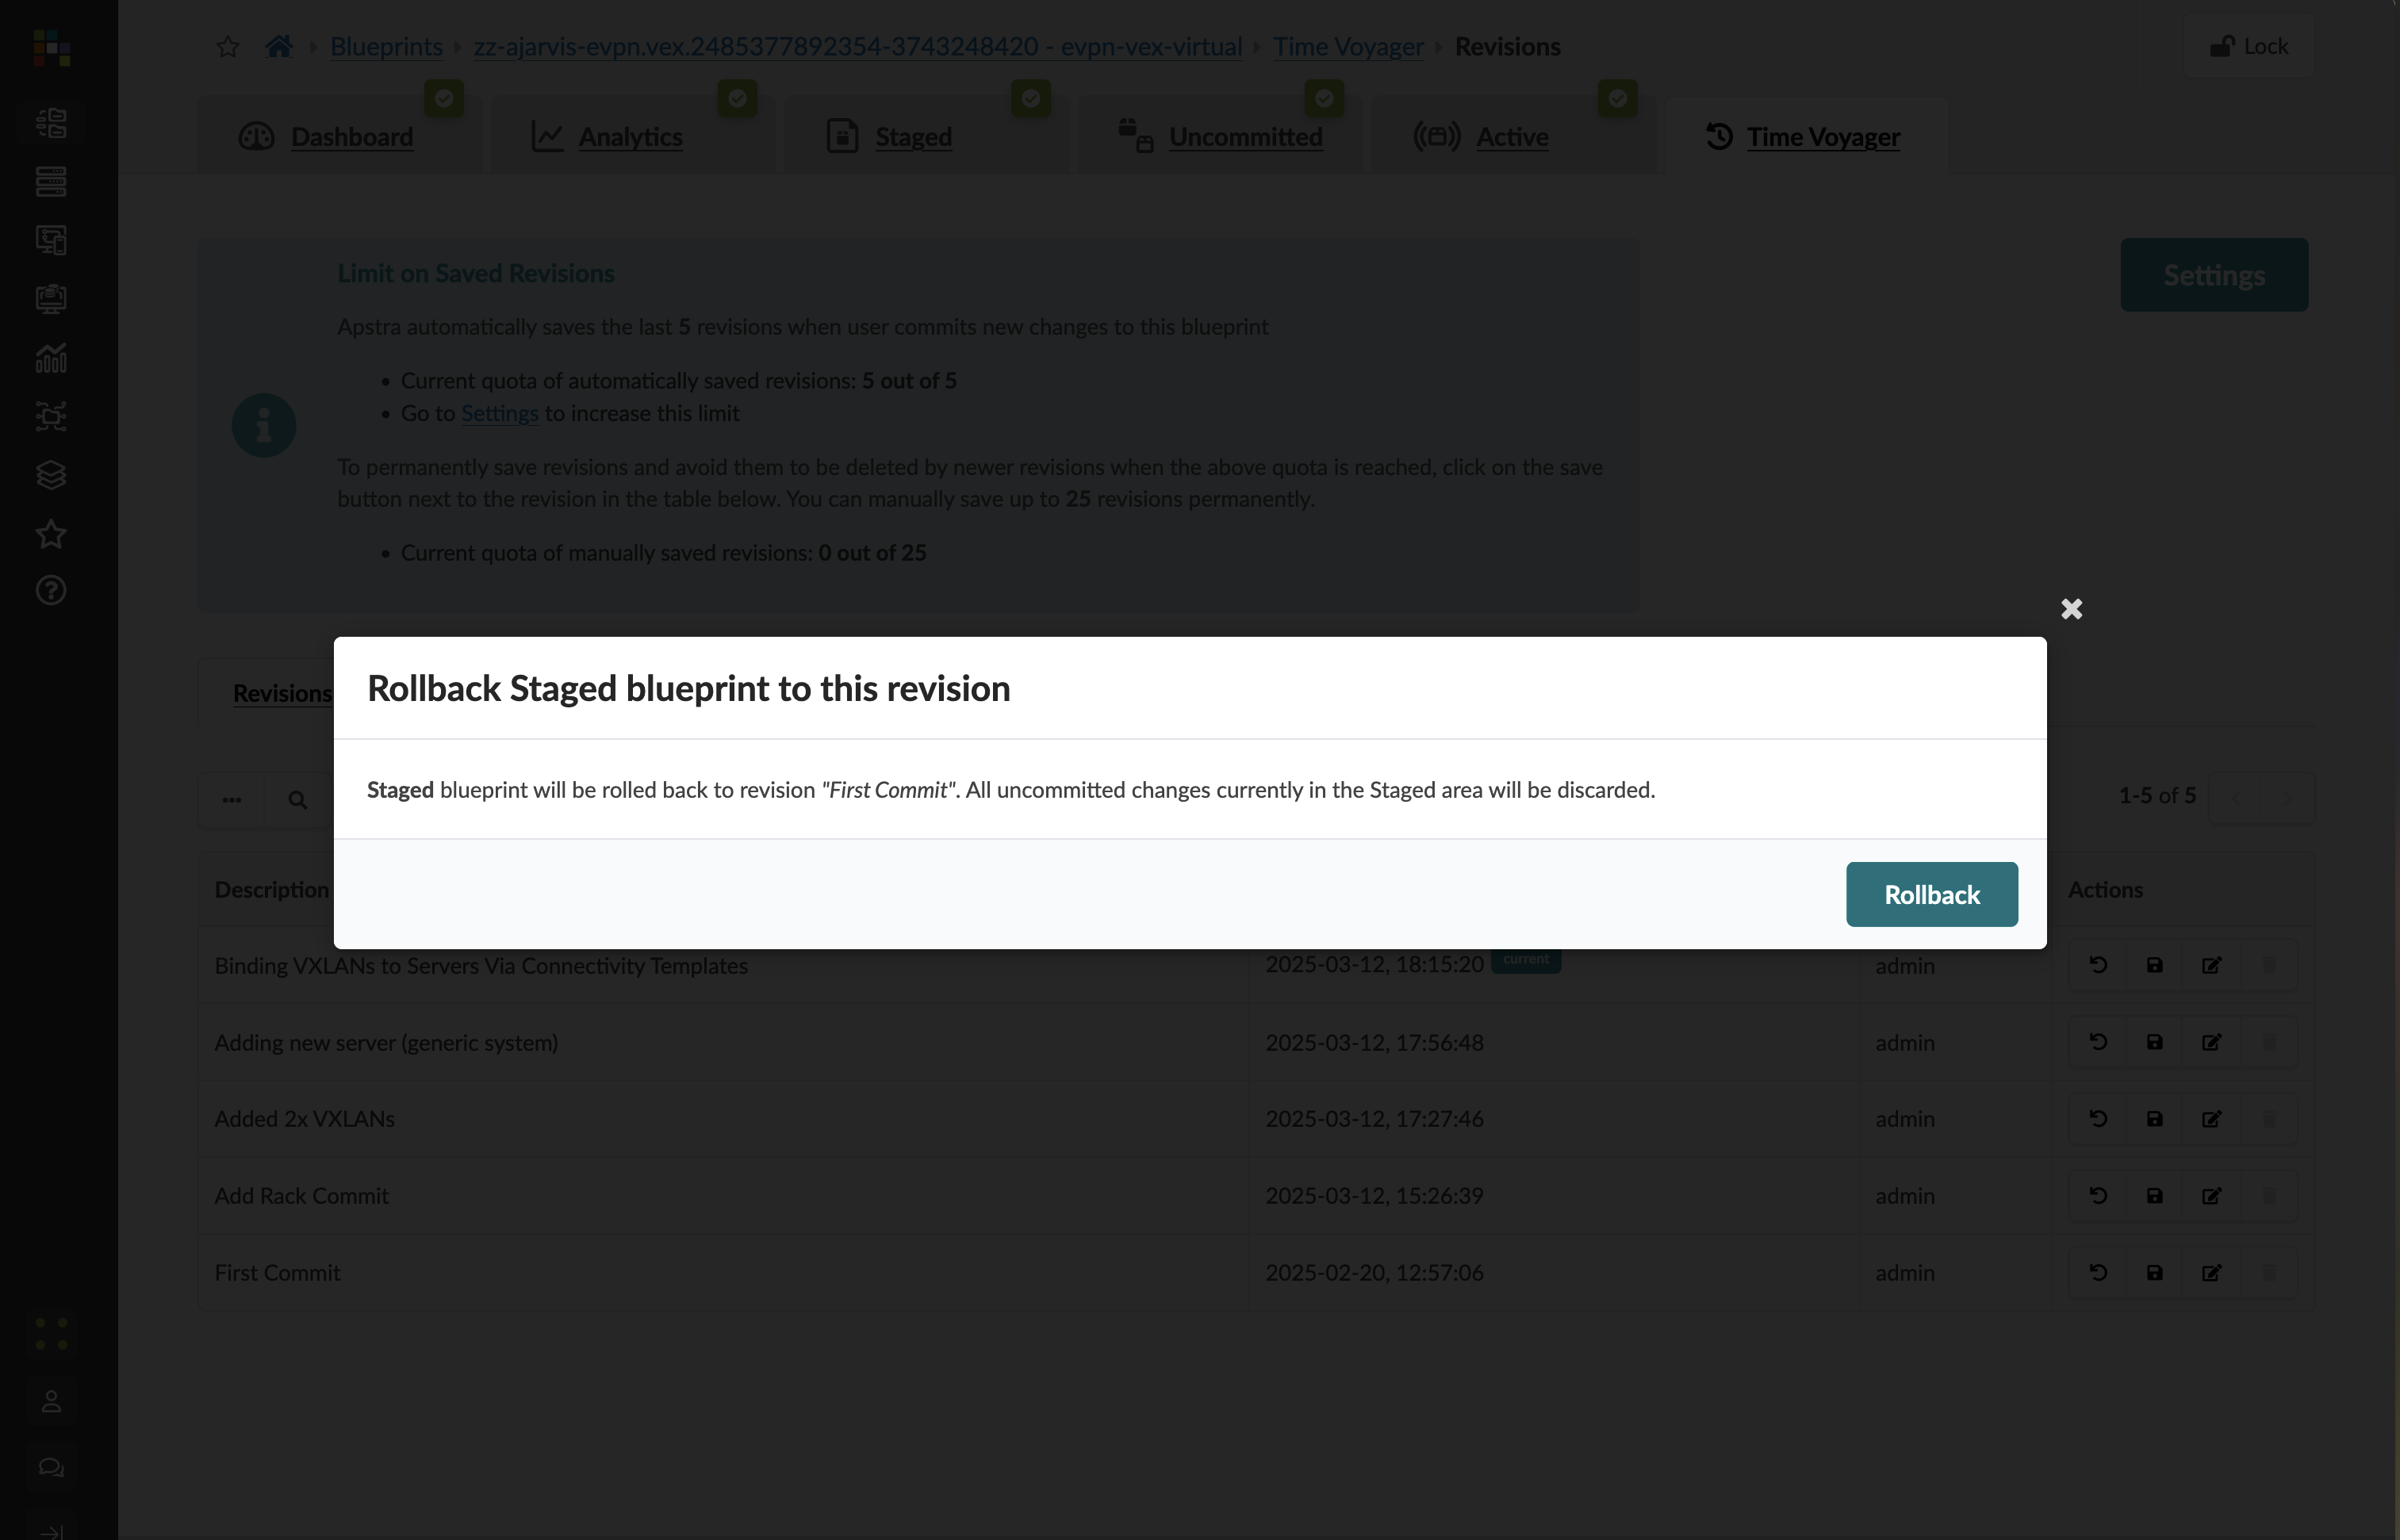
This doesn’t immediately change your active network! It only loads the previous state into the staging area for your review.
Step 3: Preview the Rollback Changes
After clicking Rollback, Apstra will load the selected commit into the staging area:
-
Navigate to the Staged tab to see what your network looked like at that point in time
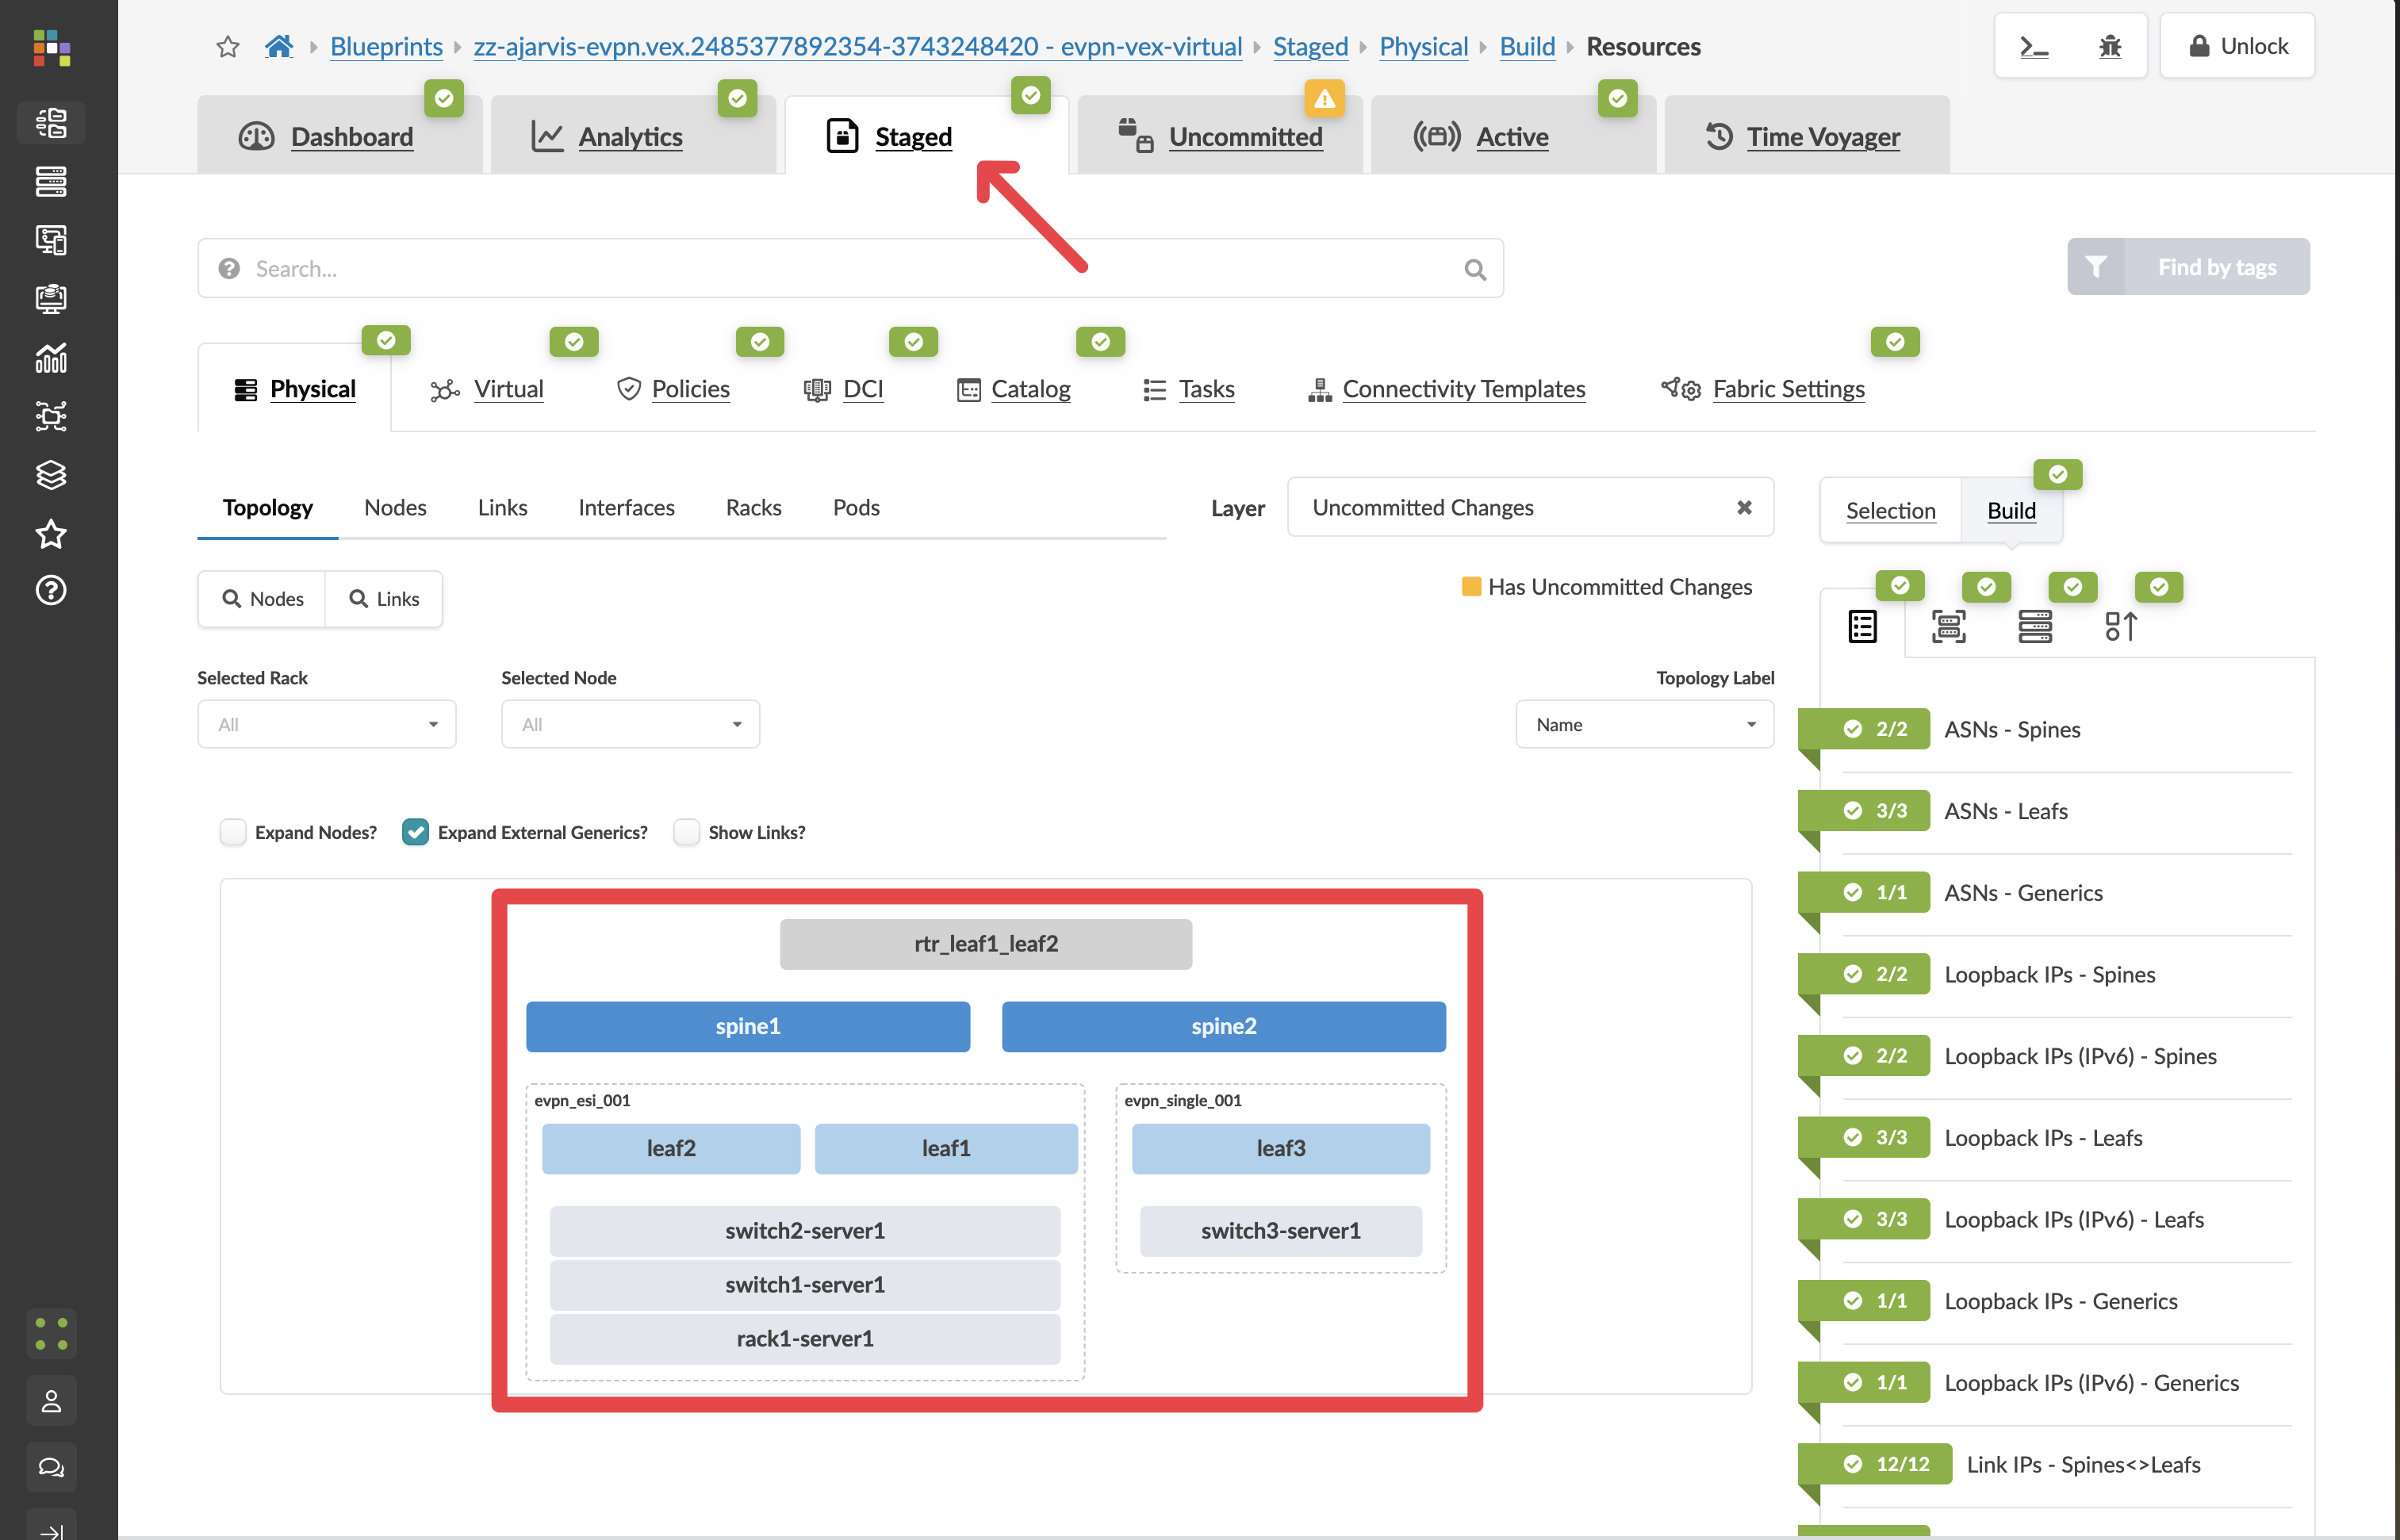
Notice that any components you’ve added since that commit (like your new rack, routing zone, or virtual networks) are no longer present
-
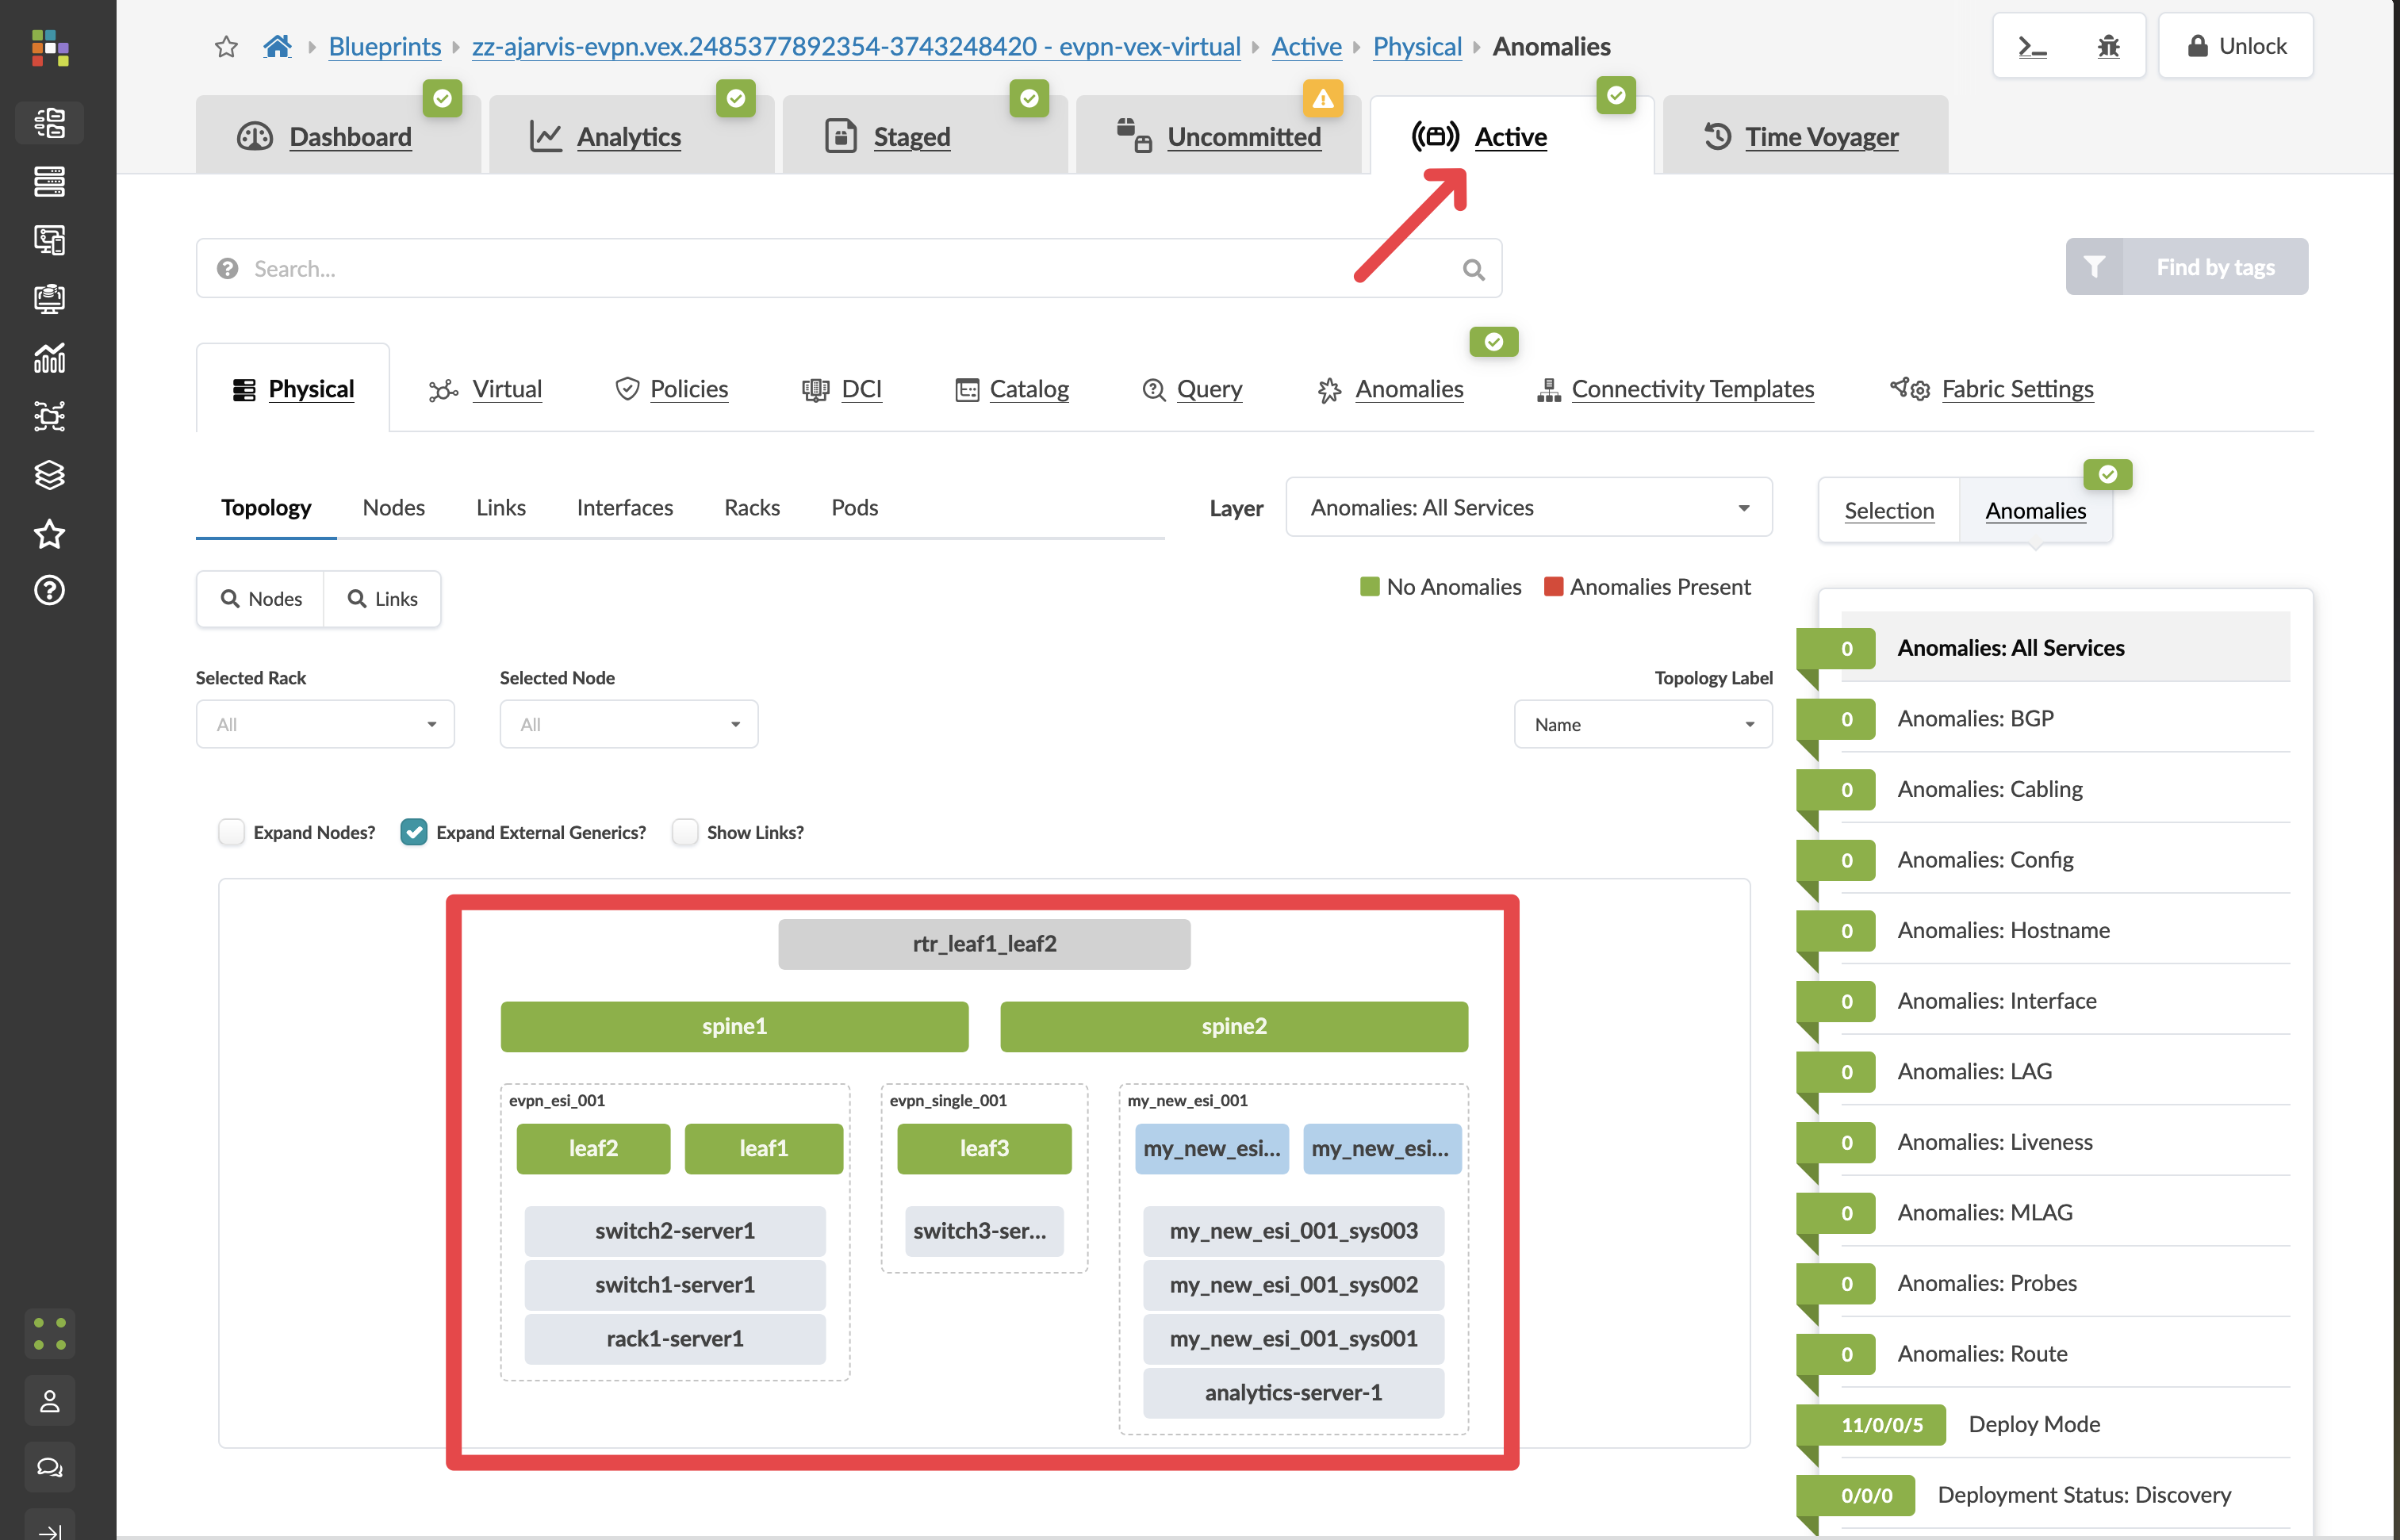
Click on the Active tab to see the topology still in production as the rollback is staged.
-
Click the Uncommitted tab to see the difference between this previous state and your current active network
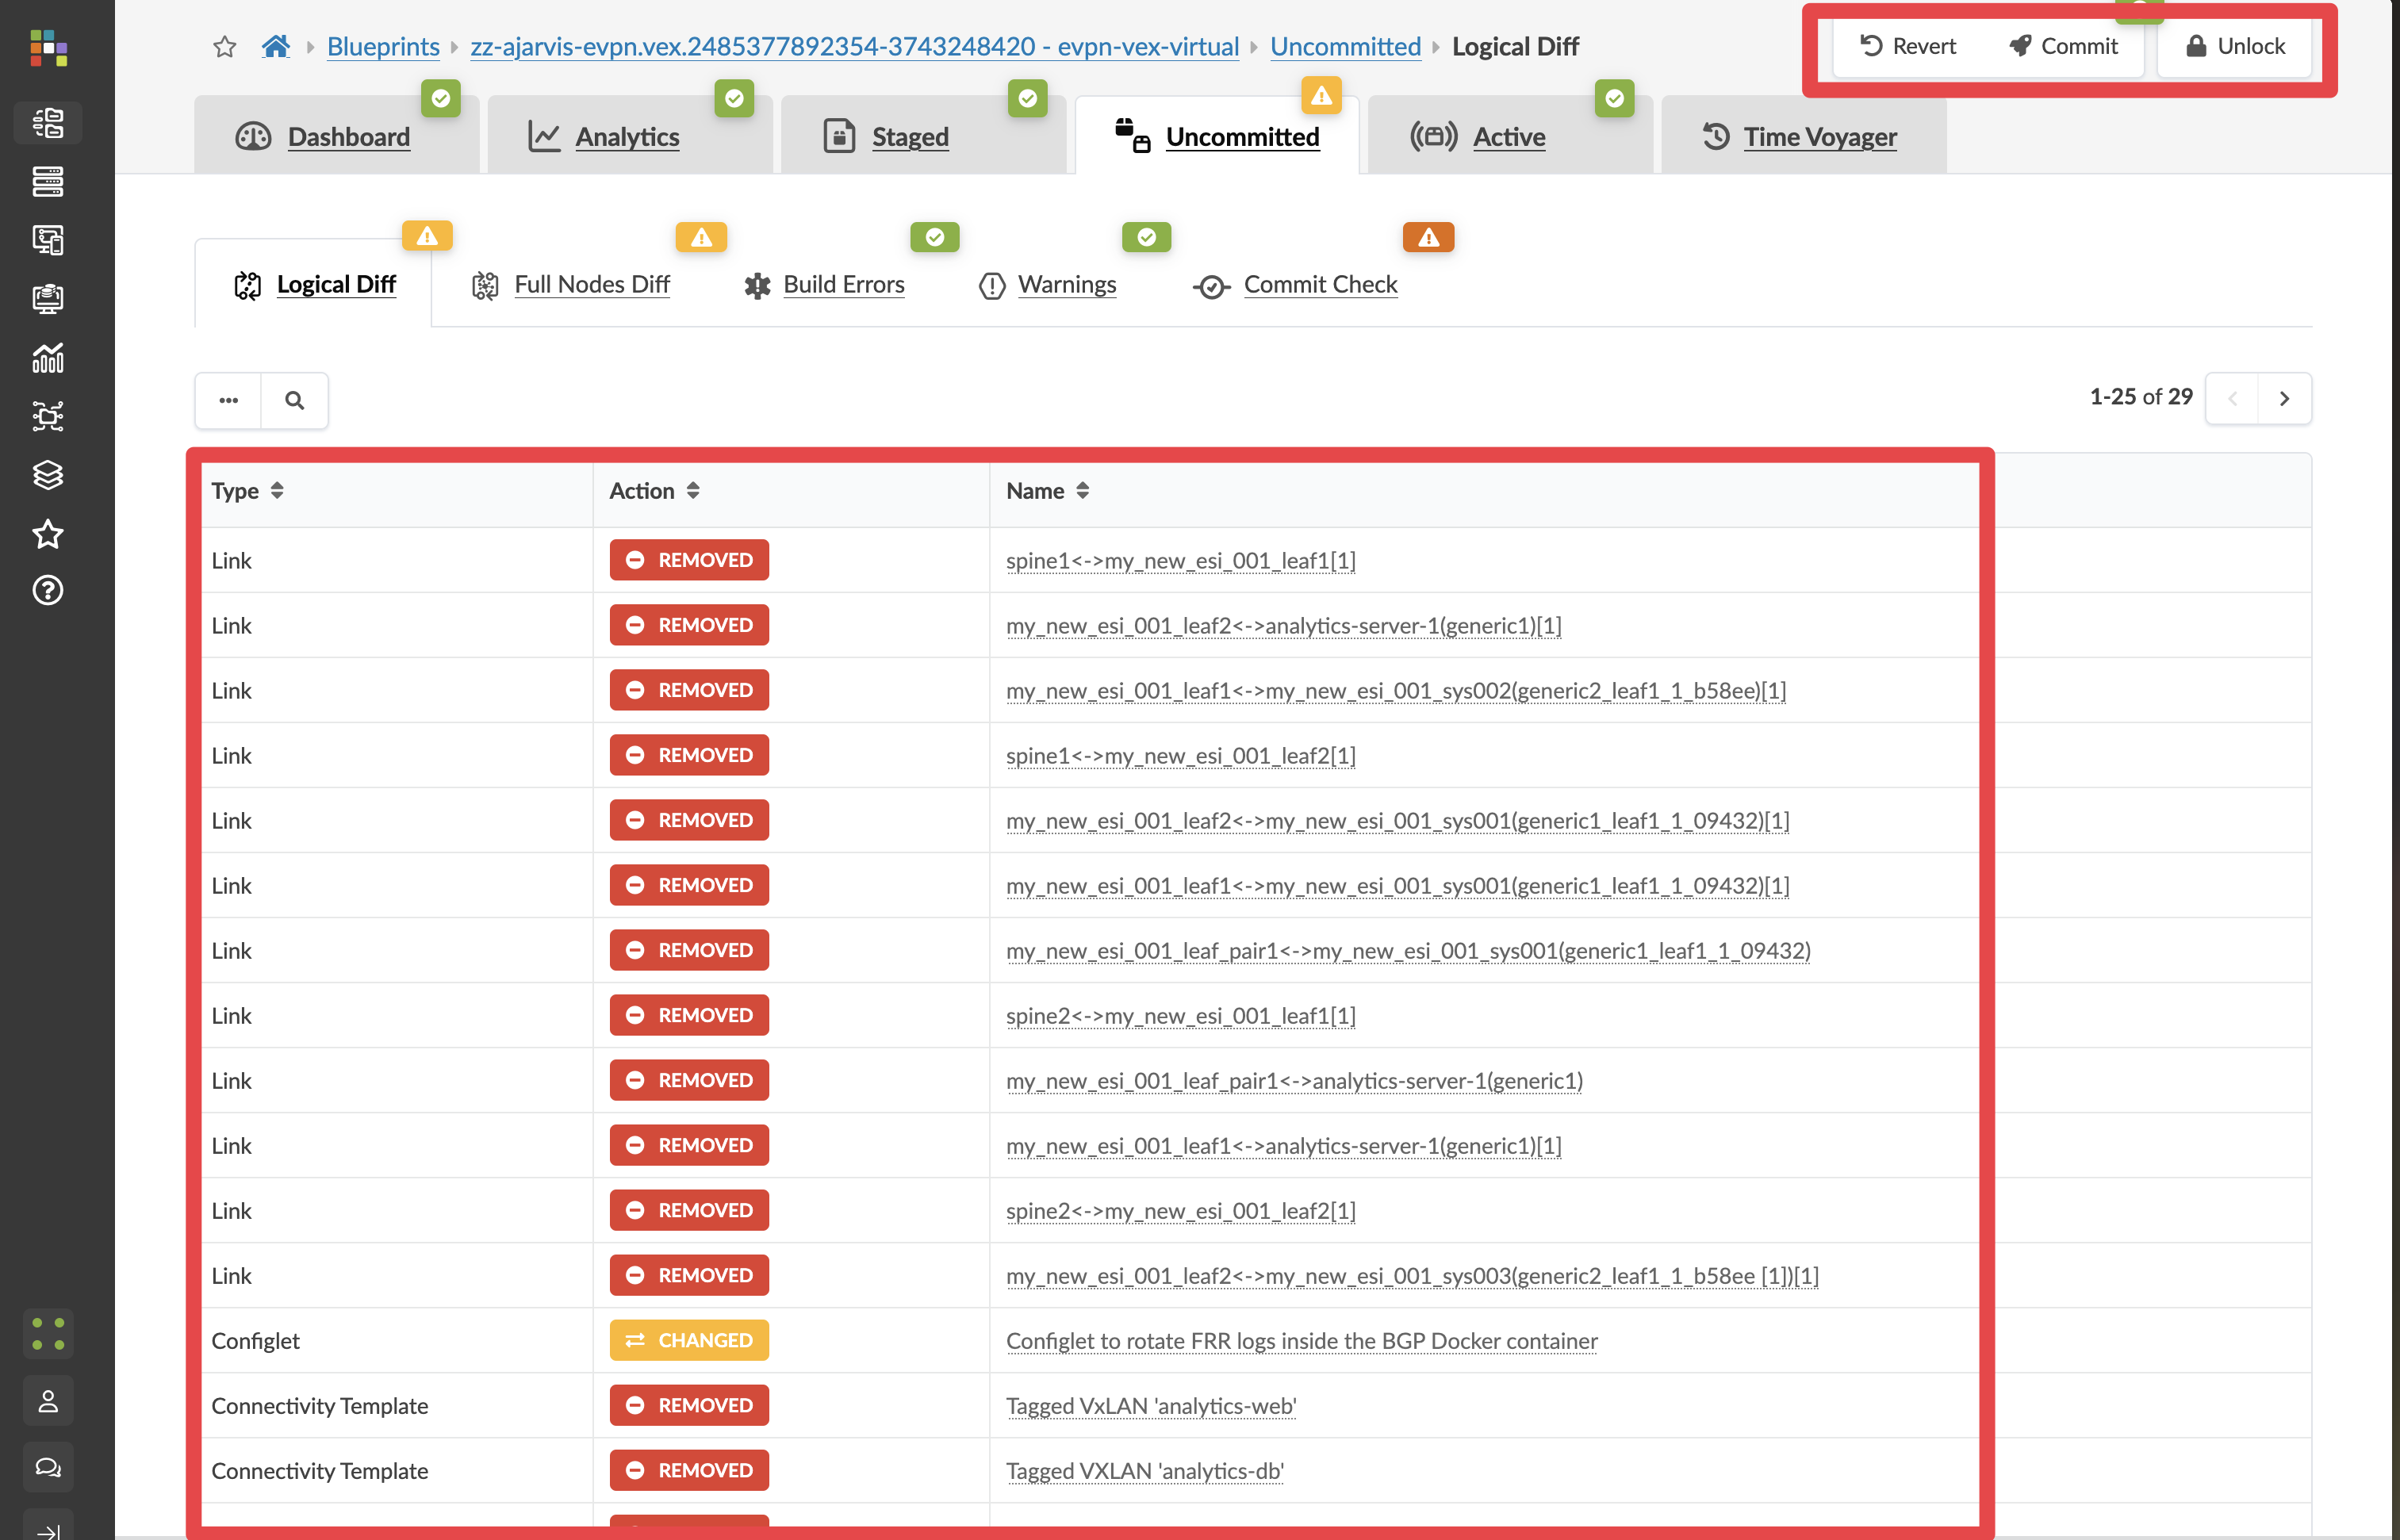
This provides a detailed view of exactly what would change if you proceeded with the rollback
Red items show what would be removed Green items show what would be added/restored
-
You can explore these differences in detail to understand the full impact of the rollback
Step 4: Choose Your Next Action
At this point, you have two options:
-
Proceed with the rollback:
-
If you want to actually roll back to this previous state, click Commit in the uncommitted tab
-
Apstra will generate and deploy all the necessary configuration changes to return your entire fabric to this previous state
-
All devices in your fabric will be updated as needed to ensure consistency
-
-
Cancel the rollback:
-
If you were just exploring or don’t want to proceed with the rollback, click the Revert button in the uncommitted tab
-
This will discard the staged changes and return you to your current active state
-
No changes will be made to your network

-
The Power of Fabric-Wide Rollbacks
What you’ve just experienced demonstrates the true power of intent-based networking and automation:
-
System-level rollback: Instead of rolling back device by device, you’re rolling back your entire fabric as a system
-
Intent preservation: The rollback maintains the integrity of your intent model
-
Comprehensive changes: Apstra automatically determines all the configuration changes needed across all devices
-
Predictable outcome: You can preview exactly what will change before committing
-
Confidence: Know that your fabric will return to a known-good state
This capability is invaluable for:
-
Recovering from failed changes or misconfigurations
-
Temporarily reverting for troubleshooting
-
Comparing different network states
-
Training and exploration without risk
What You’ve Learned
In this Test Drive, you’ve explored Apstra’s powerful capabilities across the network lifecycle:
-
Design: Modelling your network with rack types and templates
-
Deploy: Implementing physical and logical changes to your fabric
-
Operate: Monitoring network health with intent-based analytics
-
Evolve: Safely making and rolling back changes using Time Voyager
You’ve seen how Apstra’s intent-based approach transforms complex networking tasks into simple, predictable operations that reduce risk and save time.
Thank you for participating in this Apstra Test Drive! We hope you’ve gained valuable insights into how Apstra can revolutionise your data centre operations.