Using The Apstra API Docs
Swagger API Authorization
Authorizing the Swagger UI
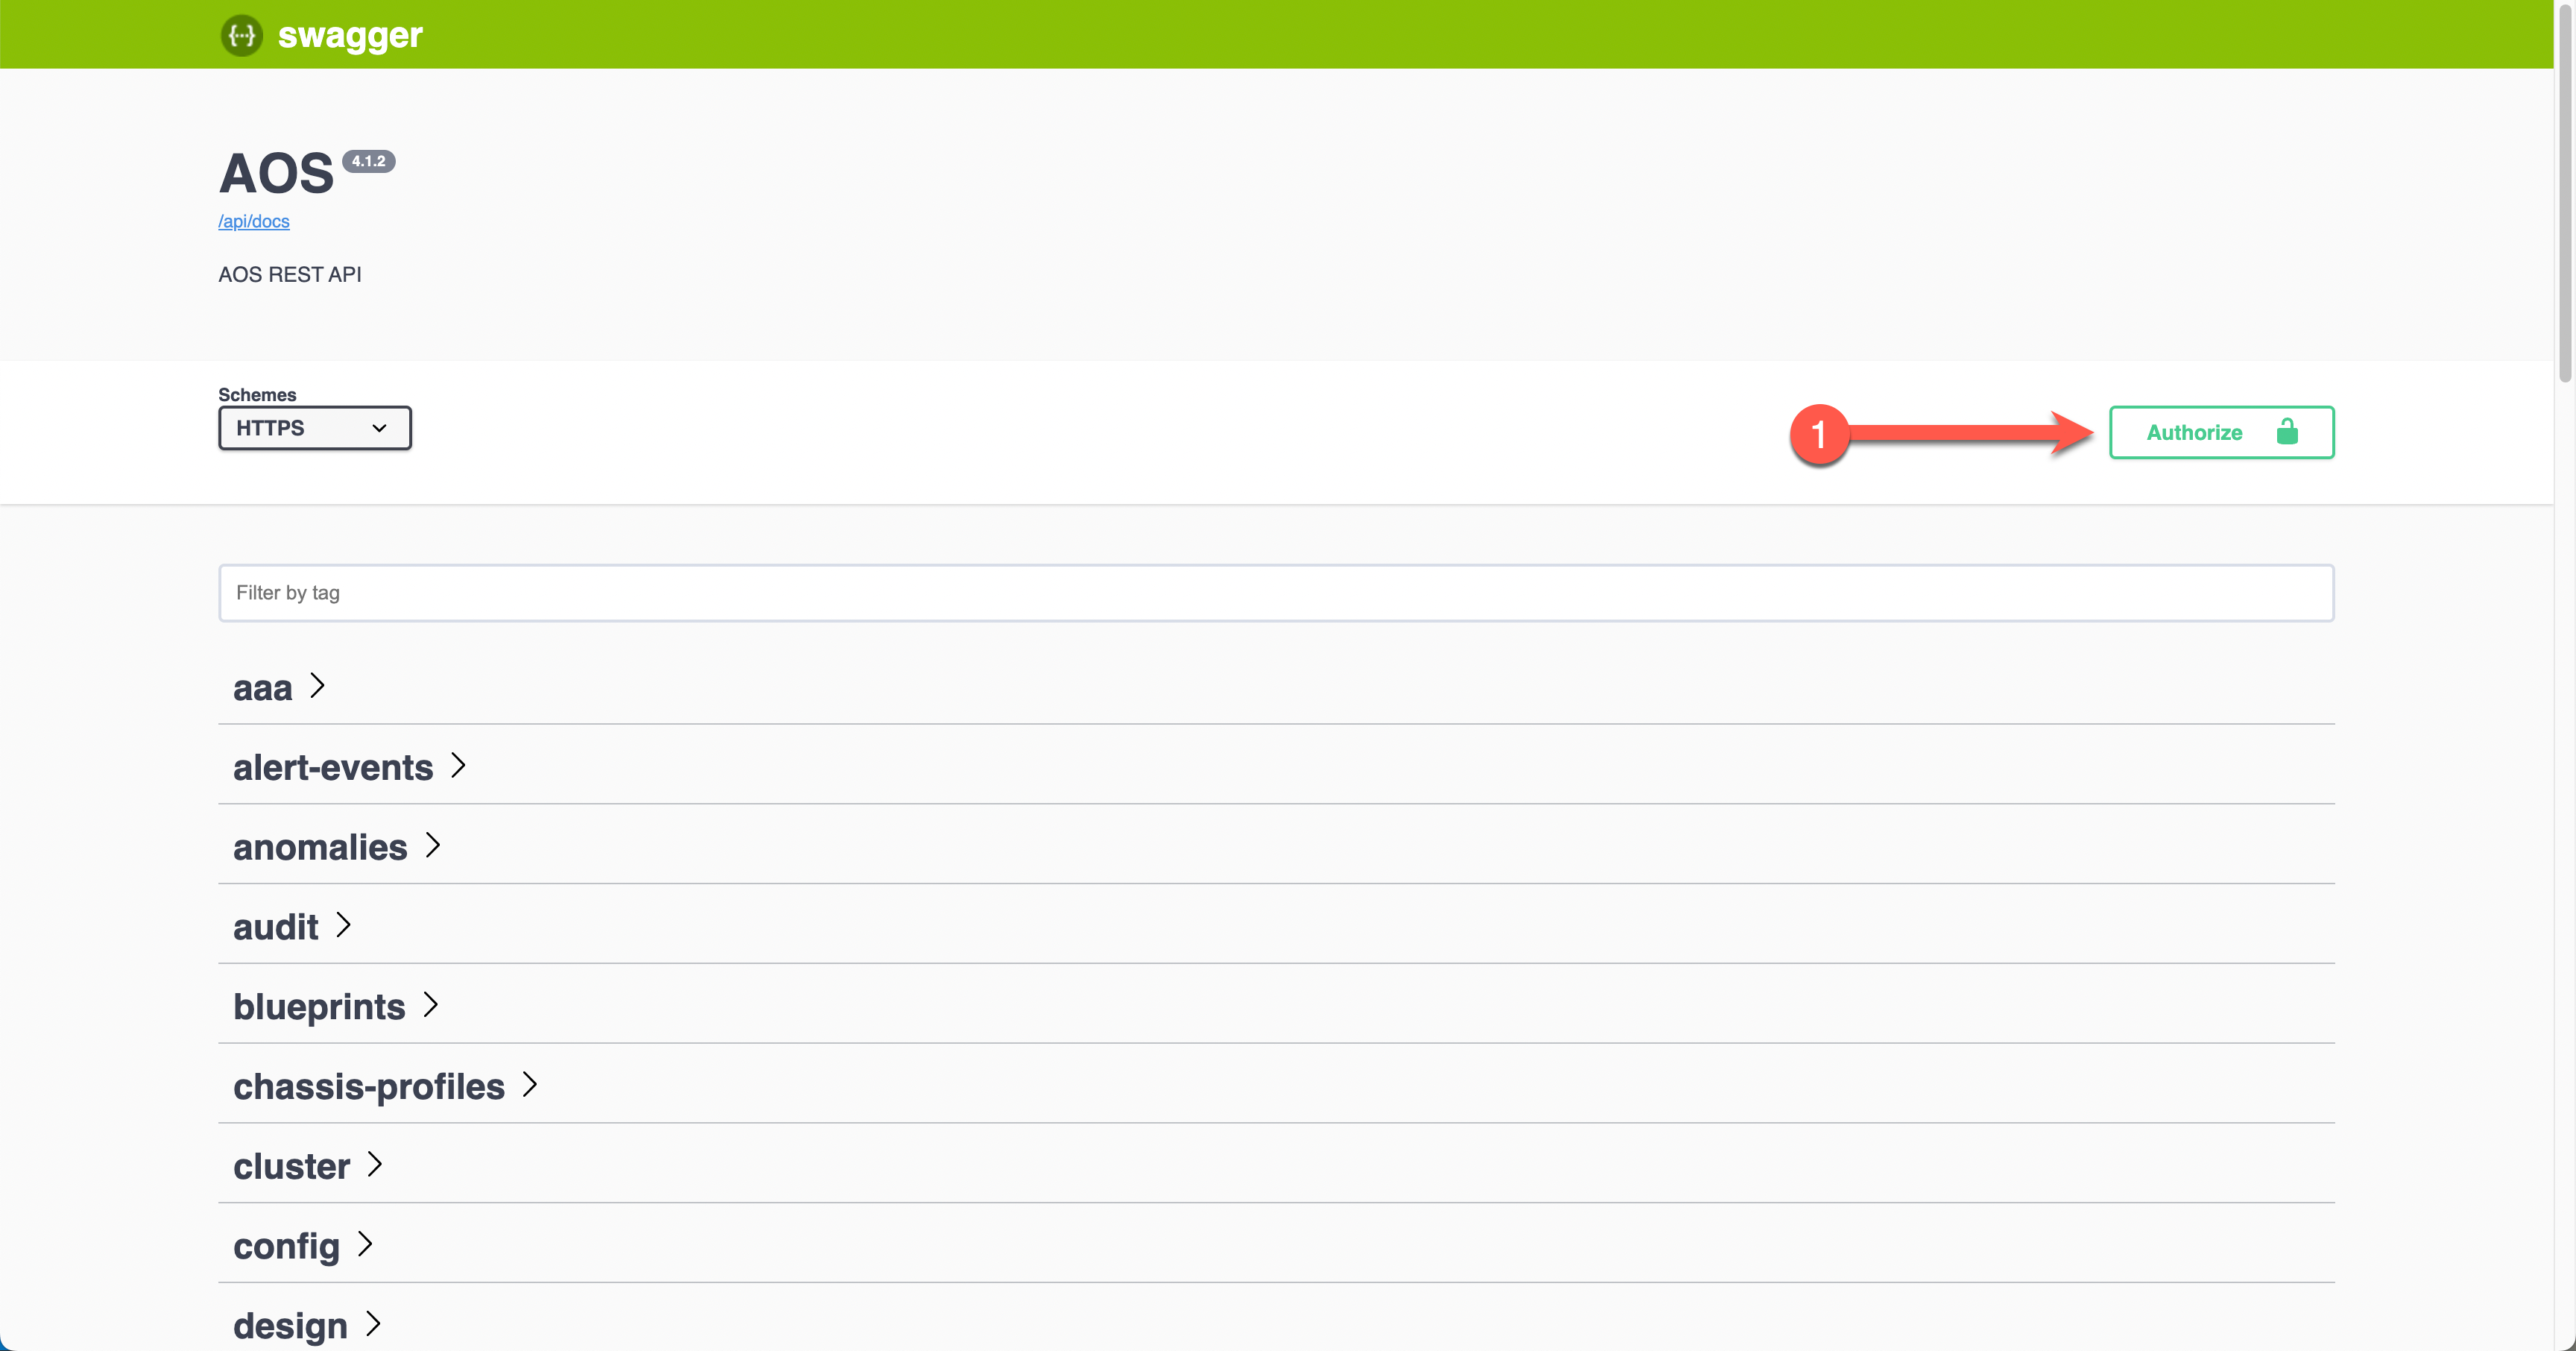
The easiest way to start using the API and looking at the different returns is using the Swagger UI directly, as you did when generating the API token. To do this, we first need to tell the Swagger UI about our API token so it can be used.
| Swagger does not automatically use the returned API token from the previous section. This needs to be added manually. |
The first step to adding the API token is at the top of the Swagger UI page, clicking on Authorize.
-
Step 1 click
Authorize.
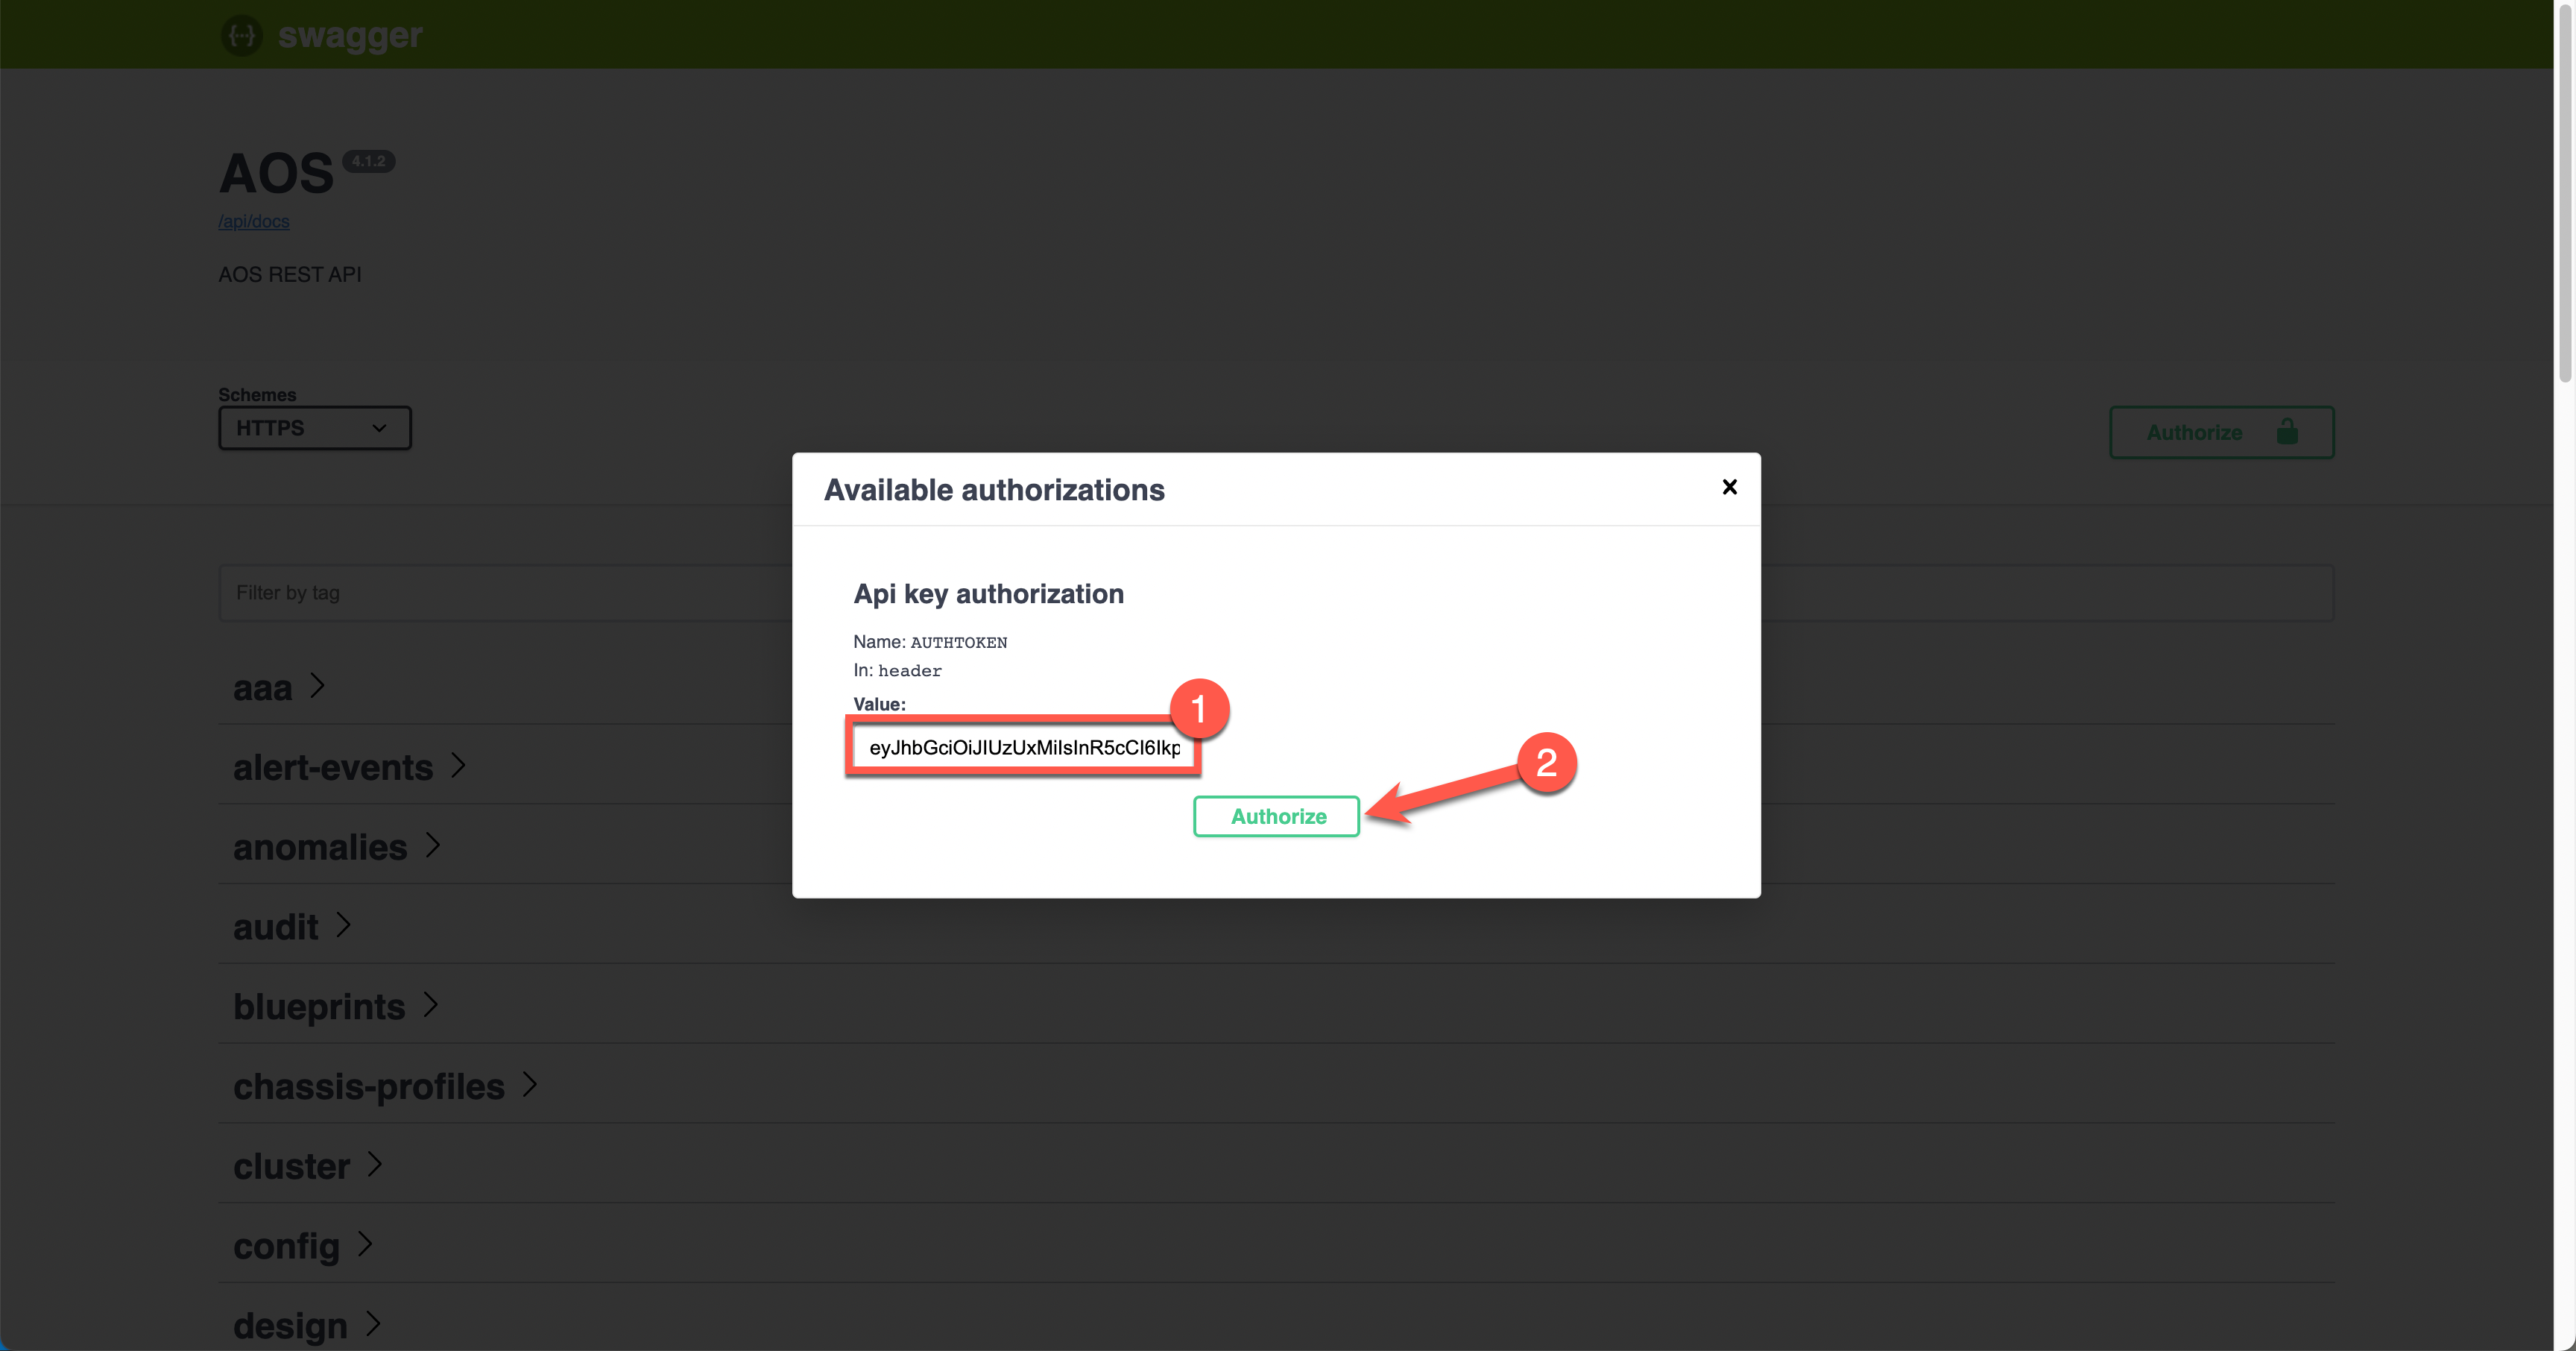
In the box highlighted, add the API token that you generated in the last lab. Once added click Authorize and close the popup.
-
Step 1 paste in your API token generated in the previous lab.
Your API key will be all the characters inside the "" marks. Make sure not to include the "" marks.For example only the bold characters are to be copied "Qdsfre4F…" |
-
Step 2 click
Authorize.
-
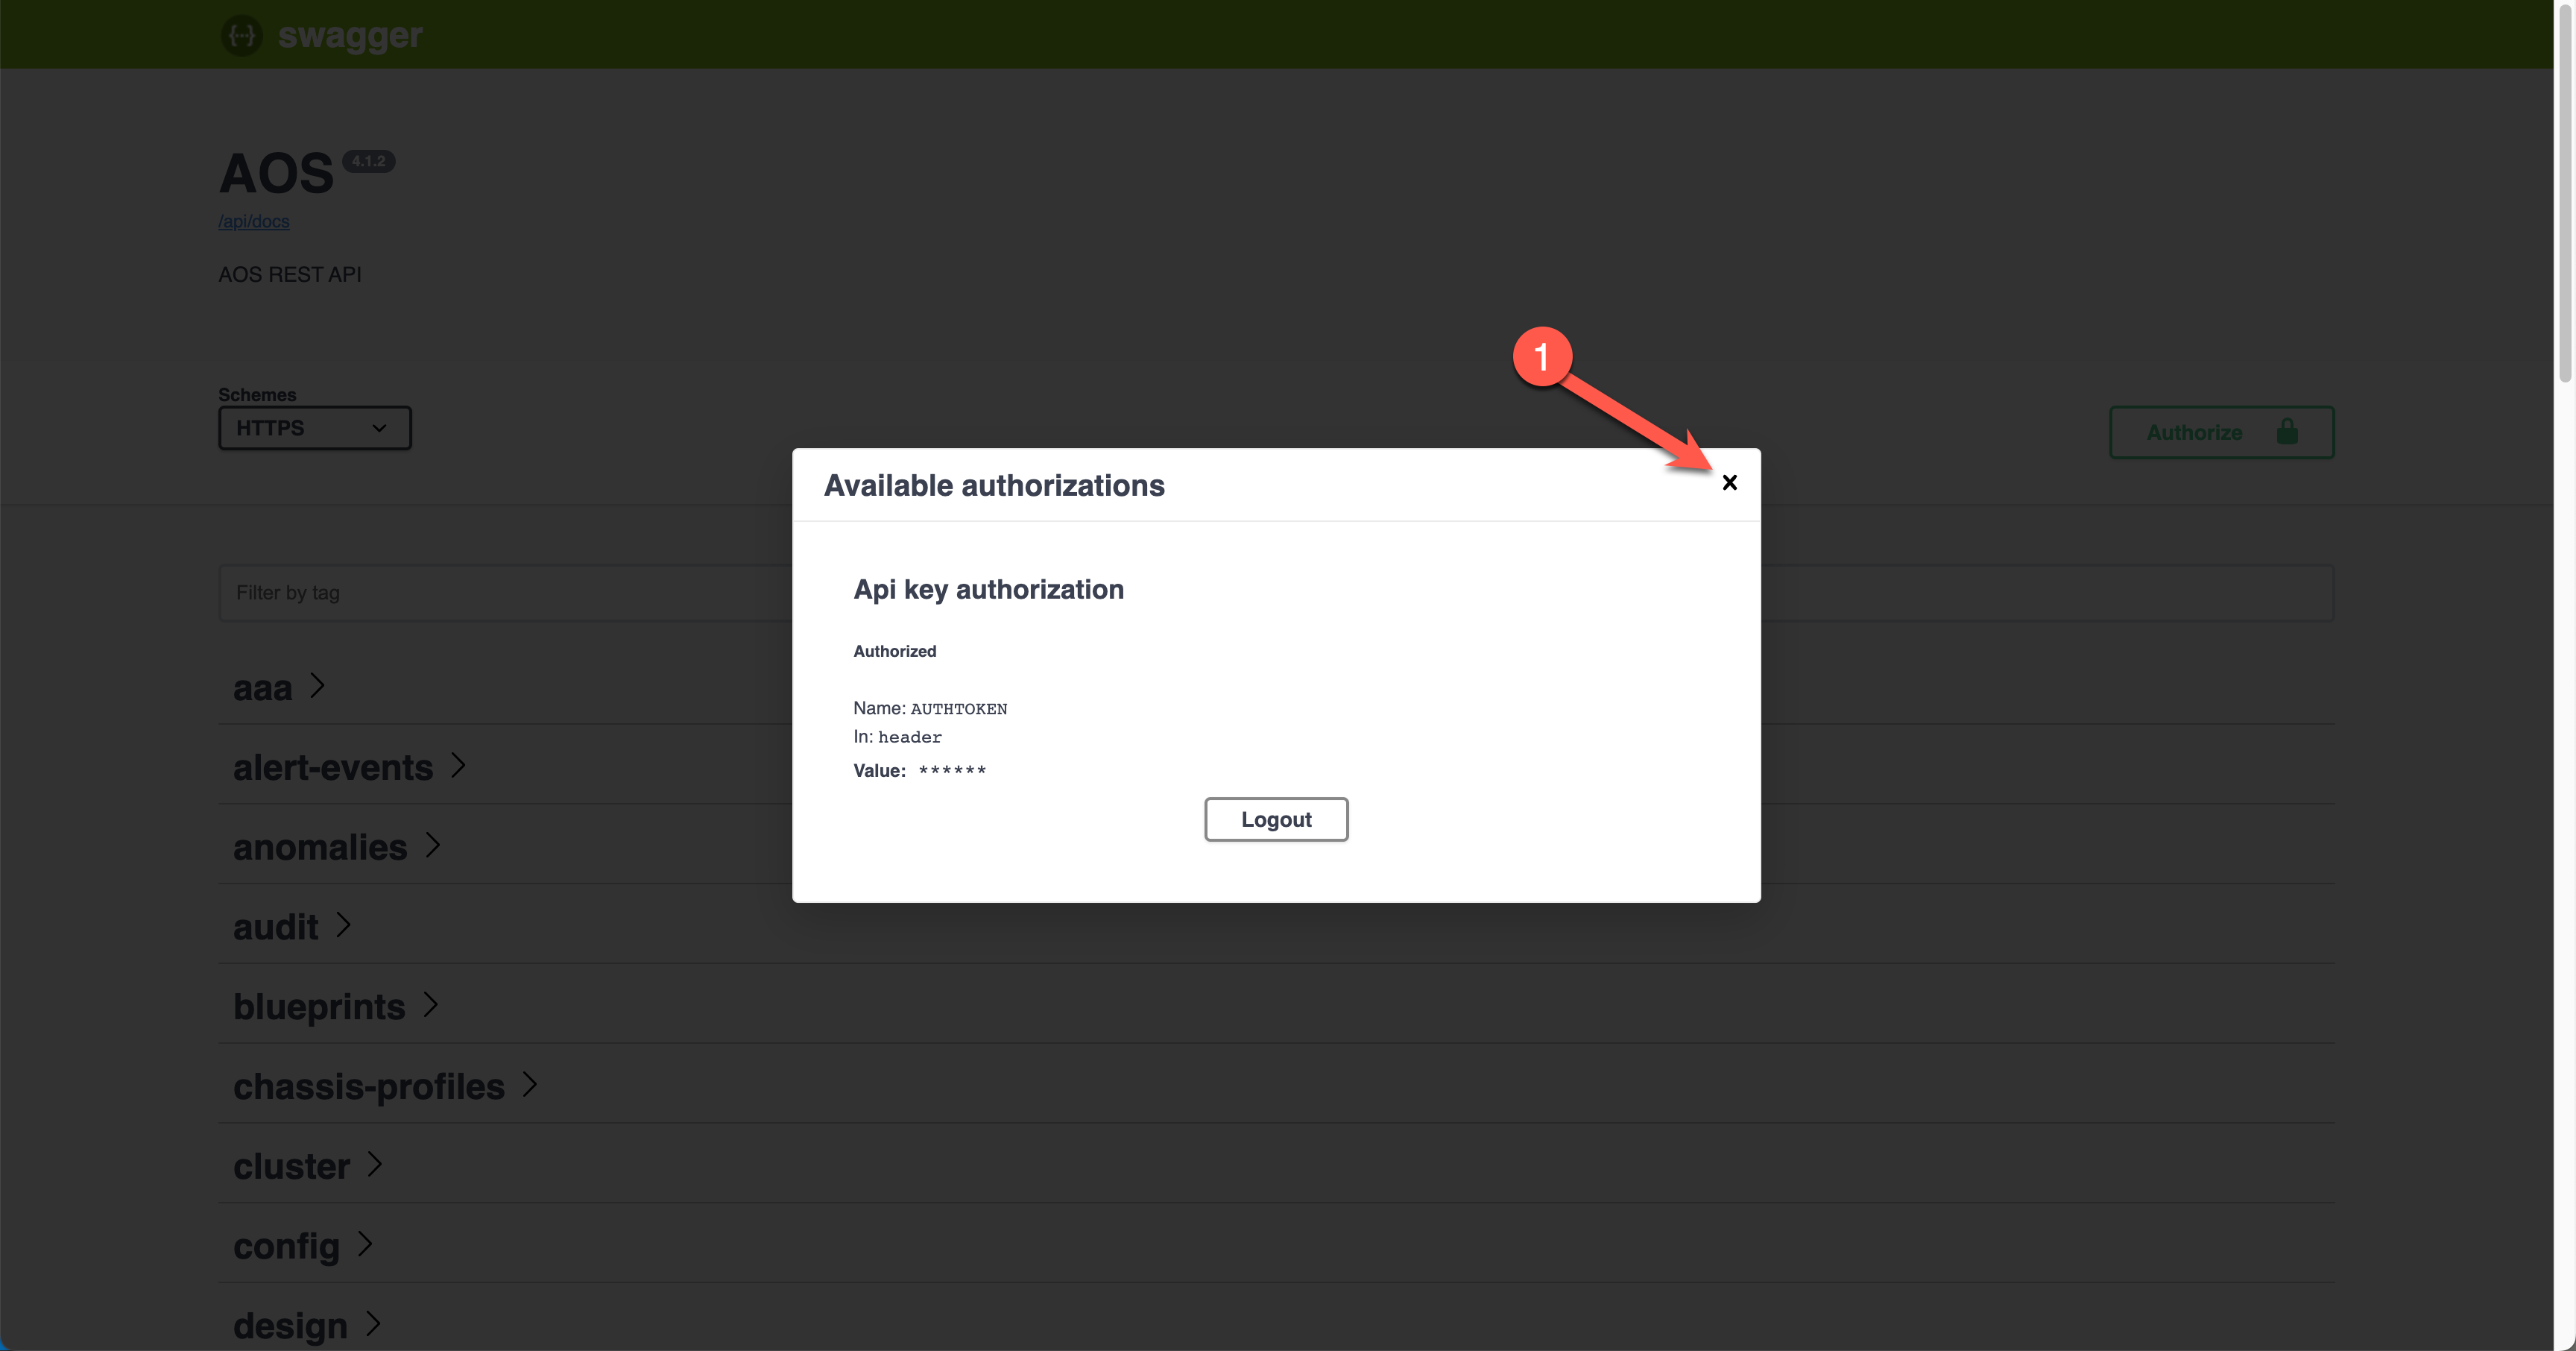
Step 1 click the cross at the top.
|
Stop, Have A Go
Using the steps just shown try this for yourself and that’s it! You are now ready to explore the API.
|
You have now successfully authorized the Swagger UI to use Apstra’s API. You are now free to explore the API, the rest of the lab will guide you through some simple tasks you can do. These are just to get you going and comfortable with the API.