Apstra CloudLabs Lab Guides
Overview
Welcome to the Cloudlabs documentation and lab guide site! Are you ready to take your Apstra experience to the next level? We’re excited to guide you through the journey of mastering Apstra.
We’ve curated a collection of interactive lab guides that cover a wide range of topics related to Apstra, to help you learn by doing. Each guide is designed to walk you through various lab scenarios, and provide an in-depth understanding of the theoretical principles. After all, as the famous quote goes:
"I hear and I forget. I see and I remember. I do and I understand."
If you’re new to Cloudlabs, start with our Getting Started with Cloudlabs section, which will provide you with an overview of how to use CloudLabs and its features. Our interactive labs will give you the opportunity to apply the concepts you learn in real-time.
Don’t hesitate to reach out to us if you have any questions or suggestions. We’re dedicated to constantly improving our documentation and we’re always happy to help. Thank you for choosing Cloudlabs, and we are confident that our lab guides will be an invaluable resource in your journey to mastering Apstra.
Lab Guides Available
Lab Guides are shown below. They are designed to provide a guided tour of the Apstra solution and the various Reference Architectures that it includes.
Reference Design Labs
| Lab Name | Lab Scenario | Description |
|---|---|---|
Lab Guide 1-Junos |
Data Center Reference Architecture |
In these exercises, you will perform the fundamental operations needed to design and activate a data center fabric. Your Cloudlabs pod consists of Juniper vQFX switches, along with Ubuntu virtual servers. |
Lab Guide 1-Multi |
Data Center Reference Architecture |
Like the exercises above, you will define objects that represent network building-blocks. But this one uses third-party virtual devices. Apstra then uses your work to activate a powerful infrastructure. You will experience Apstra’s birds-eye visability and finger-tip control. |
Freeform Labs
| Lab Name | Lab Scenario | Description |
|---|---|---|
Lab 1-Freeform |
Freeform custom design |
These exercises walk you through creating a BGP network topology that mimicks the renowned London Underground. At the completion, you will understand how Freeform allows maximum design flexibility while maintaining the power of IBN. |
Lab 2-Resource Allocation |
Freeform Resource management |
Using the topology of the previous exercise, you will explore how to enable a Freeform Blueprint to automate resources allocation. Applying this capability to IP addressing, ASN and VNI assignment, as well as integers is a power tool for automation of complex configuration elements. |
Getting Started with Cloudlabs
User Creation
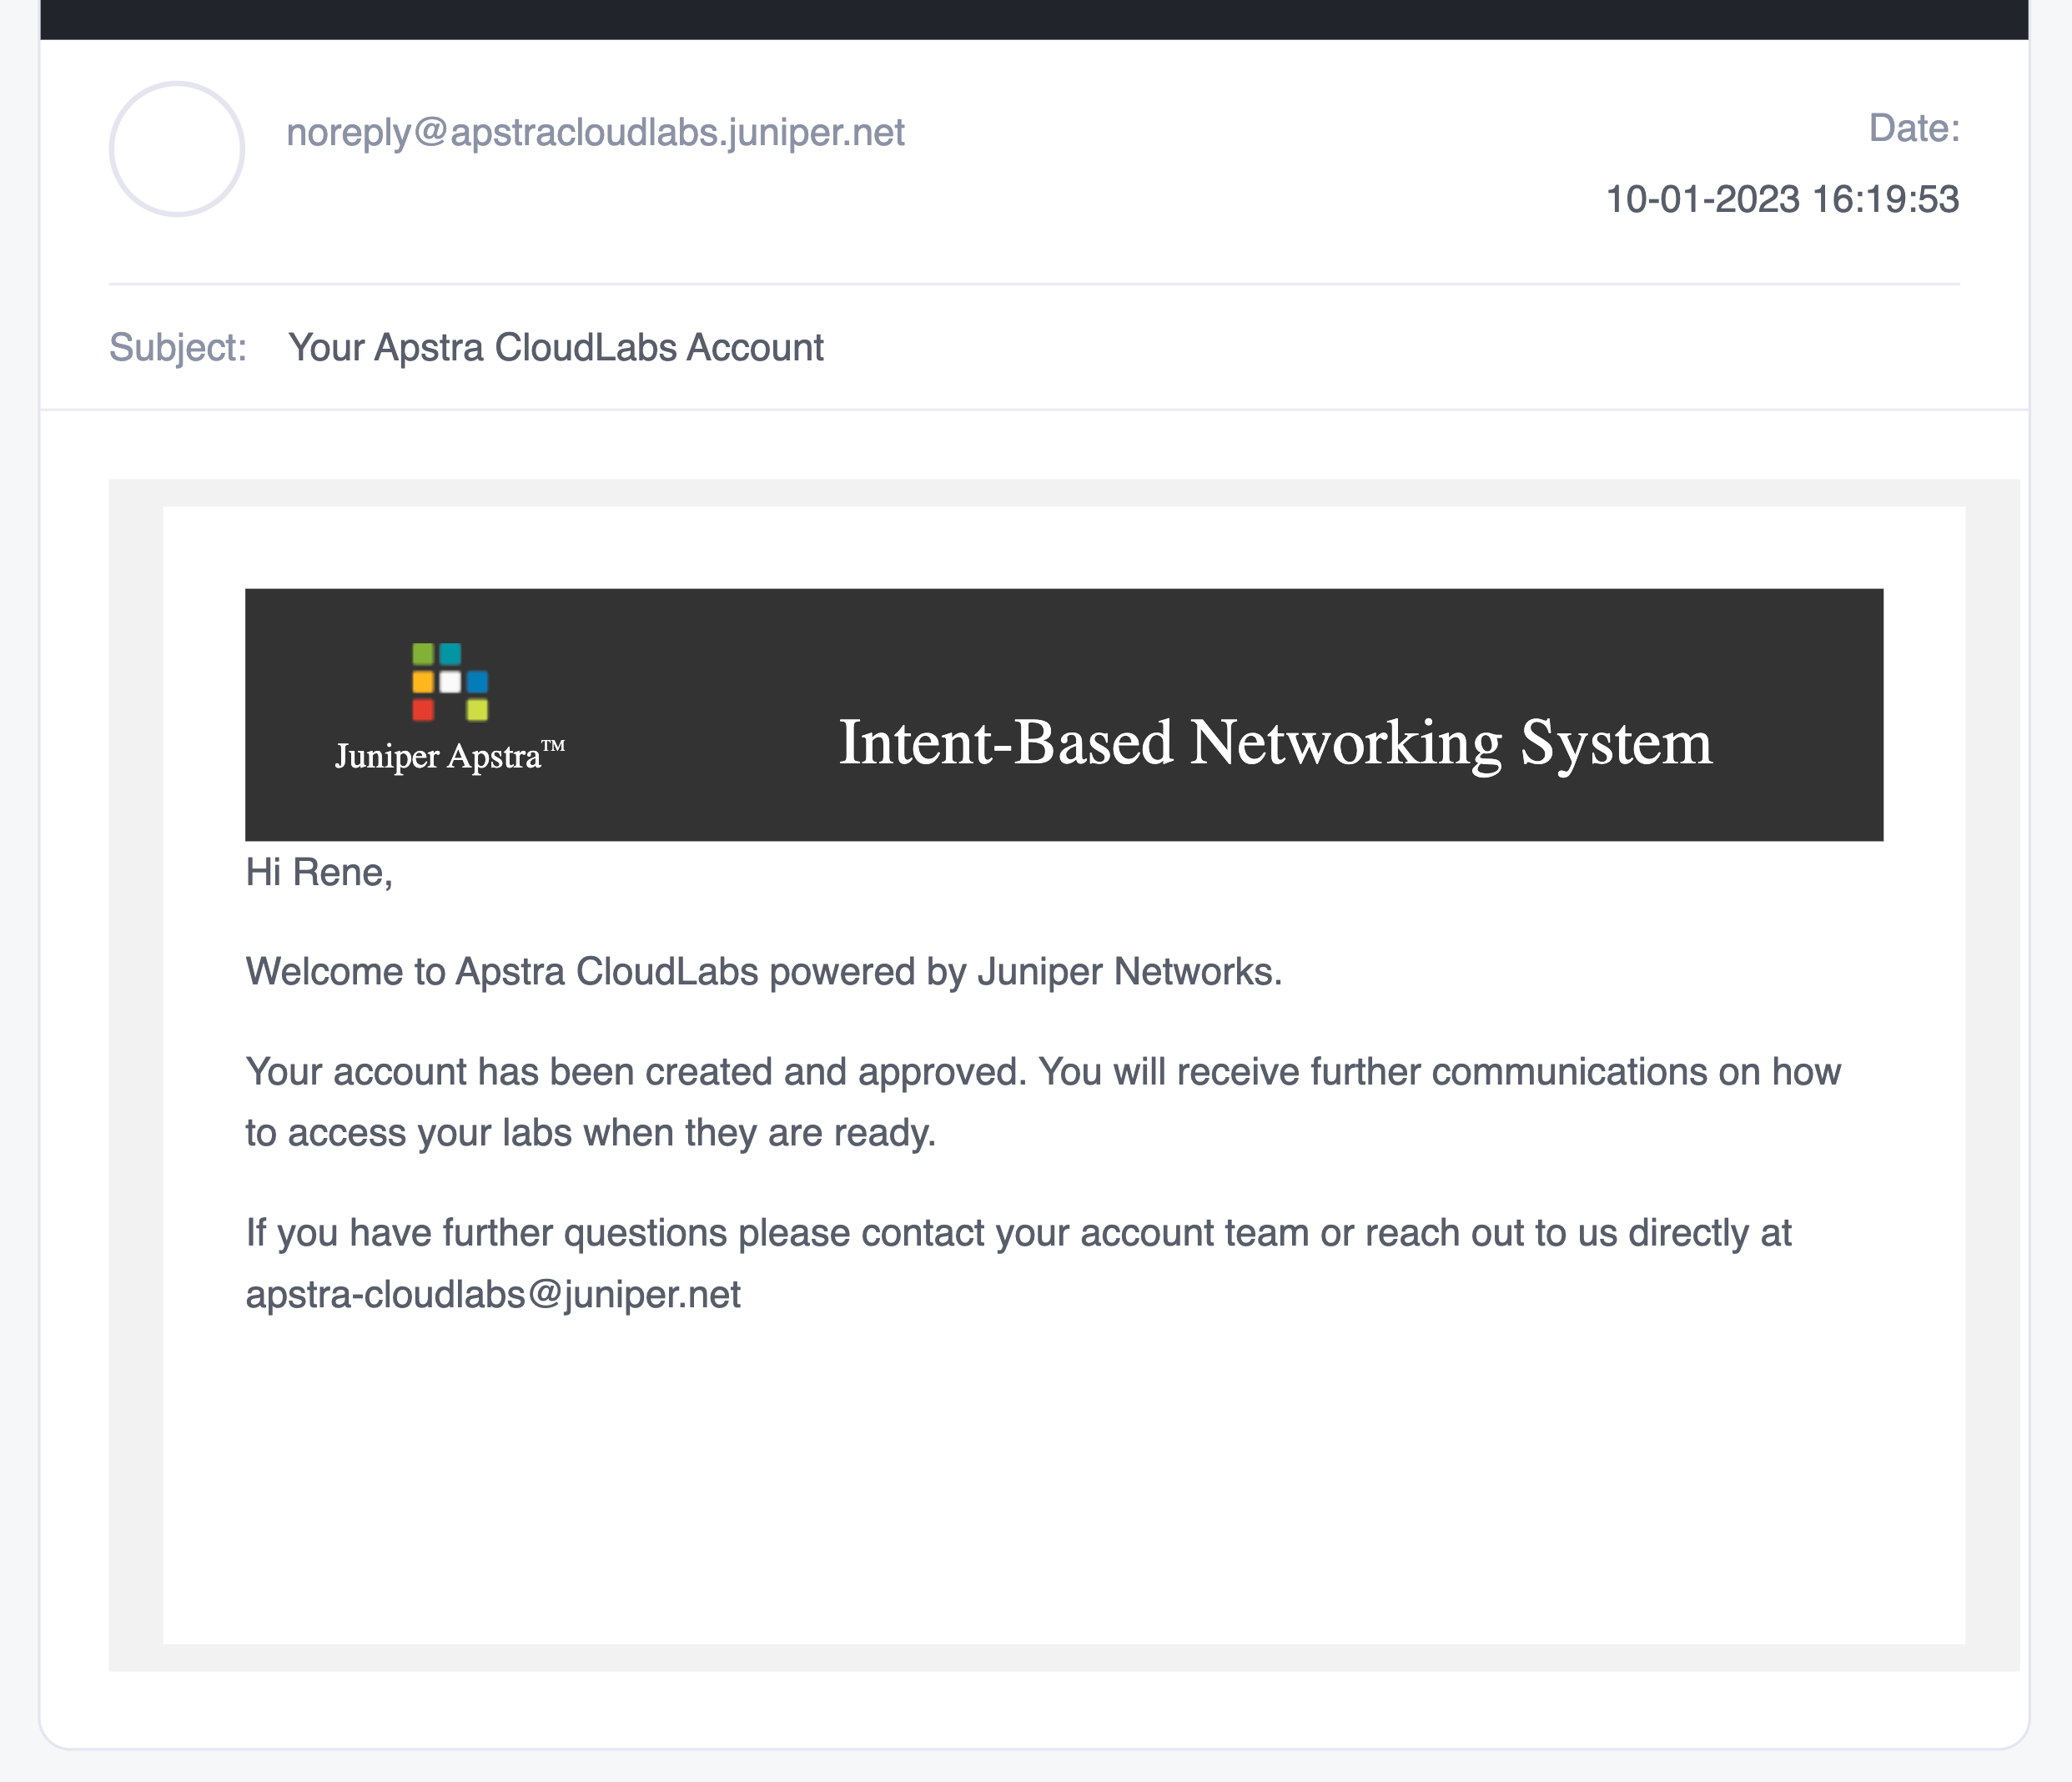
To get started with Cloudlabs, the first step is to set up a user account under your name. The process is easy, simply reach out to your Juniper account team who can request the account creation for you.
Once your account is created, you will receive a confirmation email to verify that your account has been created.
Cloudlabs Topology Creation
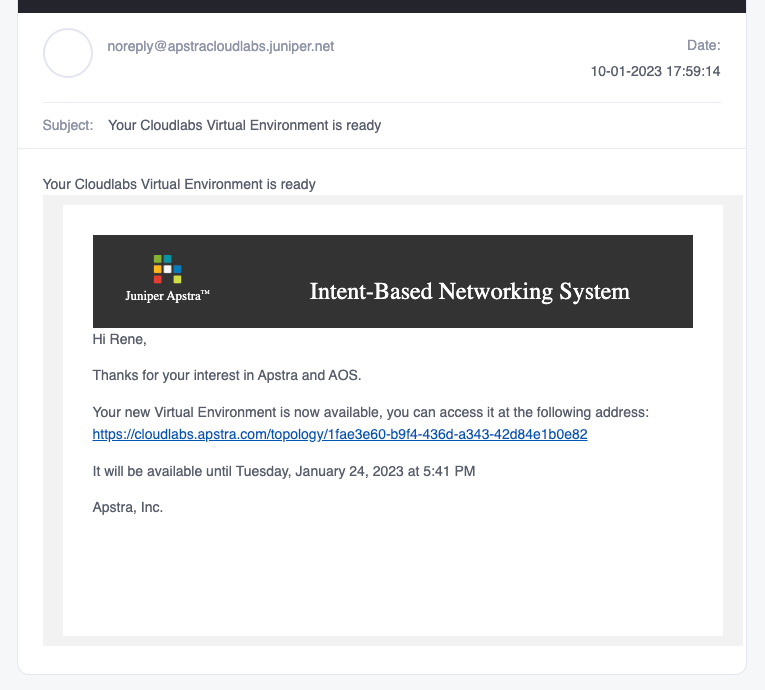
After your account is approved, you will be able to request the creation of one of our interactive and powerful virtual topologies via your Juniper account team.
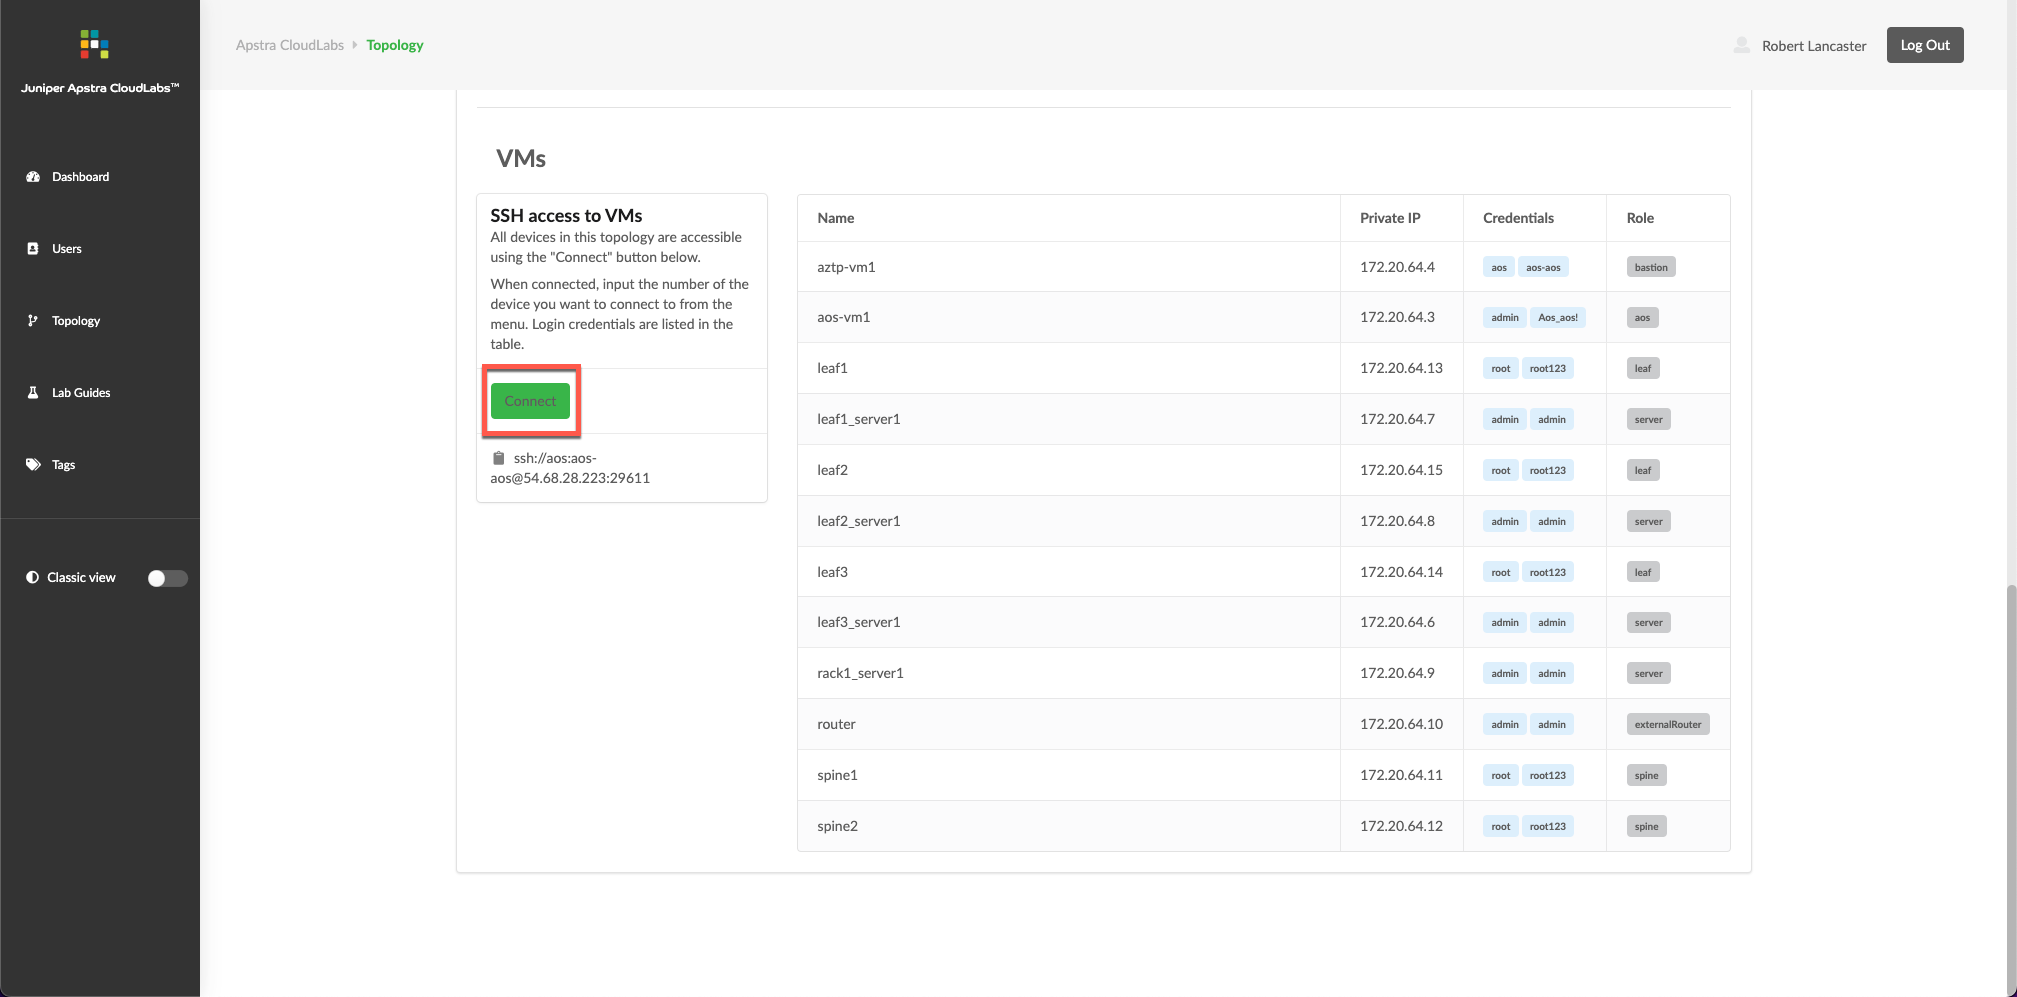
Once your topology is ready, you will be able to access it via a unique URL link sent to your email. This link will take you to your Cloudlabs Dashboard, where you can easily manage and access all aspects of your virtual lab environment. From here you can experiment, test and explore the capabilities of Apstra.
It can take 20-40 minutes for the topology and devices to be provisioned. During this time, the status shows as DEPLOYINPROGRESS and the button for accessing the Apstra Server UI is not yet functional.
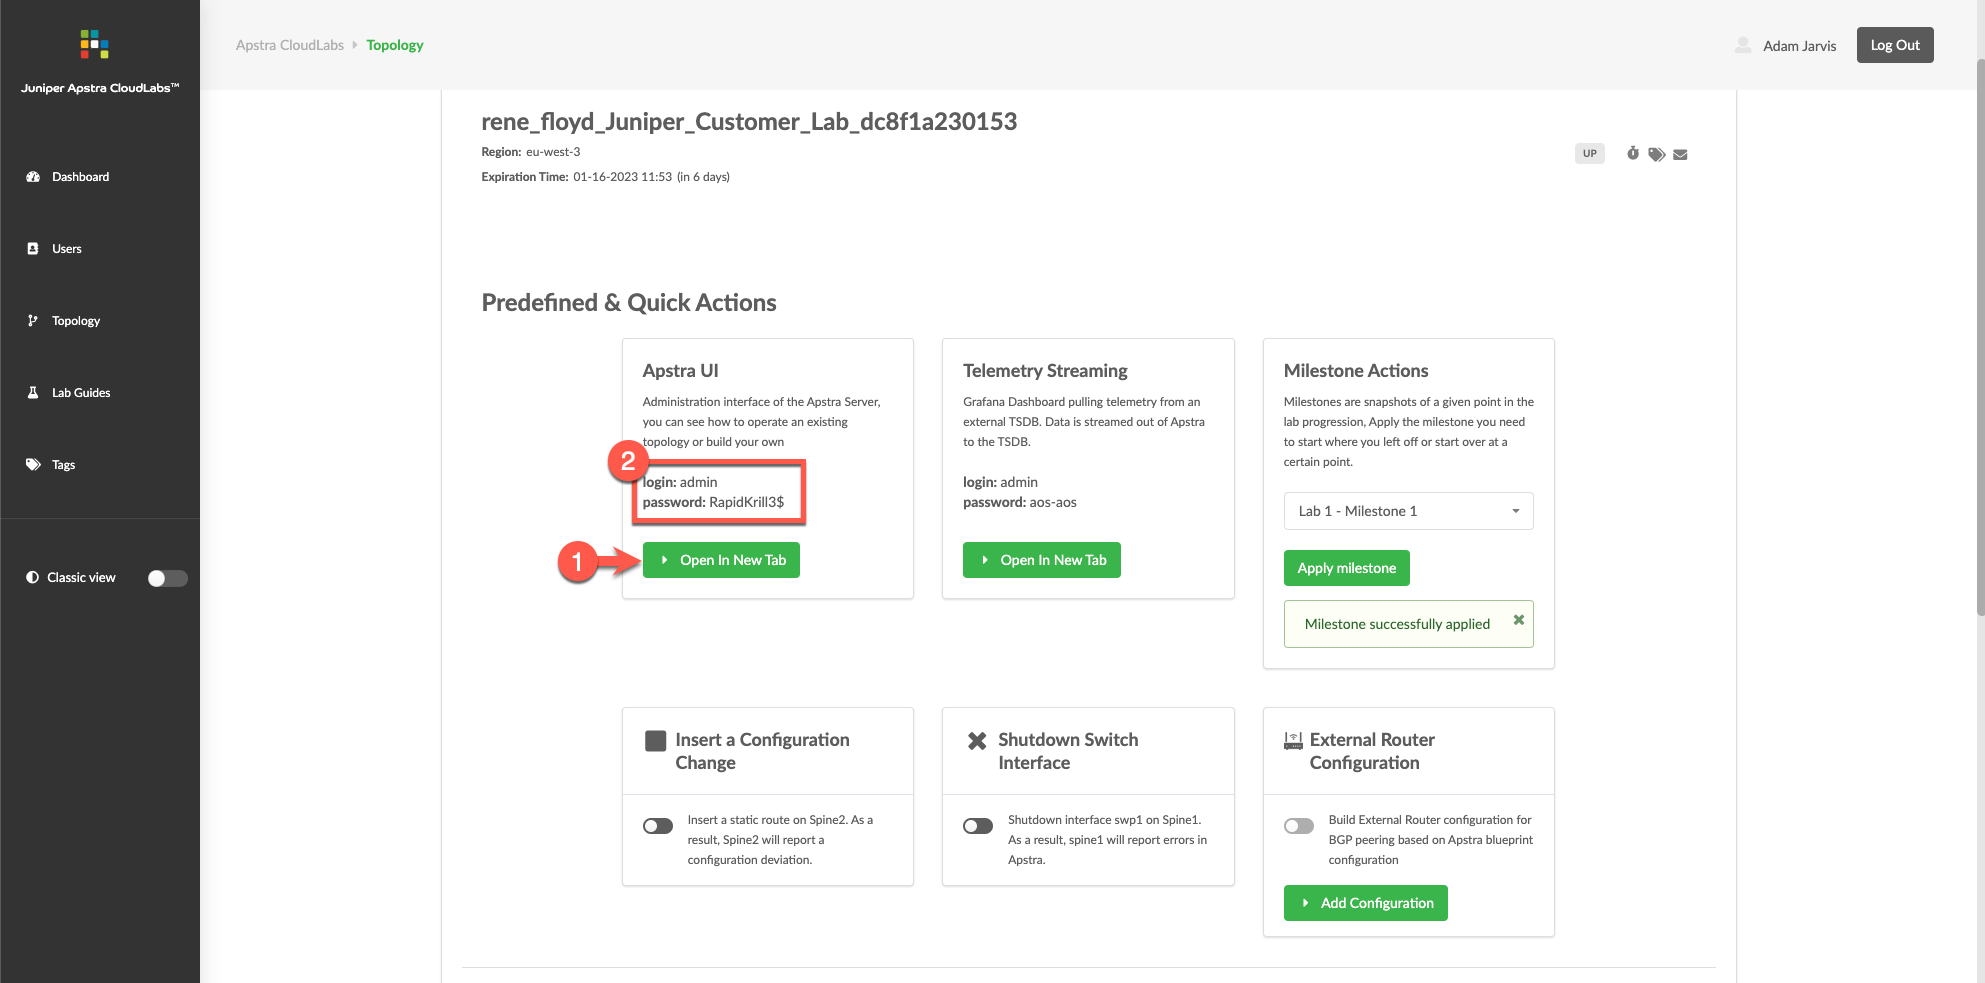
Accessing Your Topology
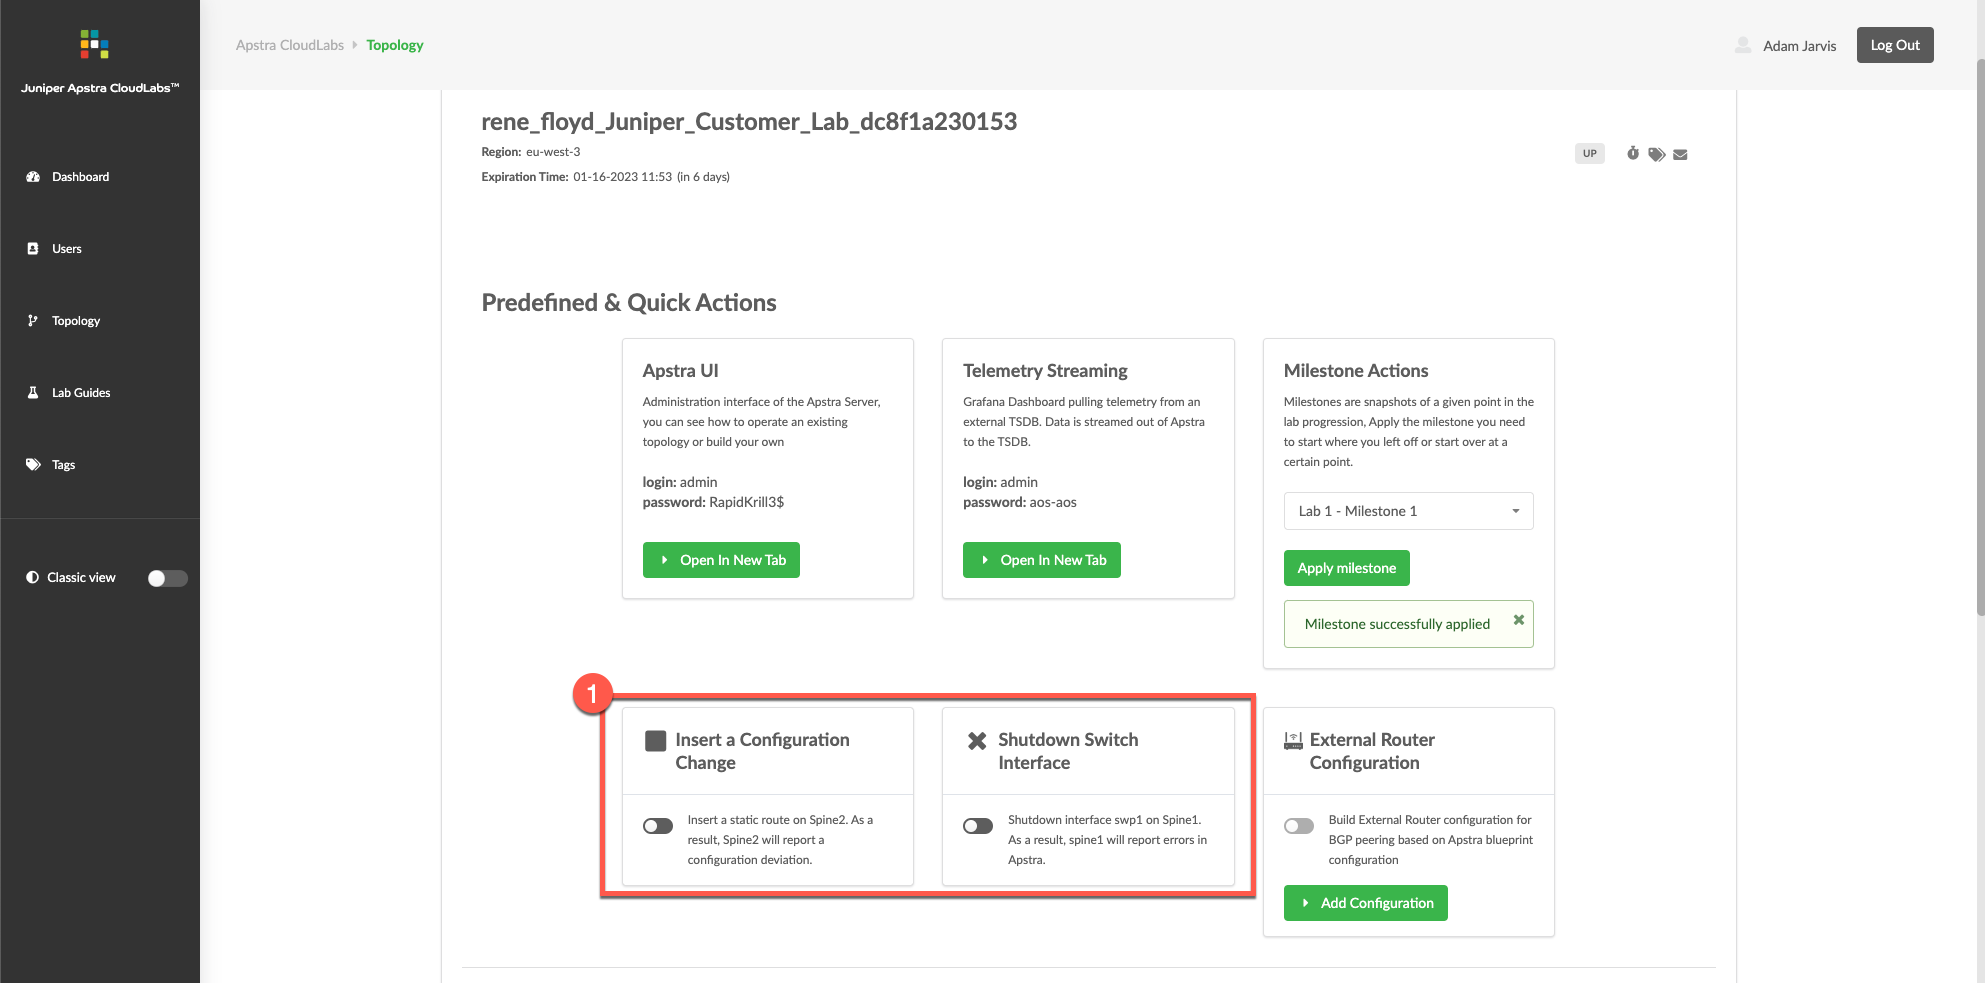
Your email link will lead you to the Apstra Cloudlabs dashboard, where you can begin your hands-on experience. To access the Apstra UI and start your interactive lab session, simply click on the Open In New Tab button and log in with the credentials provided. Start exploring and discover the full potential of Apstra!
| The button becomes functional once the status changes to UP. |
| If you receive a security warning in your browswer, click through to proceed to the site (click Advanced, then click Proceed to <apstra-server-ip> (unsafe)). The warning occurs because the SSL certificate that was generated during installation is self-signed. |