Lab Guide 1 - Multi-vendor
1. Configuration Deviation
Apstra detects when a manual configuration change occurs on a managed device and alerts you that the network has deviated from its intended state. This exercise demonstrates how Apstra detects and reports a configuration deviation.
-
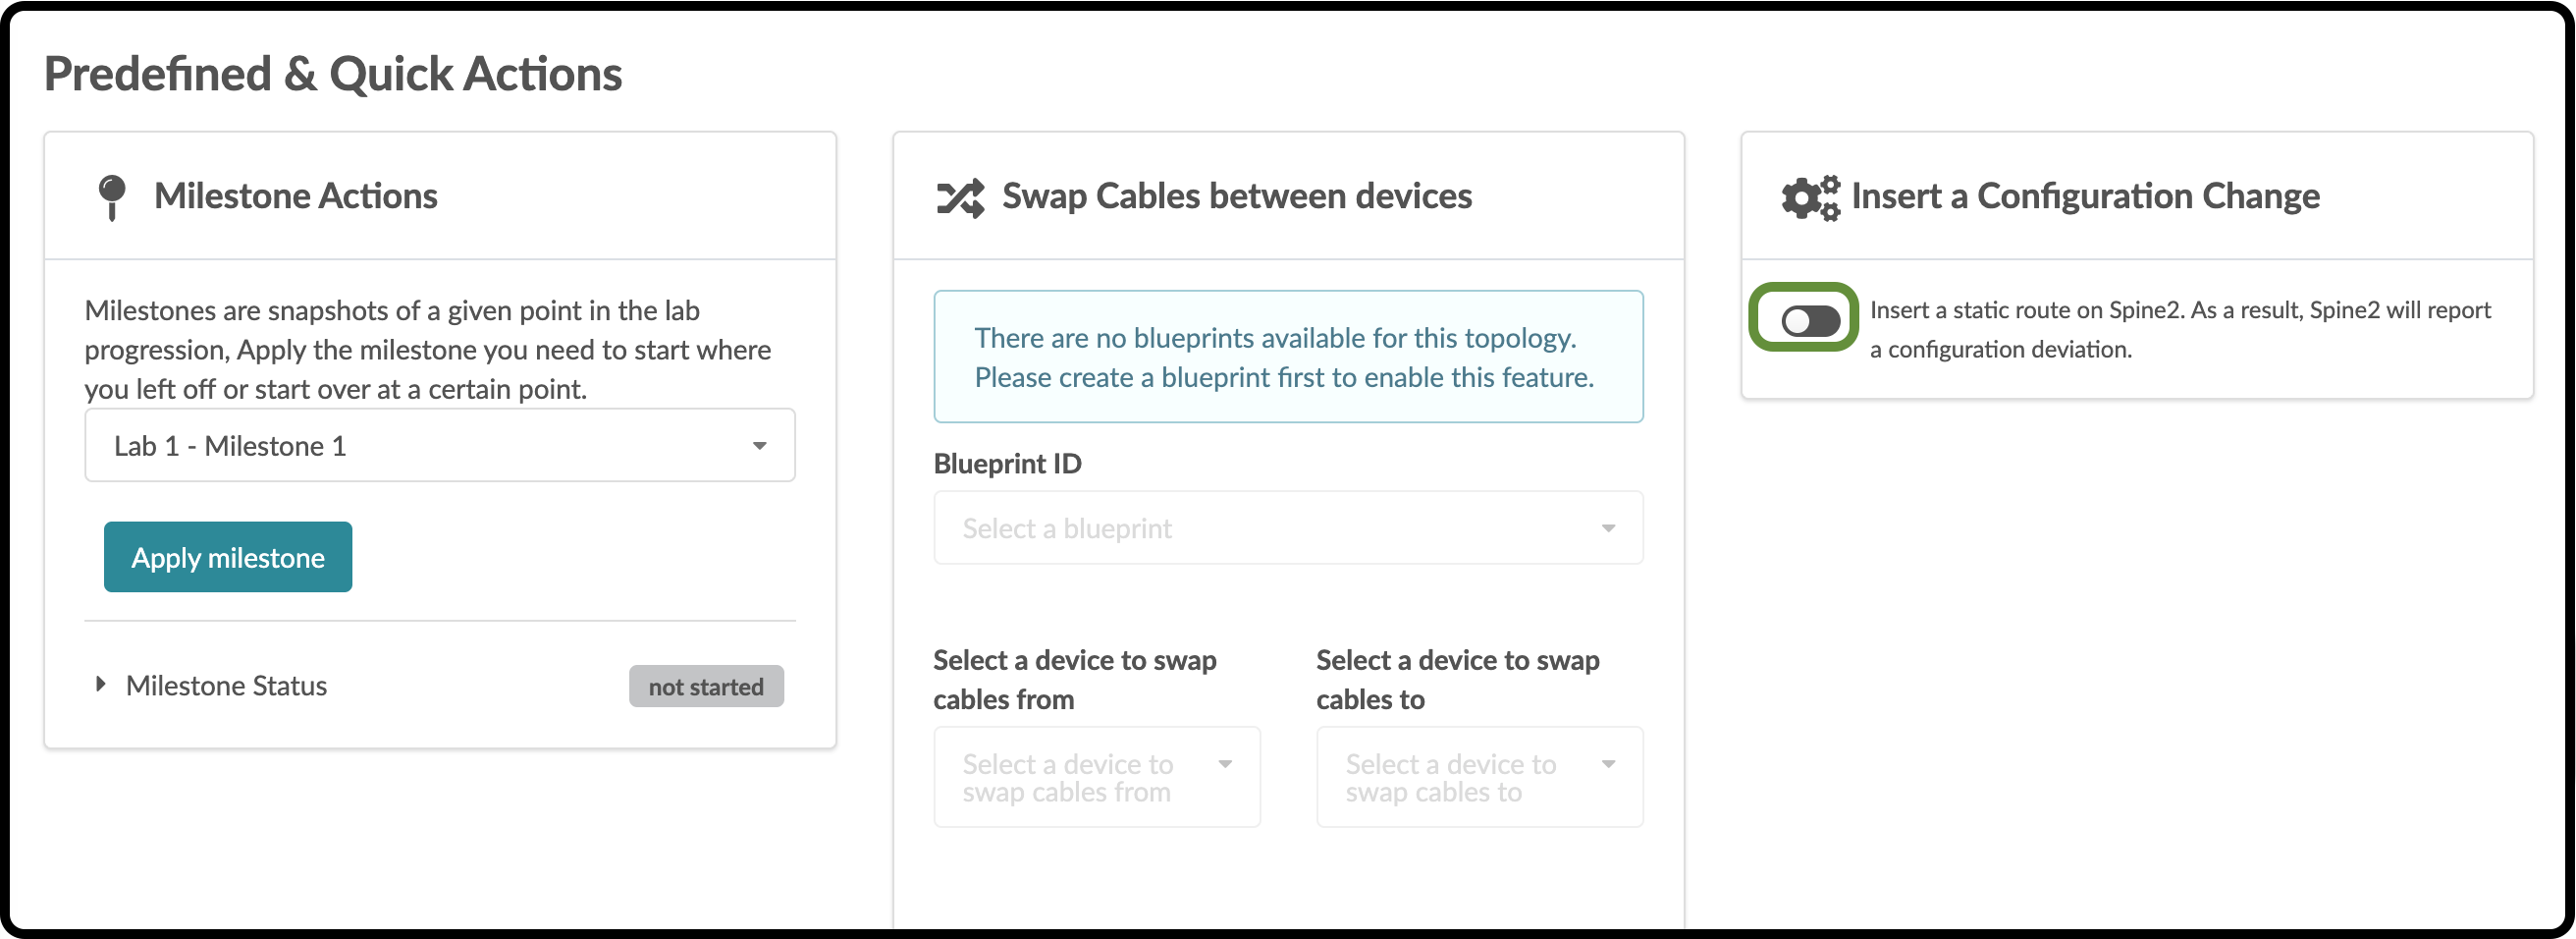
Go to the CloudLabs portal and turn on the Insert a Configuration Change toggle. The toggle turns green, and the following message appears:
-
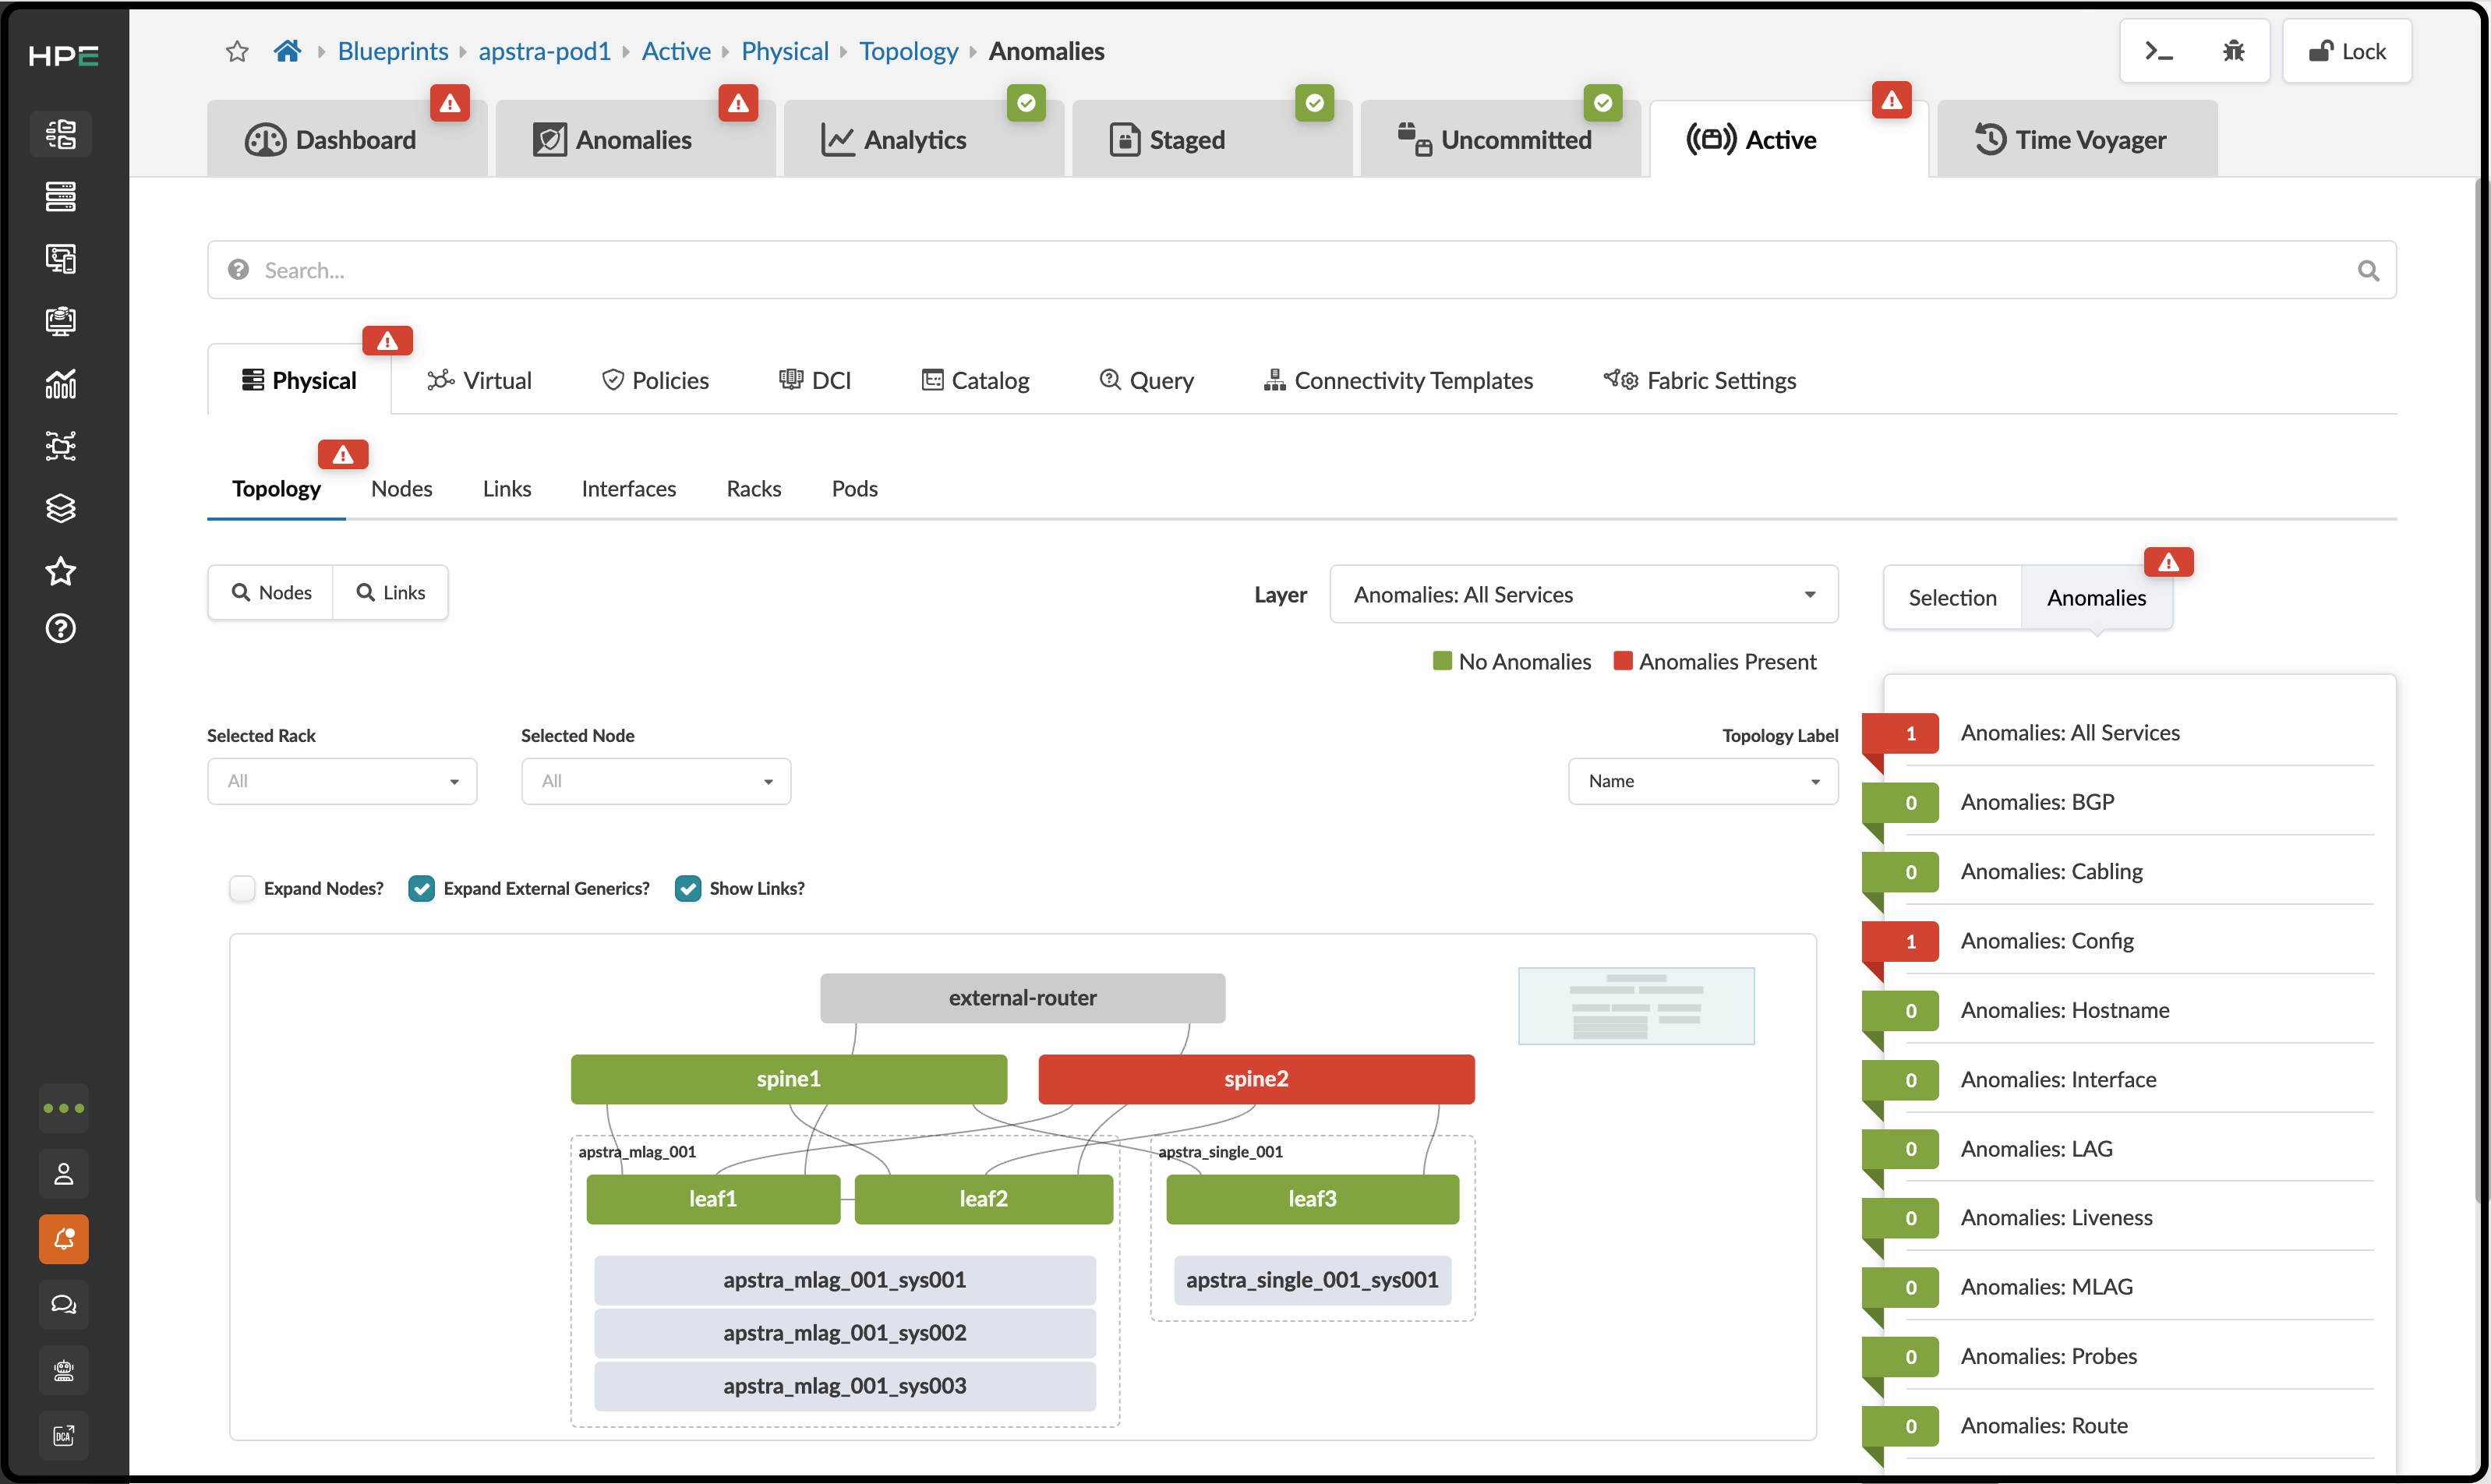
Return to the Apstra UI. After a short time, a configuration deviation anomaly appears. After reviewing the anomaly indicators, click spine2.
-
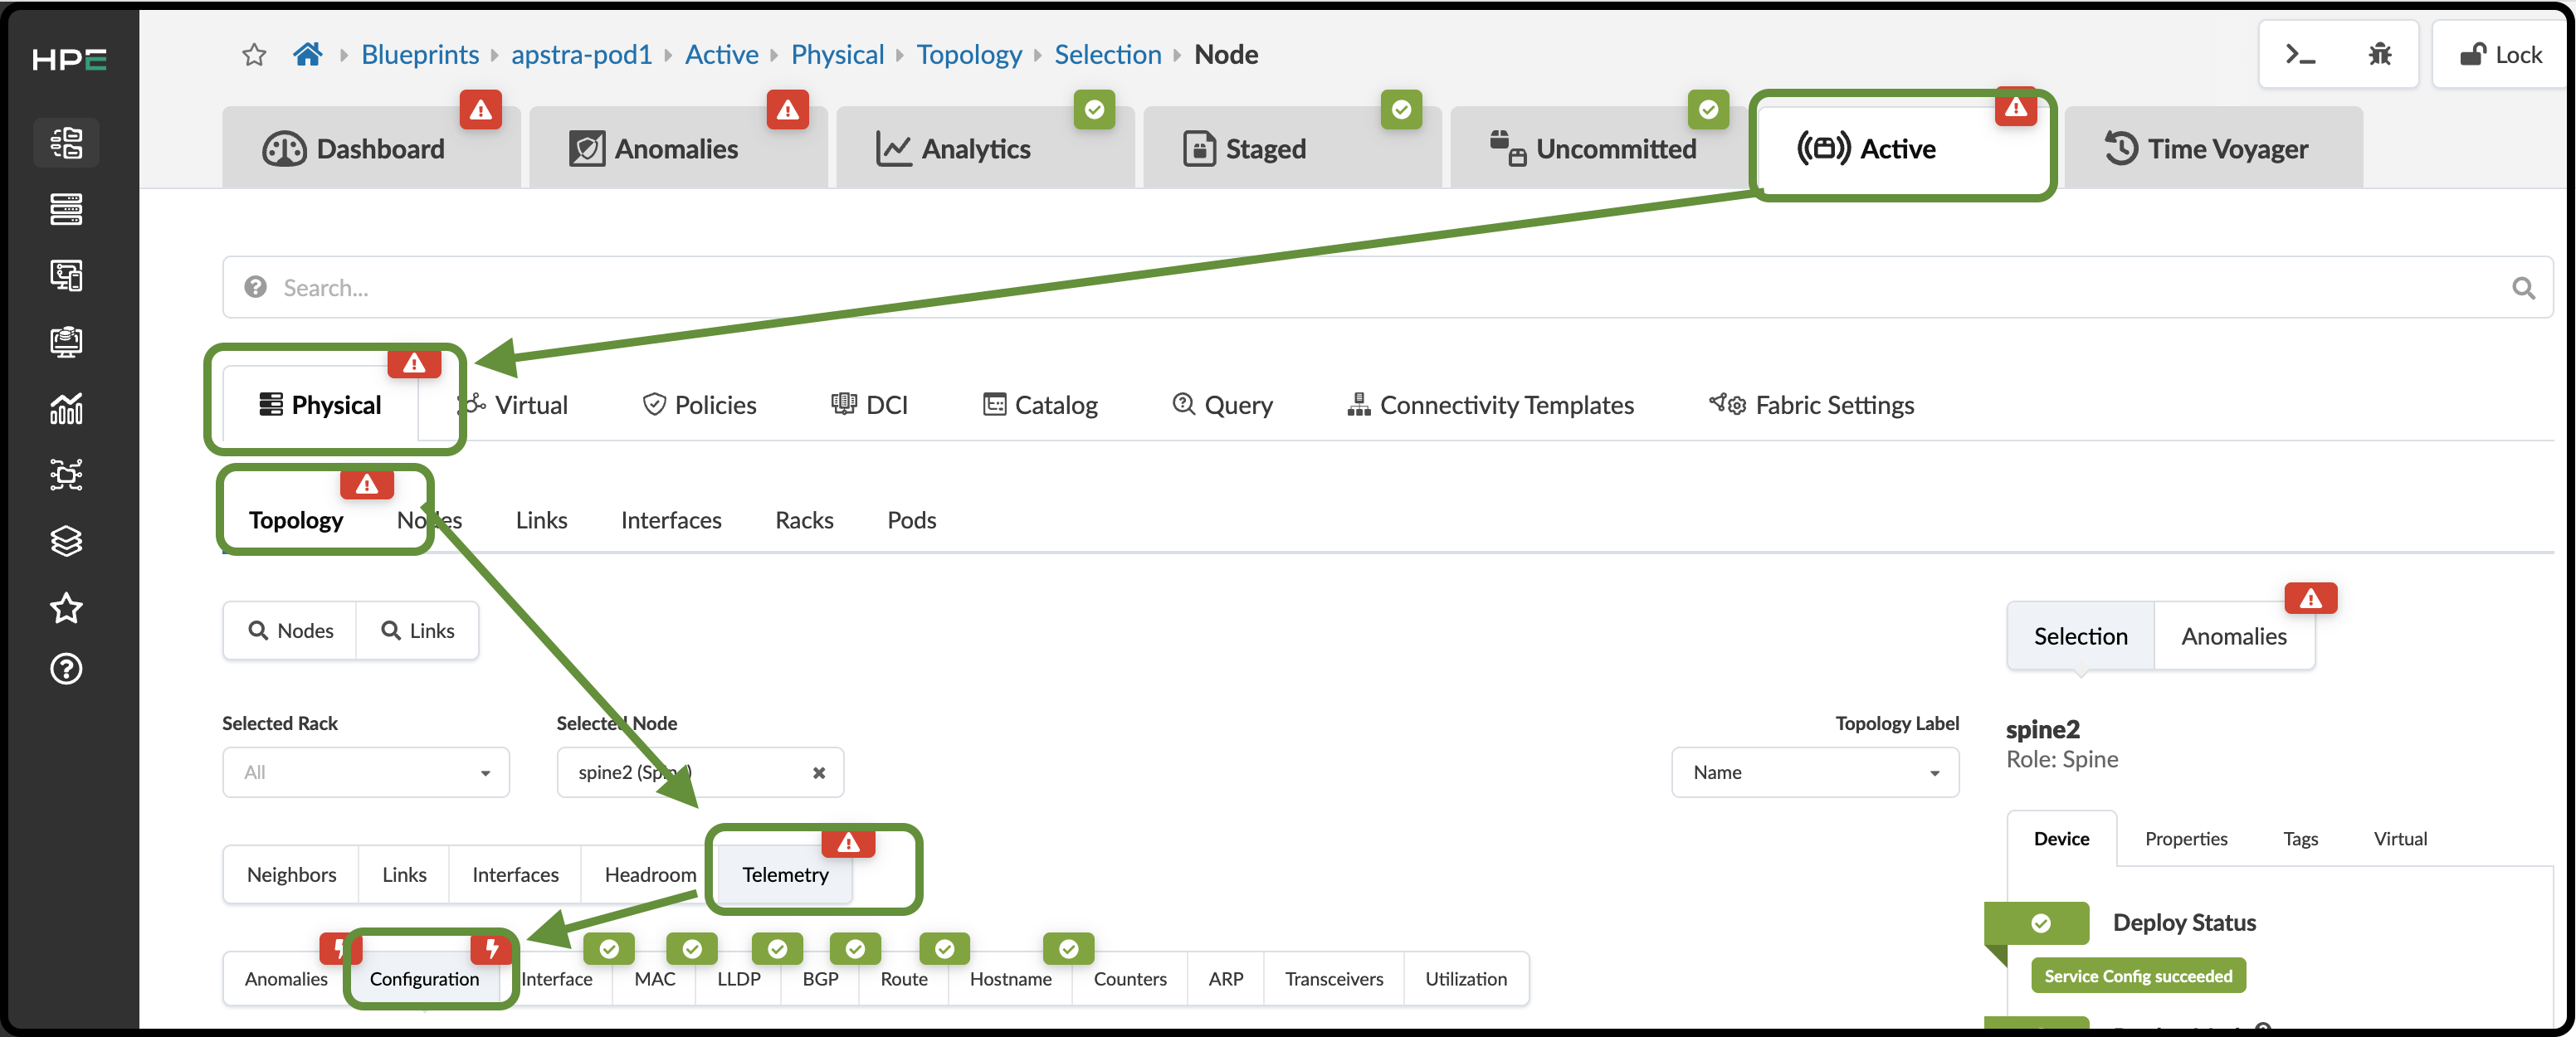
With spine2 selected, click the red box containing the number 1 next to Anomalies Config.
-
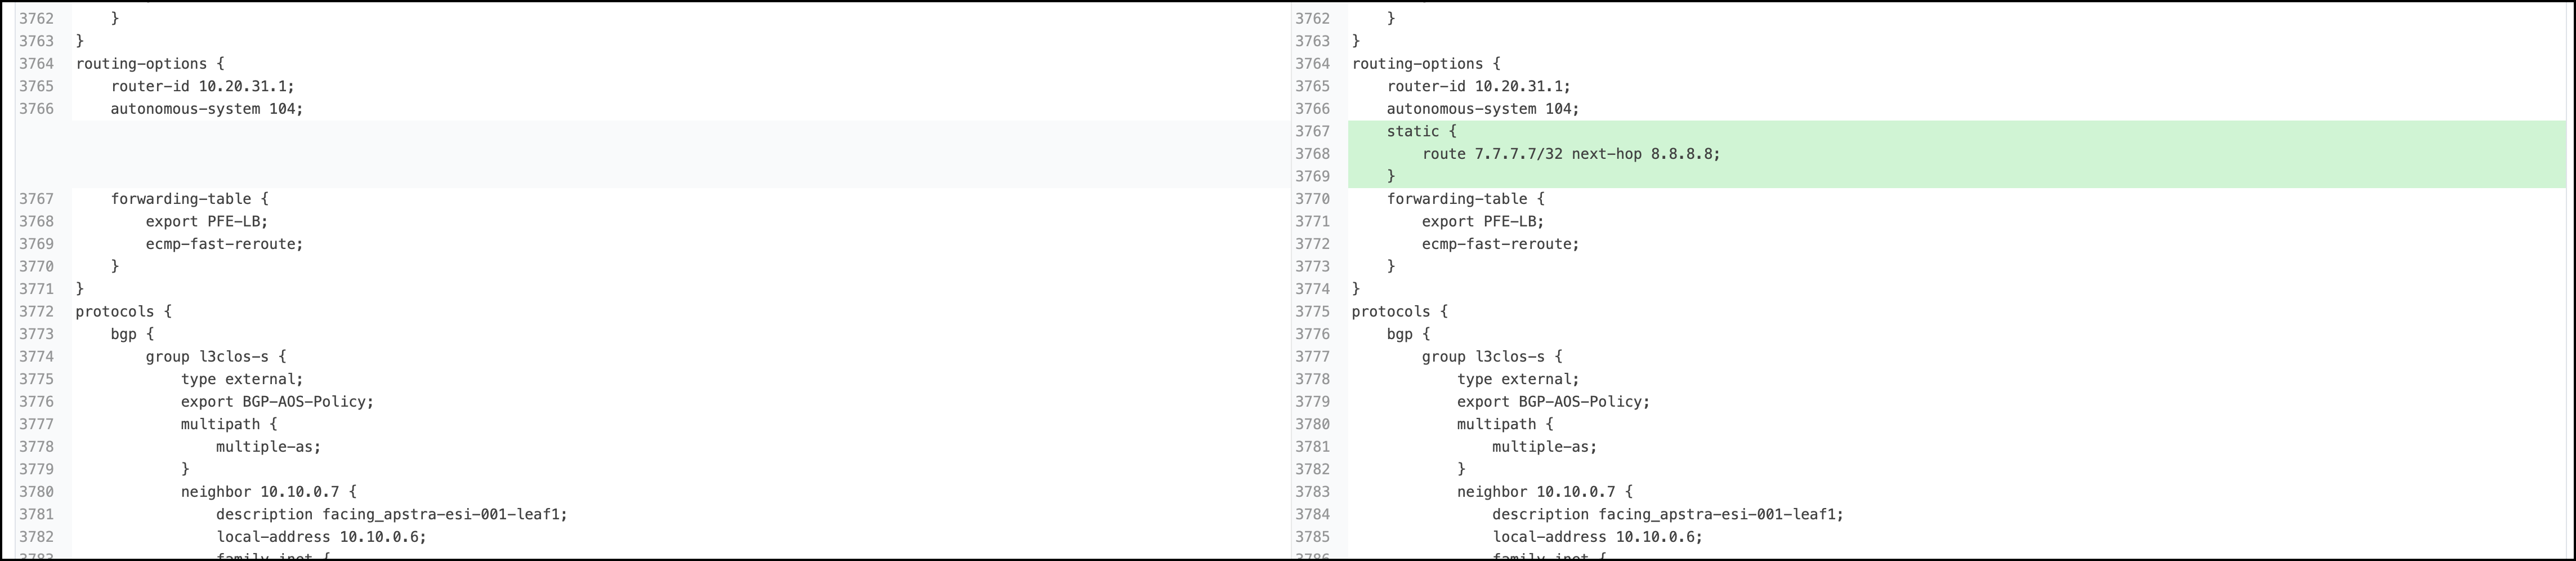
This opens a view that compares the current spine2 configuration with the intended configuration. Scroll down until you see the highlighted difference between the configurations. There are other paths in the Apstra UI that lead to this view. If you wish, take some time to follow the red anomaly indicators and explore these other paths.
-
After you have identified the configuration deviation, return to the CloudLabs portal and turn off Insert a Configuration Change. The Blueprint anomaly clears after a few moments. In a production environment, configuration deviation alerts can also be acknowledged using the Accept Changes button. Alternatively, you can use Apply Full Config in the Apstra UI to revert the device to the intended configuration.