Using The Apstra API Docs
Creating New Users
Creating new users on the Apstra system is a common task performed by administrators or other authorized users. It involves creating a new account for a user and assigning them a unique login name and password. There are several reasons why it might be necessary to create new users, such as adding new employees or contractors to Apstra.
To create a new user on the Apstra system, the first step is to check existing users to ensure that the new user is not already present. Then, the administrator should review the current roles or user groups to determine which one is appropriate for the new user. Finally, the administrator can create a new user and assign them to the appropriate role. This helps to manage access to resources and protect the security and integrity of Apstra.
In this example, we will create a user called Bob Smith that has viewer (read-only) privileges.
| This exercise will make a change to your Apstra instance (creating a new user). Please use caution. |
Accessing Current Users
This GET request will show you all the current users that are configured in you Apstra instance.
-
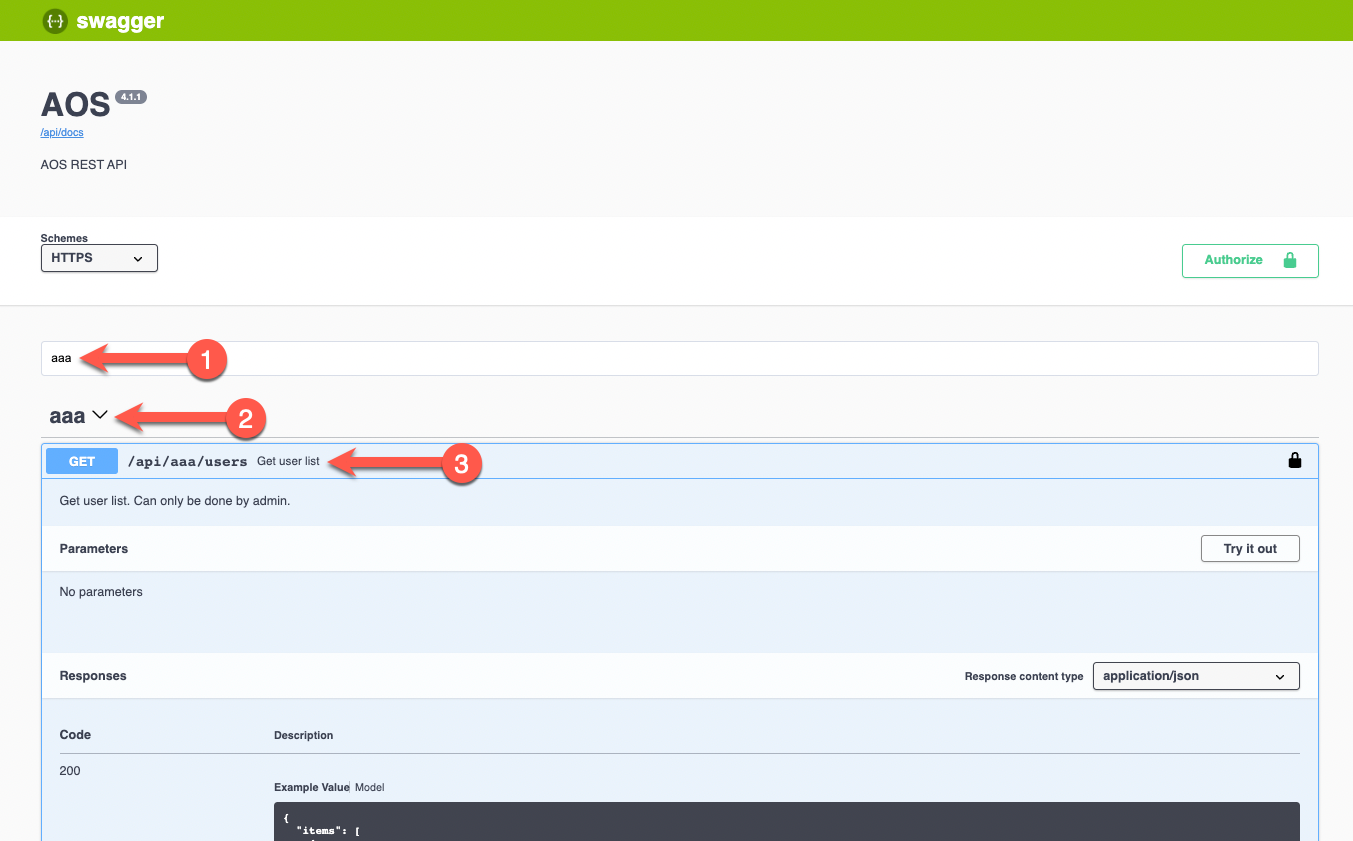
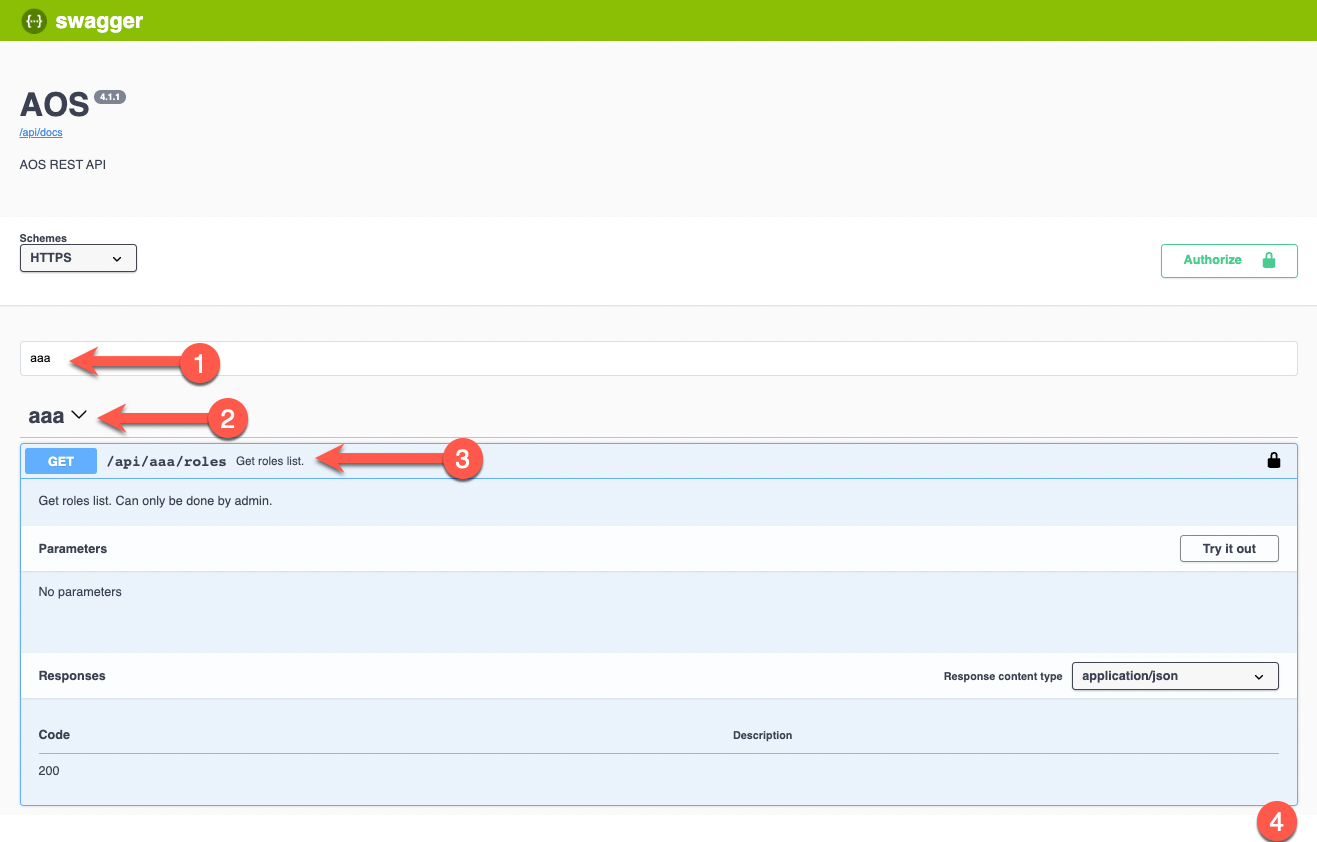
Step 1 search for
aaain the filter box or scroll down -
Step 2 expand the
aaasection -
Step 3 expand the endpoint
GET /api/aaa/users
-
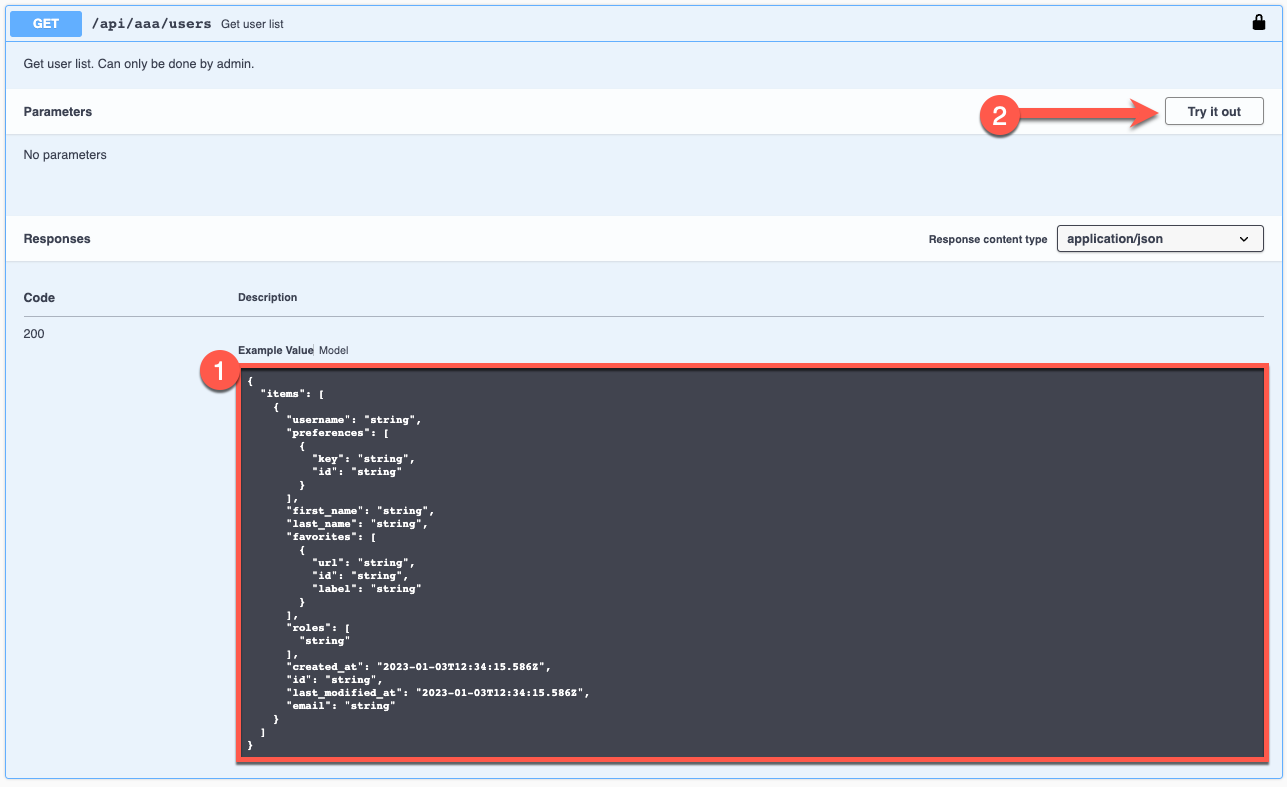
Step 1 highlights the data model we expect to be returned from performing this API call
-
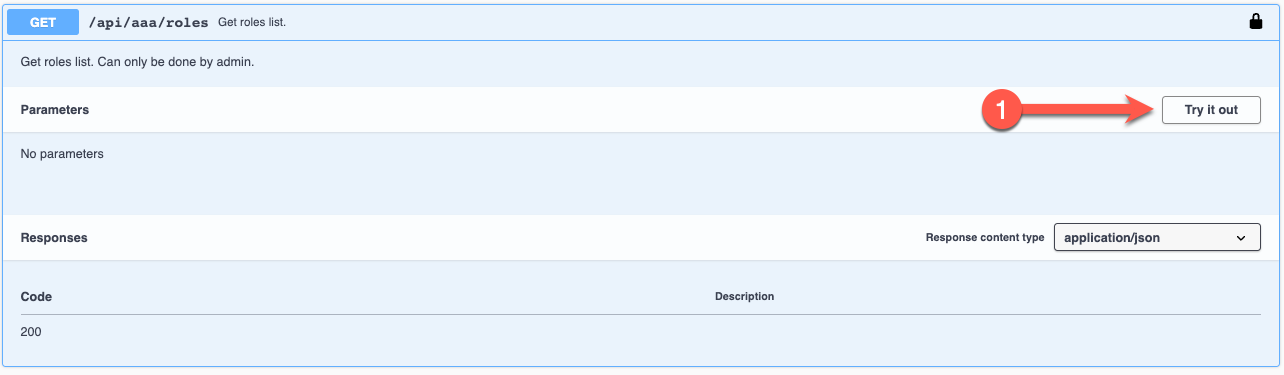
Step 2 to perform the call, click on
Try it out
-
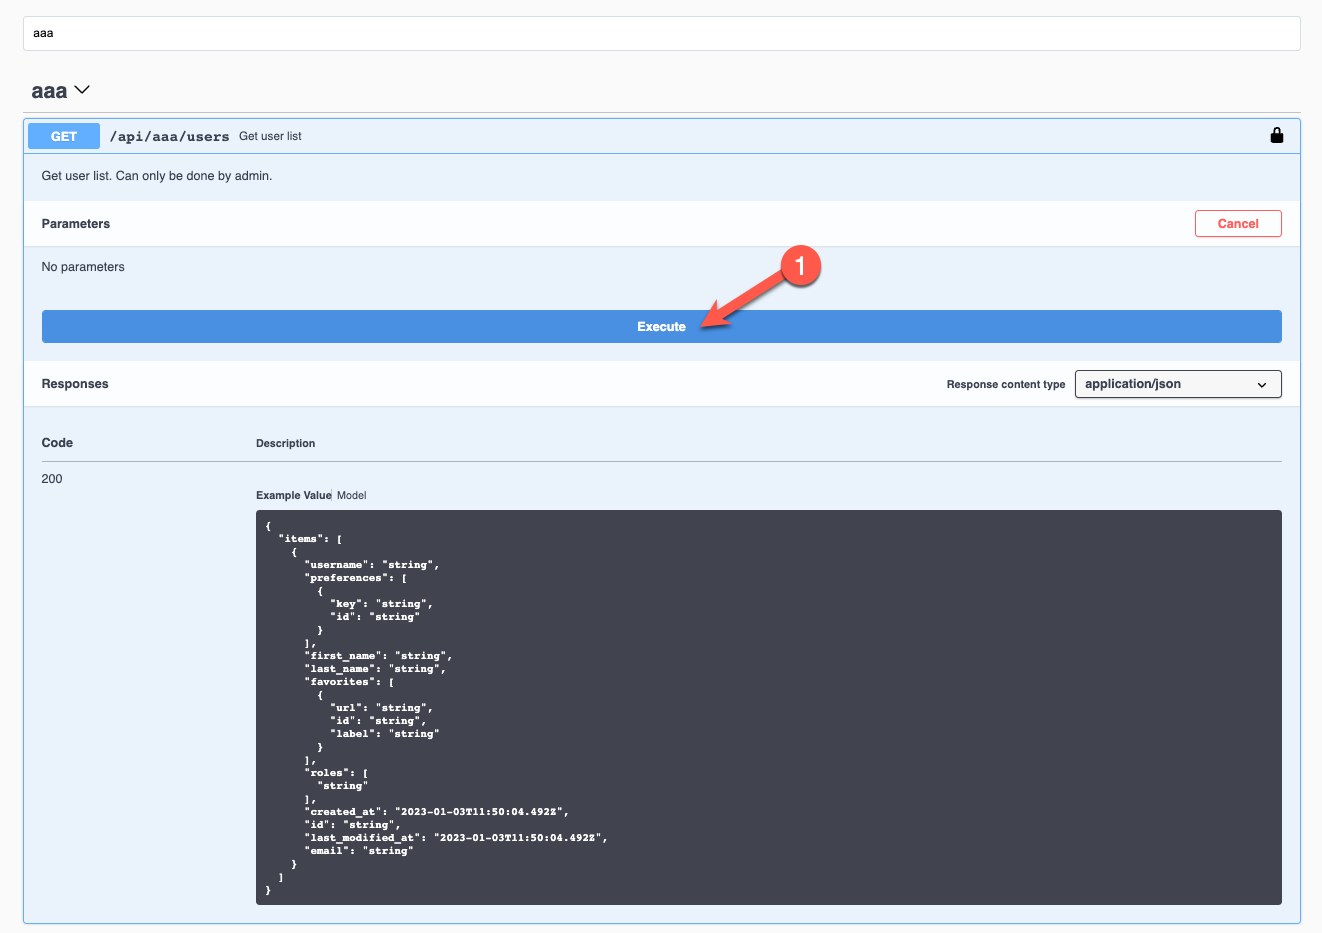
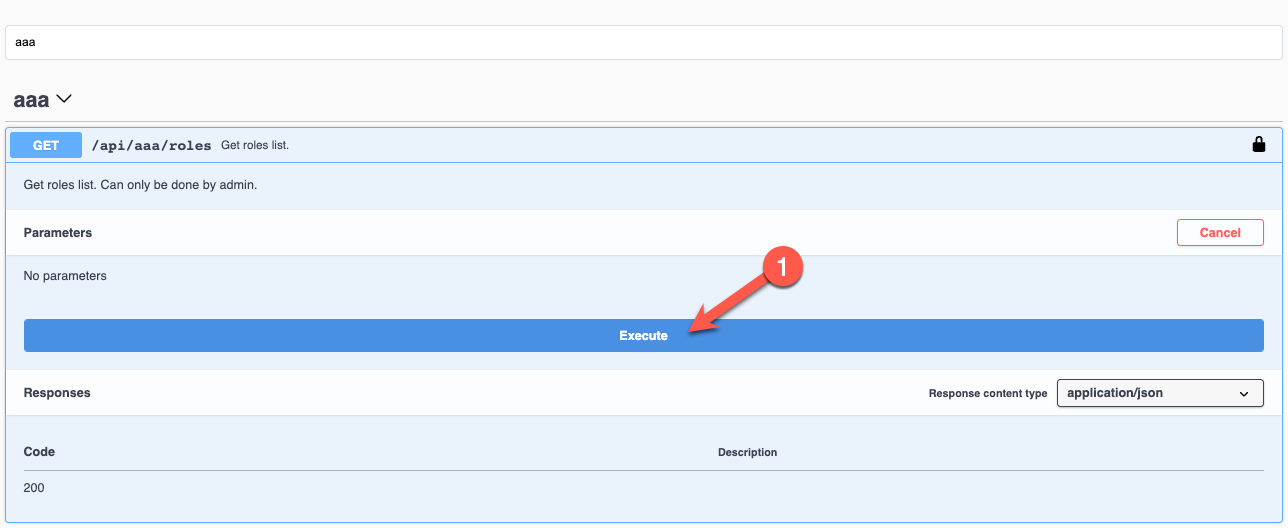
Step 1 click
Execute
-
Step 1 highlights the API return for the call you just made to the
/api/aaa/usersendpoint.
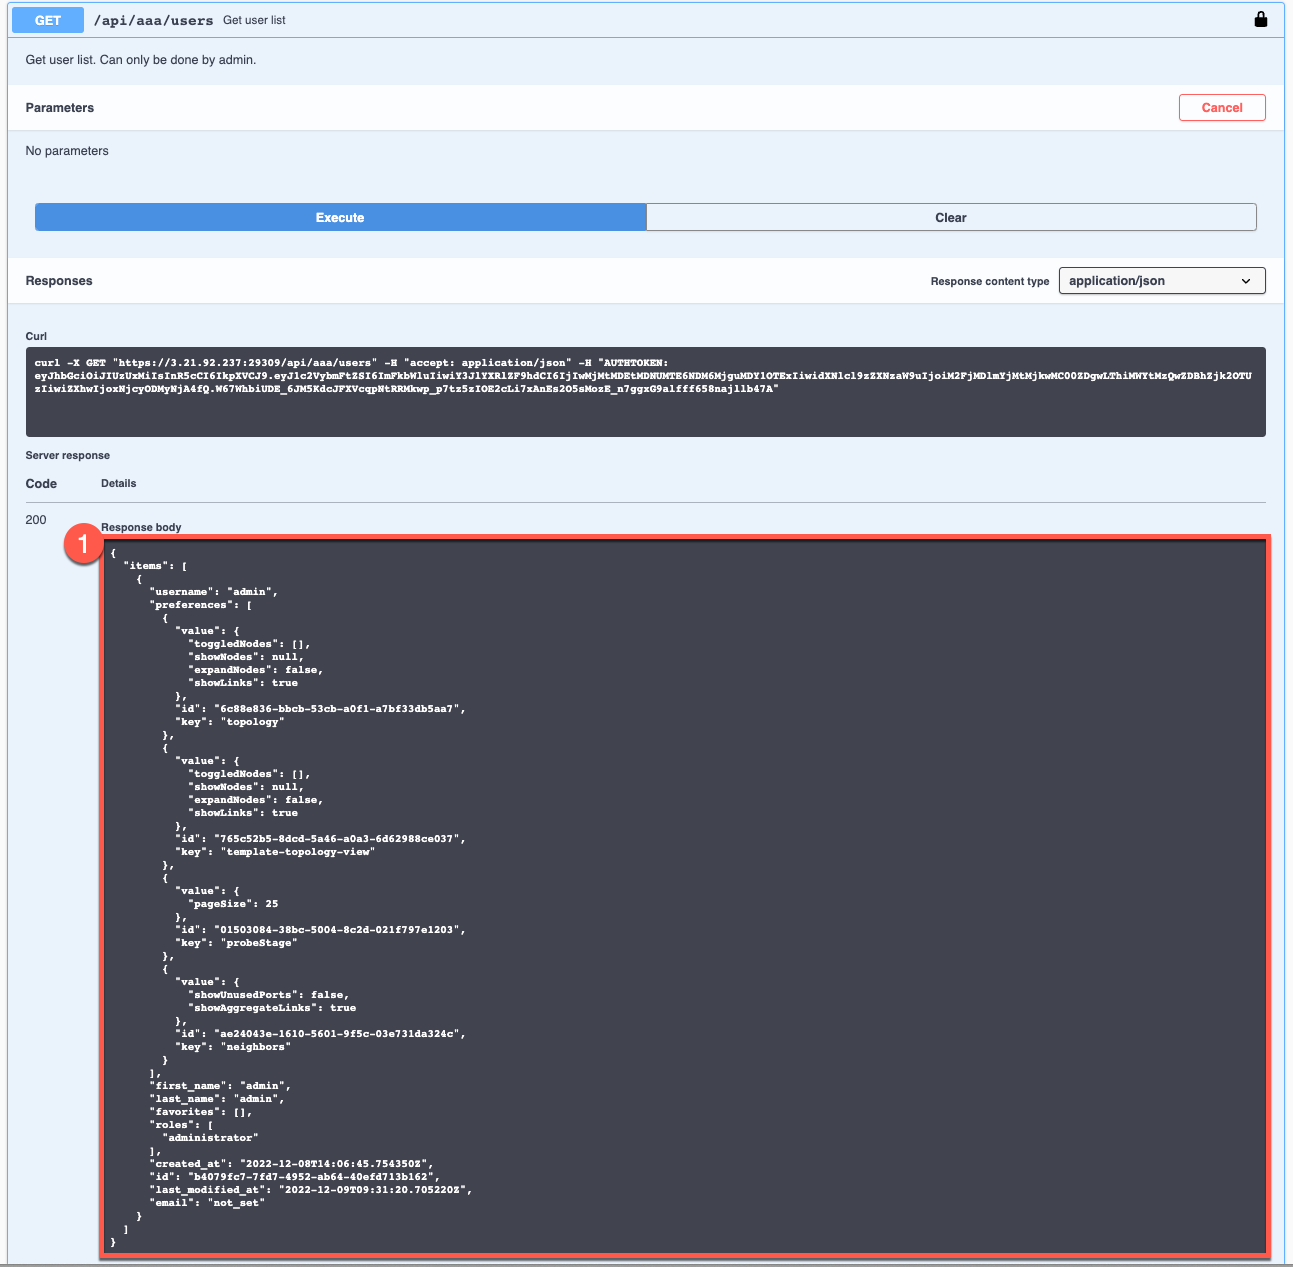
The full output from our example can be seen below which shows a single user called admin is configured on this Apstra server.
| If you’d like evaluate the JSON response in more detail we’d recommend an online JSON parser such as http://json.parser.online.fr/ |
{
  "items": [
    {
      "username": "admin",
      "first_name": "admin",
      "last_name": "admin",
      "favorites": [],
      "roles": [
        "administrator"
      ],
      "created_at": "2022-12-08T14:06:45.754350Z",
      "id": "b4079fc7-7fd7-4952-ab64-40efd713b162",
      "last_modified_at": "2022-12-09T09:31:20.705220Z",
      "email": "not_set"
    }
  ]
}
Notice the user admin had the role of administrator configured but it is possible for a user to be assigned multiple roles.
|
Stop, Have A Go
What does your instance of Apstra return? Using the steps just shown try this for yourself.
|
Accessing User Roles
Now we have established no user name Bob Smith configured on this Apstra server we need to understand the available Roles. Once we know which one will be assigned to this new user we can create Bob Smiths account via the API.
In Apstra, a role is a set of permissions that can be assigned to a group of users. For example, a viewer role would only provide read-only access to entities within Apstra, meaning that users with this role would not be able to edit any of the data or resources. Roles can be used to control access to different parts of the system and ensure that users only have the permissions they need to perform their tasks.
| Custom roles can be configured within Apstra but several common Roles are avalible out of the box. For more information on Roles within Apstra please see https://www.juniper.net/documentation/us/en/software/apstra4.1/apstra-user-guide/topics/topic-map/user-role-use-cases.html |
-
Step 1 search for
aaain the filter box or scroll down -
Step 2 then expand the
aaasection -
Step 3 then expand the endpoint
GET /api/aaa/roles
-
Step 1 to perform the call, click on
Try it out
-
Step 1 click
Execute
-
Step 1 highlights the API return for the call you just made to the
/api/aaa/rolesendpoint.
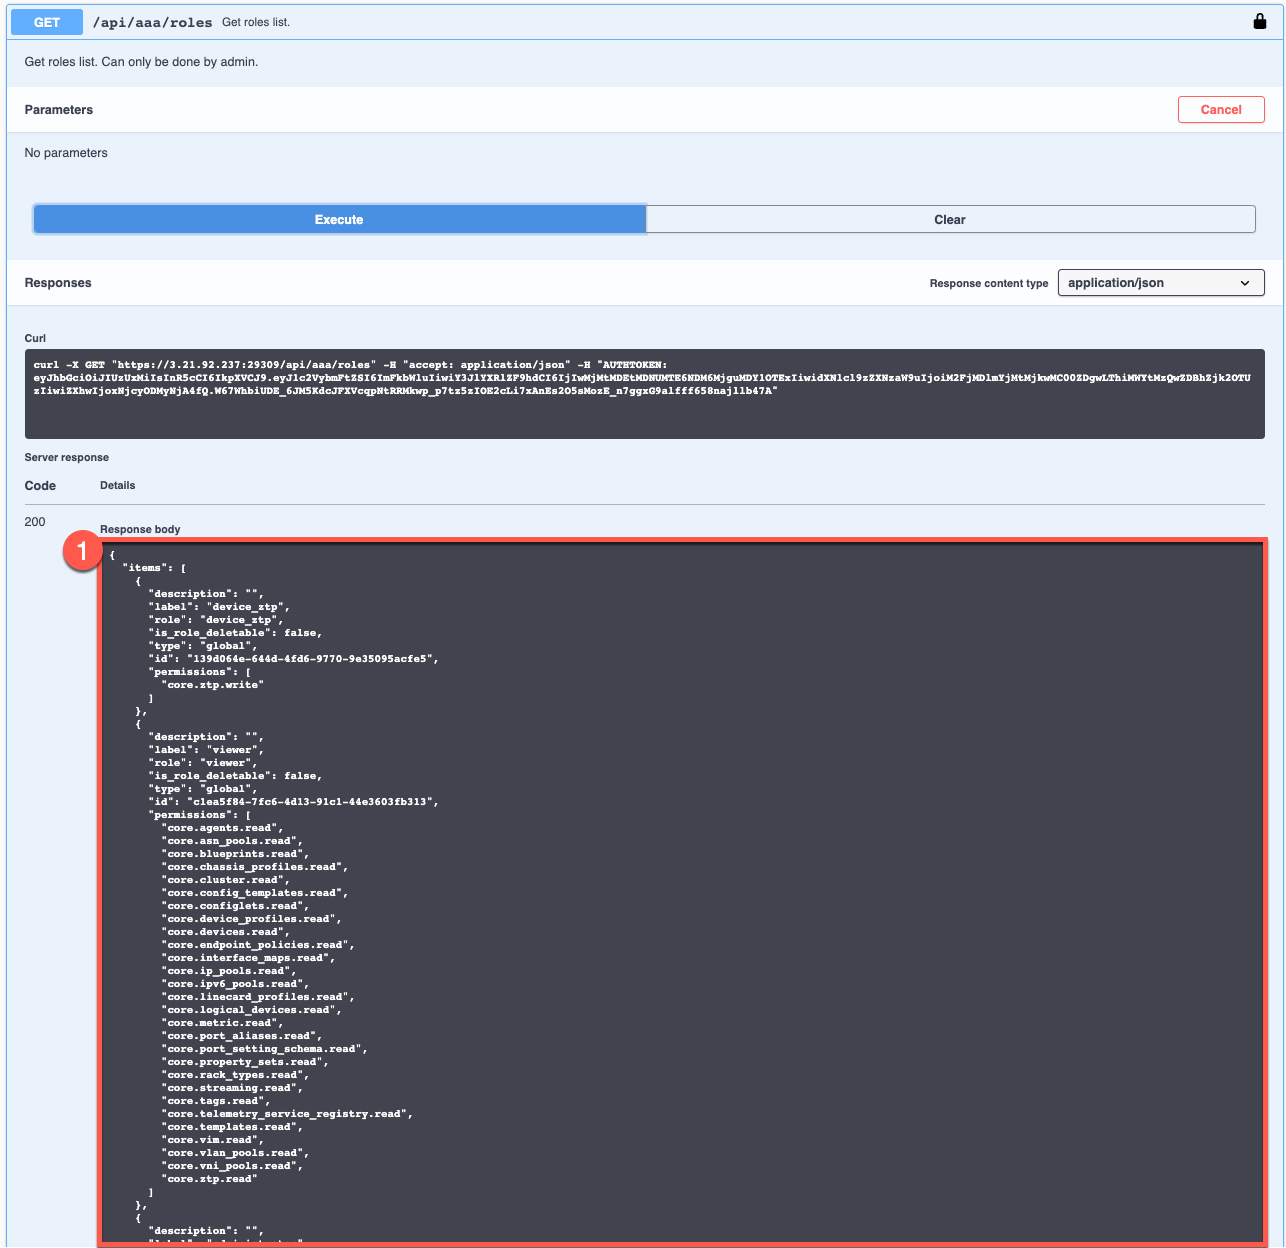
The full output from our example can be seen below which shows all the roles already configured on this Apstra server.
| If you’d like evaluate the JSON response in more detail we’d recommend an online JSON parser such as http://json.parser.online.fr/ |
|
Take Note
For this example we want Bob Smith to be a viewer so we will want to pick out "role": "viewer" from the response below
|
{
  "items": [
    {
      "description": "",
      "label": "device_ztp",
      "role": "device_ztp",
      "is_role_deletable": false,
      "type": "global",
      "id": "139d064e-644d-4fd6-9770-9e35095acfe5",
      "permissions": [
        "core.ztp.write"
      ]
    },
    {
      "description": "",
      "label": "viewer",
      "role": "viewer",
      "is_role_deletable": false,
      "type": "global",
      "id": "c1ea5f84-7fc6-4d13-91c1-44e3603fb313",
      "permissions": [
        "core.agents.read",
        "core.asn_pools.read",
        "core.blueprints.read",
        "core.chassis_profiles.read",
        "core.cluster.read",
        "core.config_templates.read",
        "core.configlets.read",
        "core.device_profiles.read",
        "core.devices.read",
        "core.endpoint_policies.read",
        "core.interface_maps.read",
        "core.ip_pools.read",
        "core.ipv6_pools.read",
        "core.linecard_profiles.read",
        "core.logical_devices.read",
        "core.metric.read",
        "core.port_aliases.read",
        "core.port_setting_schema.read",
        "core.property_sets.read",
        "core.rack_types.read",
        "core.streaming.read",
        "core.tags.read",
        "core.telemetry_service_registry.read",
        "core.templates.read",
        "core.vim.read",
        "core.vlan_pools.read",
        "core.vni_pools.read",
        "core.ztp.read"
      ]
    },
    {
      "description": "",
      "label": "administrator",
      "role": "administrator",
      "is_role_deletable": false,
      "type": "global",
      "id": "135d03d1-06e4-4a04-98ad-2633240bfc59",
      "permissions": [
        "core.aaa_providers.read",
        "core.aaa_providers.write",
        "core.agents.read",
        "core.agents.write",
        "core.asn_pools.read",
        "core.asn_pools.write",
        "core.audit.config.read",
        "core.audit.config.write",
        "core.audit.events.read",
        "core.blueprints.commit",
        "core.blueprints.delete",
        "core.blueprints.read",
        "core.blueprints.write",
        "core.chassis_profiles.read",
        "core.chassis_profiles.write",
        "core.cluster.read",
        "core.cluster.write",
        "core.config_templates.read",
        "core.config_templates.write",
        "core.configlets.read",
        "core.configlets.write",
        "core.device_profiles.read",
        "core.device_profiles.write",
        "core.devices.read",
        "core.devices.write",
        "core.endpoint_policies.read",
        "core.interface_maps.read",
        "core.interface_maps.write",
        "core.ip_pools.read",
        "core.ip_pools.write",
        "core.ipv6_pools.read",
        "core.ipv6_pools.write",
        "core.linecard_profiles.read",
        "core.linecard_profiles.write",
        "core.logical_devices.read",
        "core.logical_devices.write",
        "core.metric.read",
        "core.port_aliases.read",
        "core.port_aliases.write",
        "core.port_setting_schema.read",
        "core.property_sets.read",
        "core.property_sets.write",
        "core.rack_types.read",
        "core.rack_types.write",
        "core.roles.read",
        "core.roles.write",
        "core.security.config.read",
        "core.security.config.write",
        "core.streaming.read",
        "core.streaming.write",
        "core.sysdb.read",
        "core.sysdb.write",
        "core.tags.read",
        "core.tags.write",
        "core.telemetry_service_registry.read",
        "core.telemetry_service_registry.write",
        "core.templates.read",
        "core.templates.write",
        "core.users.read",
        "core.users.write",
        "core.vim.read",
        "core.vlan_pools.read",
        "core.vlan_pools.write",
        "core.vni_pools.read",
        "core.vni_pools.write",
        "core.ztp.read",
        "core.ztp.write"
      ]
    }
  ]
}
Creating A New User
The final part of this workflow is creating a new user account for Bob Smith. We have verified an account does not already exist and found the name of the role we wish to assign ("role": "viewer").
The final step is to find the POST API request and craft an appropriate JSON request body.
-
Step 1 search for
aaain the filter box or scroll down -
Step 2 then expand the
aaasection -
Step 3 then expand the endpoint
POST /api/aaa/users
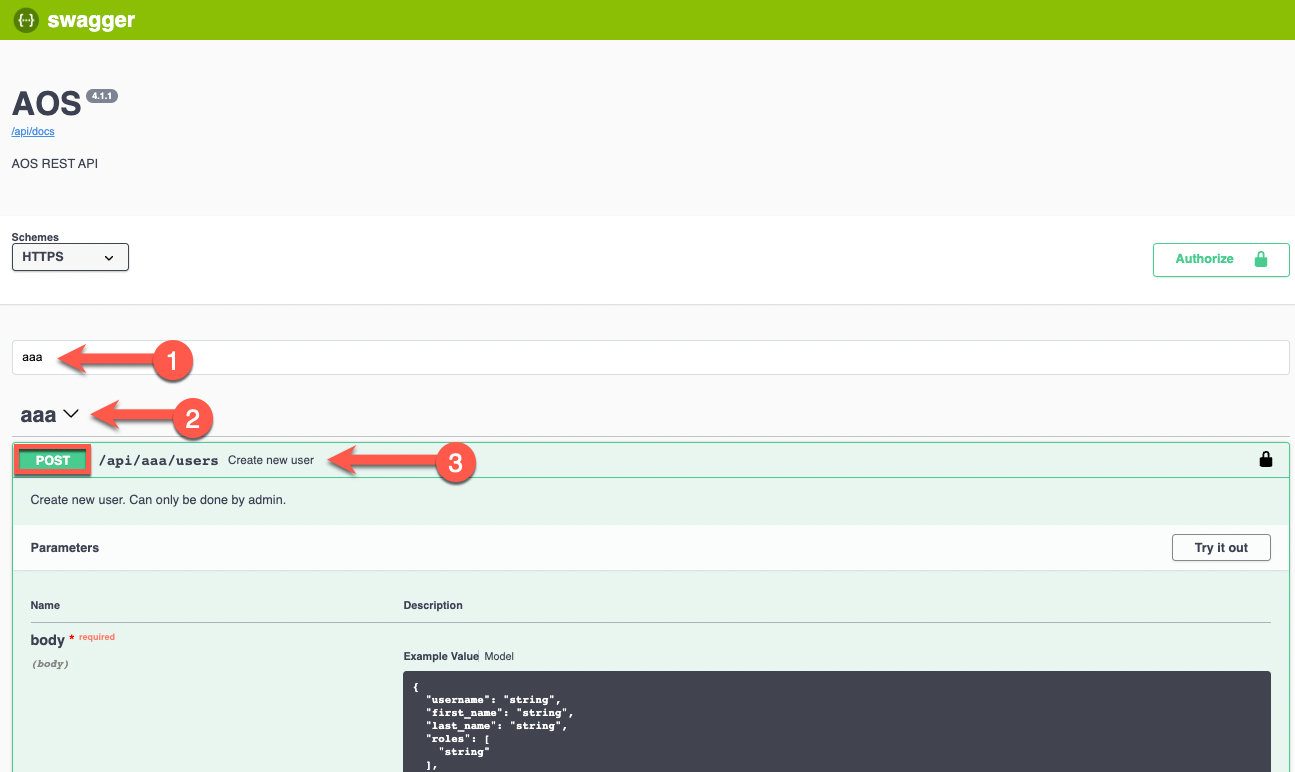
-
Step 1 highlights the data model we need to create in this POST request as this is what the API is expecting
-
Step 2 to perform the call, click on
Try it out
-
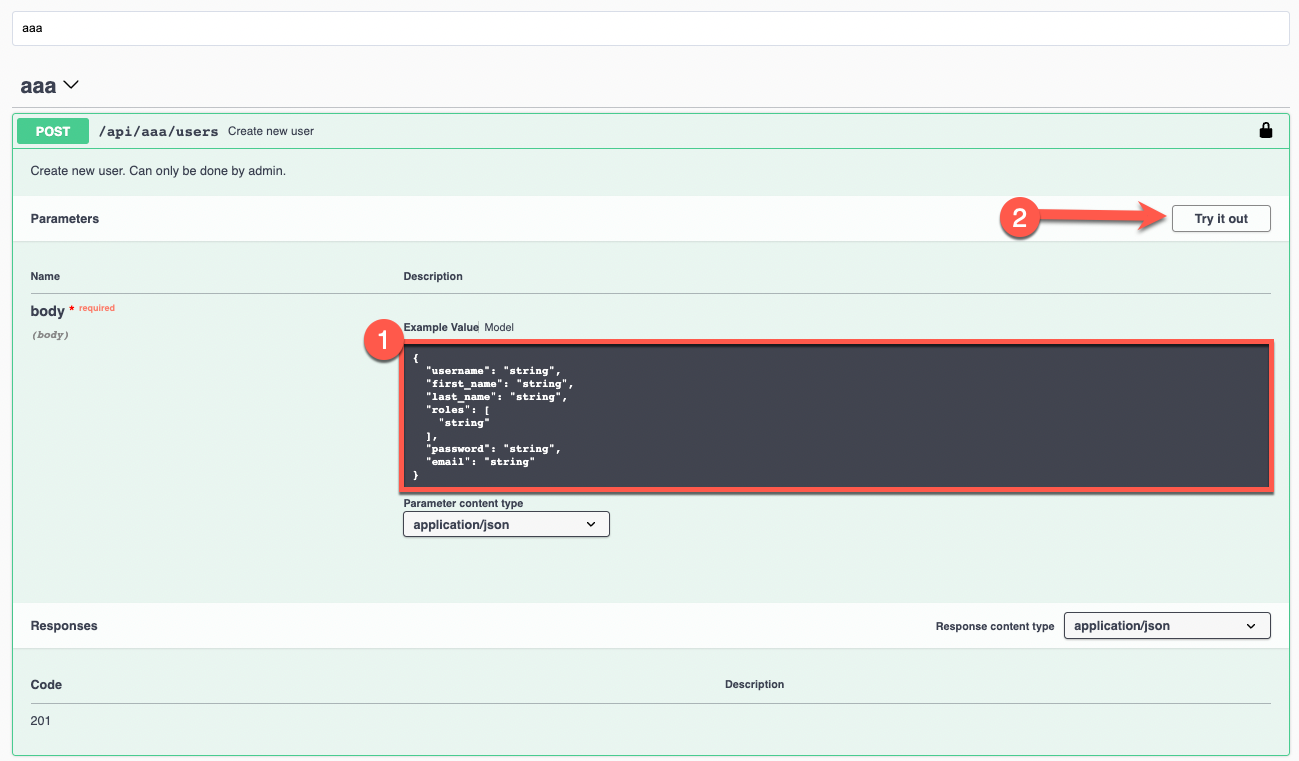
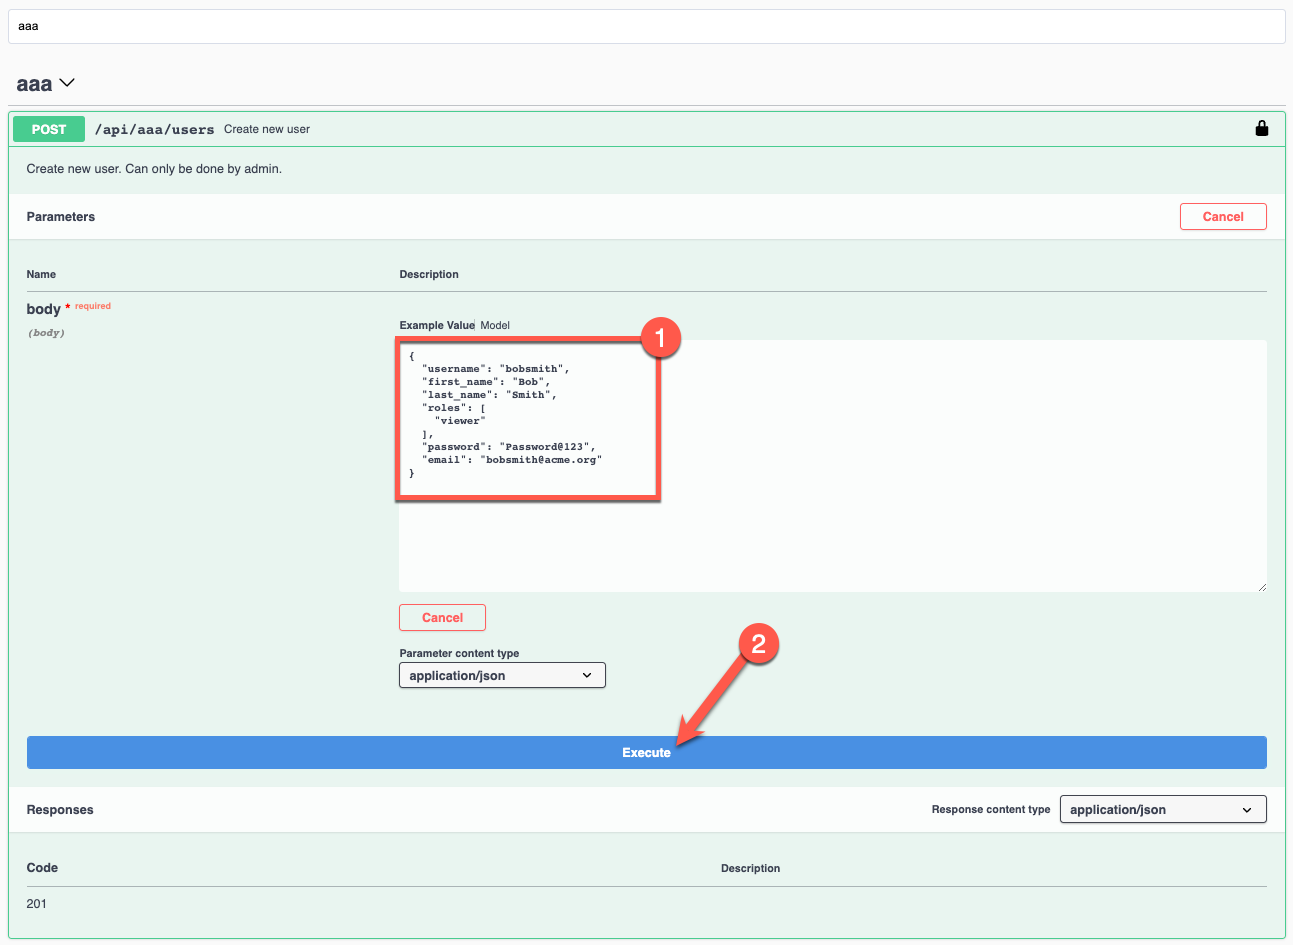
Step 1 This is where we craft the request body. You can copy and paste the example body below.
{
  "username": "bobsmith",
  "first_name": "Bob",
  "last_name": "Smith",
  "roles": [
    "viewer"
  ],
  "password": "Password@123",
  "email": "bobsmith@acme.org"
}-
Step 2 click
Execute
-
Step 1 highlights the API return for the POST request we have just created. It returns the user ID user dynamically created by Apstra.
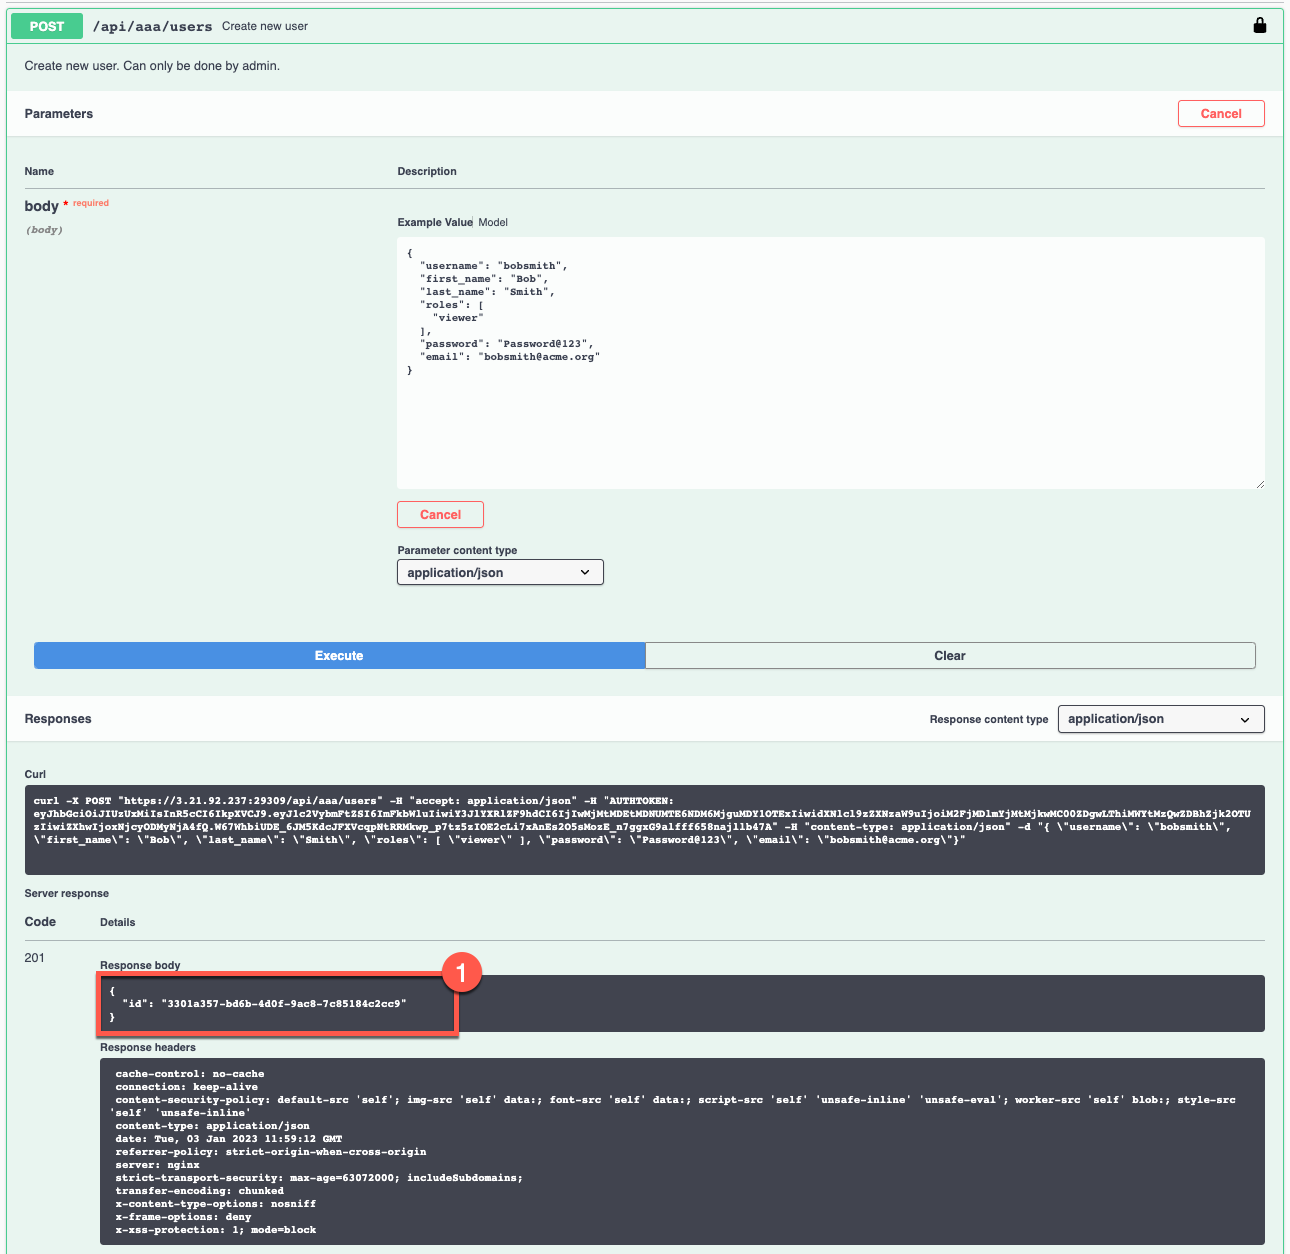
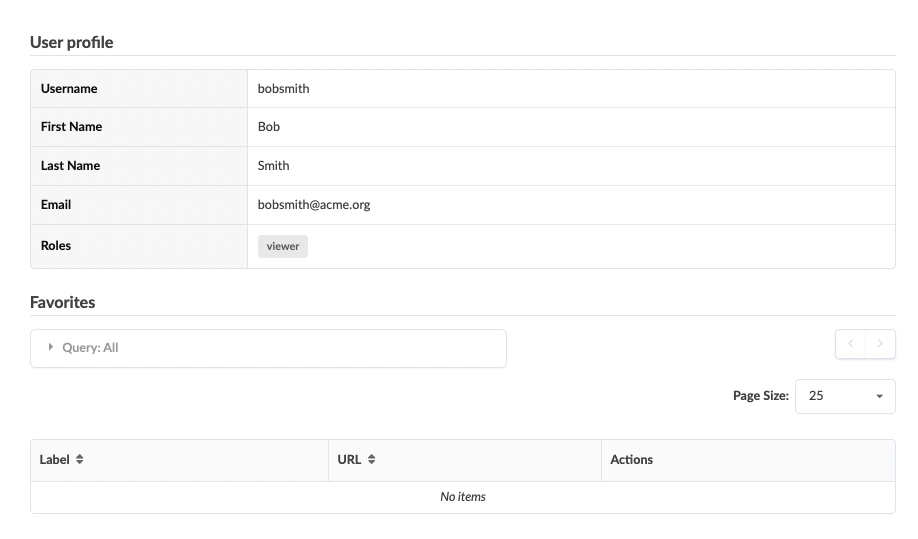
That’s the user created!
|
Stop, Have A Go
Create Bob Smith or any user in your Apstra instance.
|
To verify you could go back to the first stage Accessing Current Users or use the UI to validate that Bob Smith was created and the attributes for that user.