Lab Guide 1 - Juniper
Resource Management
The resource management system in Apstra enables you to create resource pools for ASNs, VNIs and IP addresses. You can create them during the design phase or just before you need them during the build phase. When you assign resources to managed devices in your network (Blueprint), Apstra pulls them automatically from the pool you specify. In cases where you need to assign a specific network identifier you have the option of assigning a resource manually.
Create an IP Pool
The IP pool that we’ll create here is for you to see how easy it is to define resource pools. There are a number of pools needed for the exercises that have already been created for you. So, we won’t be using this particular one in the construction of the lab.
-
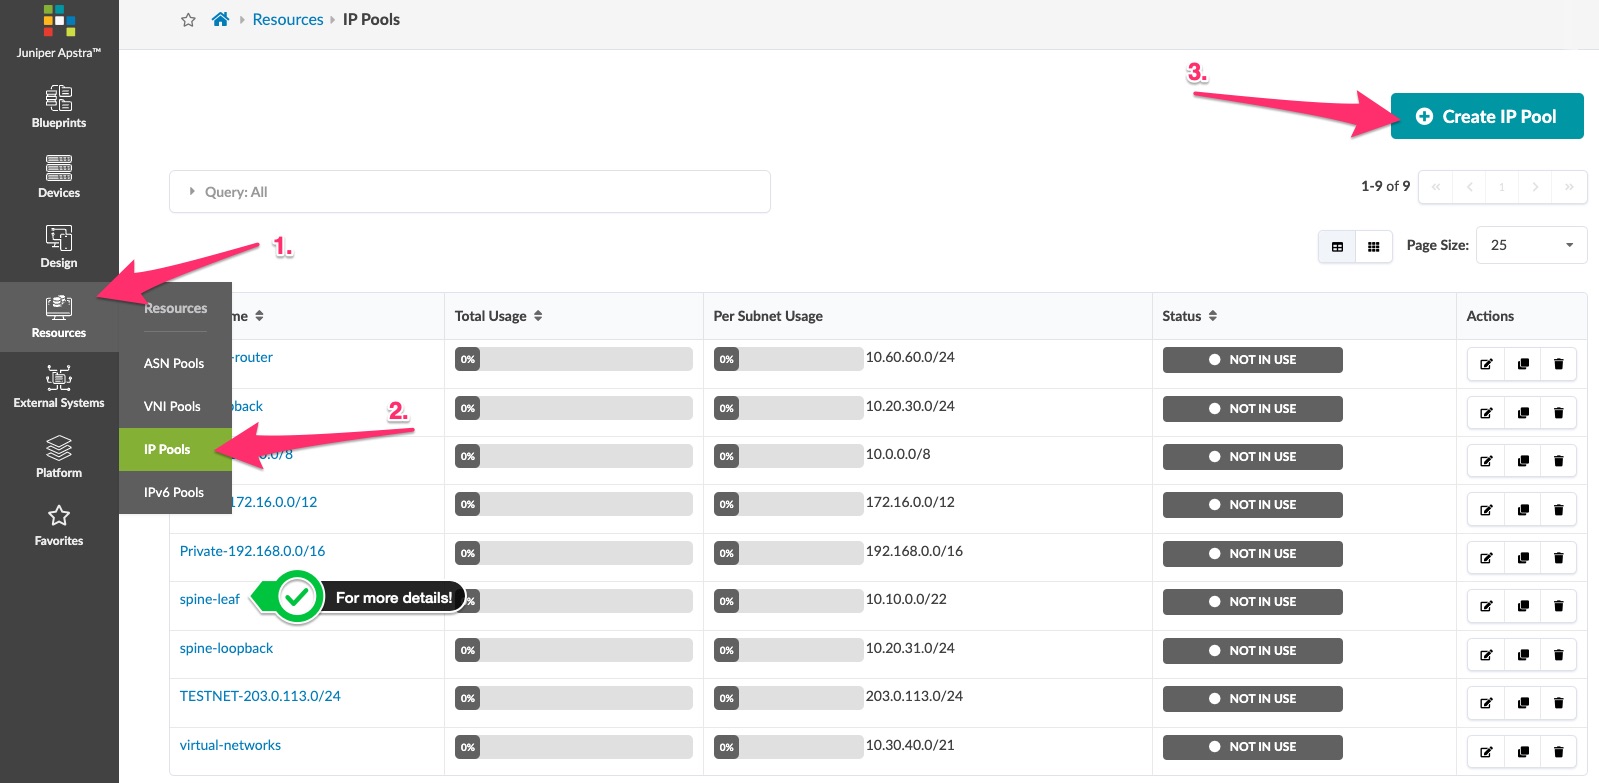
Navigate to Resources > IP Pools and click Create IP Pool.

-
You can create an IP pool with one or more ranges. Ours will have two ranges. Enter values as shown in the table below. Tags is an optional field for filtering and grouping.
Table 1. Table IP Pool Values IP Pool Value Name
apstra-pool
Subnet
4.0.0.0/24
Add a subnet
click Add a subnet
Subnet
4.0.1.0/24
-
Click Create to create the pool and return to the list view. The status bars for each resource pool give you a clear view of usage and indicate when you might need to replenish a pool with more resources.
| Hovering over a status bar shows the number of resources used out of the total number of resources in that range. |
Create ASN Pool
The procedure for creating ASN pools is similar to the one for creating IP pools. When we need an ASN later, we’ll have Apstra assign one from the pool that we’re about to create.
-
Navigate to Resources > ASN Pools and click Create ASN Pool.
-
Enter values as shown in the table below.
Table 2. Table ASN Pool Values ASN Pool Value Name
vpod-evpn-asn-pool
Ranges
100 - 1000
-
Click Create to create the pool and return to the list view.